Disclosure: This post may contain affiliate links. I earn a small commission of product sales to keep this website going.
Updated for the latest generation of Fujifilm cameras, including the X100VI and X-T50.
I’ve received a lot of questions about my Fujifilm settings for travel photography. I wanted to take some time to address which settings I use and, more importantly, why.
I think this last part is the key piece of information missing from many blogs that tell you what to do but leave out why.
These are my recommendations, ideas to get you started.
I will try to leave this as generic as possible since different Fujifilm lines have different settings. Not all cameras have all of these settings.
I’m also not going to go over every setting. But I hope this is enough to get you started no matter which Fujifilm X you own, whether it’s the X-T200, X-E4, X-H2S, and so on.
You can also learn about these settings and more by checking out the Fujifilm Photographer Membership – click here to get 20% off your first three months!
Image Quality Setting
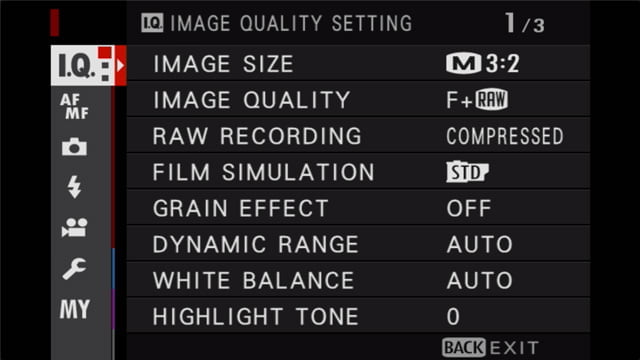
Image Size
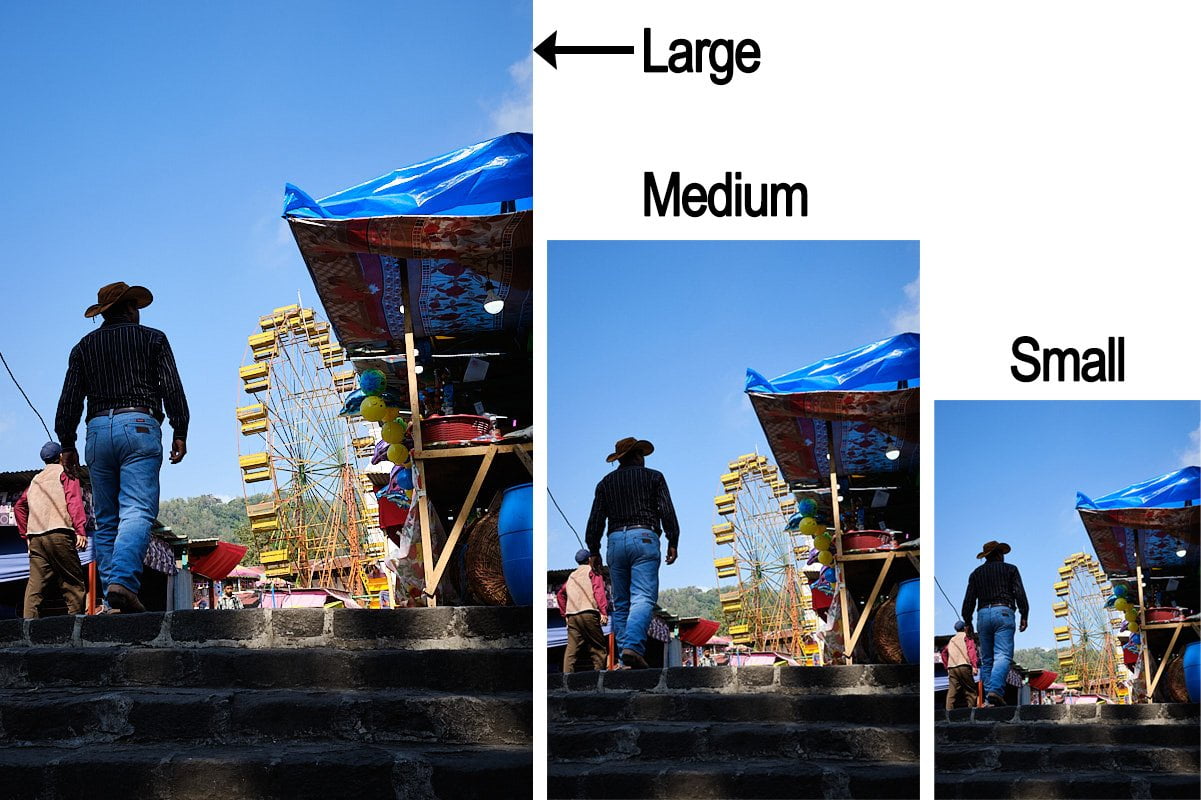
MEDIUM 3:2. This only matters if you’re recording JPEG or RAW+JPEG. Your RAW output is going to be Large 3:2, no matter what. But the camera can crop and downsize your JPEG output if you’d like.
The Medium size, on a 24MP sensor, is resized to 12MP, with dimensions of 4000 x 3000 pixels. That’s plenty big! It’s massive for display on blogs & social media and enough to give you excellent prints up to 11″x14″, and up to 24″x30″ if needed.
If your photos are only destined for social media or the family digital album, you could even go down to Small, which is 25% of the entire sensor output (3000 x 2000 pixels on a 24MP camera).
Despite what you may want to believe, bigger is not always better.
While a square or letterbox format can make your photos uniquely cool, I wouldn’t let the camera crop them at capture unless you’re doing some kind of creative challenge. Do it later in a post-processing program, which you can even do on a smartphone in Snapseed or Lightroom. Record the full 3:2 rectangular shape.
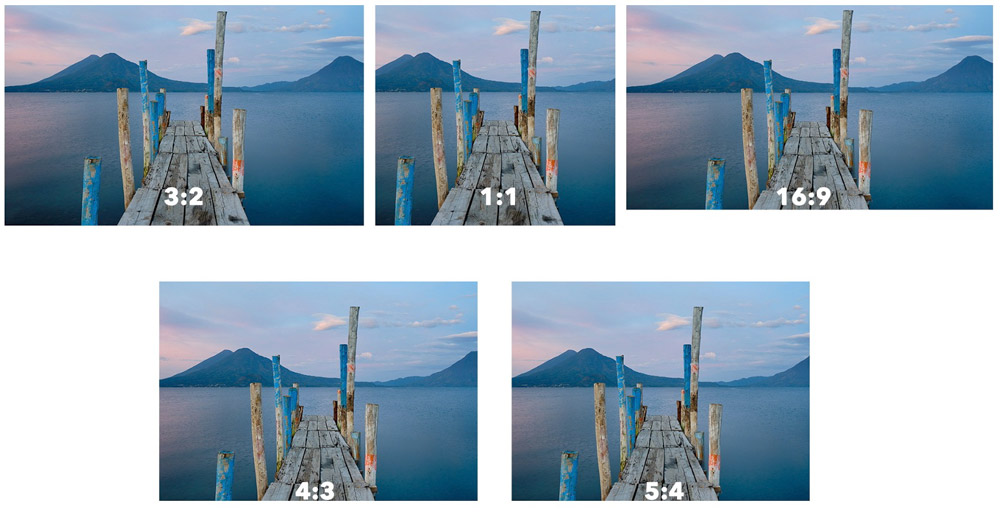
Image Quality
FINE+RAW. I record both RAW and JPEG for reasons you can read here. And I always want the best JPEG file quality possible, which is Fine. Anything below that will have more information “discarded” when the JPEG is saved.
Memory cards can hold so much information these days that there’s no reason to reduce the JPEG quality.
RAW Recording
Lossless Compressed. Use this method to cut your digital storage requirements in half (on average). The files are much smaller. The decompression may take a little extra time, but nothing that will slow you down. I think it’s worth it, especially if your photo collection is measured in terabytes.
Just note that some programs, like Mac Finder, Photos, and Lightroom can’t extract the thumbnail. Capture One, Lightroom Classic, and most other RAW converters have no problem uncompressing these files.
Select JPEG/HEIF
JPEG. Yes, it’s true that HEIF is a better file format. It contains more tonal information at a smaller file size.
The caveat, however, is that not all devices/software can display the HEIF/HEIC format. If you want to be able to easily share your photos with others, I’d encourage using the standard JPEG format.
Long Exposure NR
OFF. This feature attempts to reduce noise in long exposures by taking another “reference” exposure after your initial exposure to map out “hot” pixels and remove them. This will double your exposure time on long exposures, and the benefit for travel photographers usually isn’t worth it. I’d rather be able to take photos in more rapid succession.
Color Space
sRGB. There’s a lot of misinformation out there that says Adobe RGB is better than sRGB. I fell for it for a long time. Adobe RGB color space is indeed bigger than sRGB, but that doesn’t make it better for photography. You should only choose Adobe RGB if you have specialty printing equipment in your home studio and are familiar with color mapping.
Everyone else should be selecting sRGB. Phones, TVs, computer monitors, tablets, etc., are all in the sRGB color space. If you want your colors displayed accurately, your photos should speak the same language as your viewers’ devices, in sRGB.
This only applies to JPEG photos; RAW photos do not have a color space.
JPEG Settings
I won’t review settings like Highlight Tone, Shadow Tone, Color, Film Simulation, etc., in this post. These aren’t really Fujifilm settings for travel but rather depend on your style.

You can click here to download our new FREE Fujifilm Image Quality Settings Guide eBook, and read even more information about specific settings in these articles:
- Fujifilm Film Simulation Comparisons
- Creating Fujifilm Custom JPEG Recipes
- Highlight & Shadow Tone
- How Dynamic Range Works
- Dynamic Range vs Dynamic Range Priority
- Reasons for Using Manual White Balance
- Color Chrome Effect and Color Chrome FX Blue
AF/MF Setting
AF Mode
ALL. If your focus joystick is set up to activate the Focus Area screen, you can also cycle through all AF Modes using the command dial with this setting. So you don’t have to come here to the menu to do it. It’s super helpful and makes things faster.
AF Mode All Setting
I won’t offer any suggestions for exactly what to set in this new setting but rather want to encourage you to set it as desired – it will make the previous setting much easier to use.
Deselect any options you don’t want to use when scrolling through the available AF Modes with the command dial. For example, these are the only modes I use:
- AF-S: Single Point 1, Single Point 5, and Zone 5×5.
- AF-C: Zone 5×5 and Wide/Tracking.
Now, with only those selected, choosing the appropriate AF Mode is much faster when using ALL. You can watch this YouTube video for a quick demonstration.
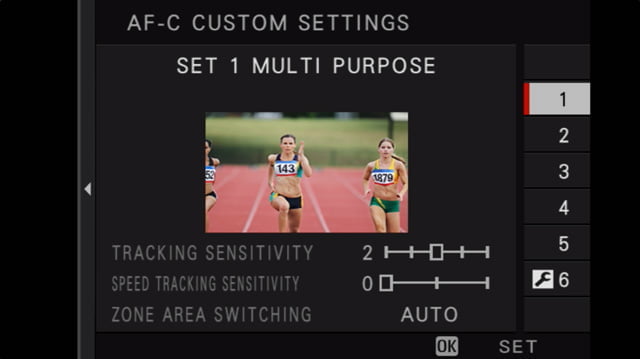
AF-C Custom Setting
1. This is the best general Fujifilm setting for travel photographers, dictating how your continuous autofocus tracking behaves.
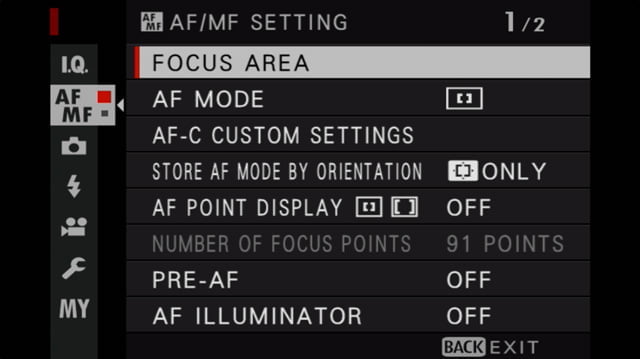
Store AF Mode by Orientation
ON. This is one of my favorite focus/display settings that I never knew about. It’ll speed up your shooting when using autofocus since you can store where your autofocus area is in both horizontal and vertical orientation.
AF Point Display
OFF. Having your active autofocus points displayed on the screen is an unnecessary distraction. You’ll still have the “box” showing where your AF area is.
Number of Focus Points
The smaller number. That’ll help you move your autofocus area quicker, and there are still plenty of AF points with that smaller number. The higher number might work if you’re clamped down on a tripod and don’t want to move the camera, but that’s not what most travel photographers do.

Pre-AF
OFF. Turning this on is a colossal waste of battery. Your camera will always try to focus when the camera is on, not just when you’re pressing the button.
AF Illuminator
OFF. This helps your autofocus in low light. However, it only has an effective range of a few feet, and it can be incredibly annoying to strangers when you’re taking environmental portraits.
The camera will instead temporarily boost the ISO to focus, which works just fine.
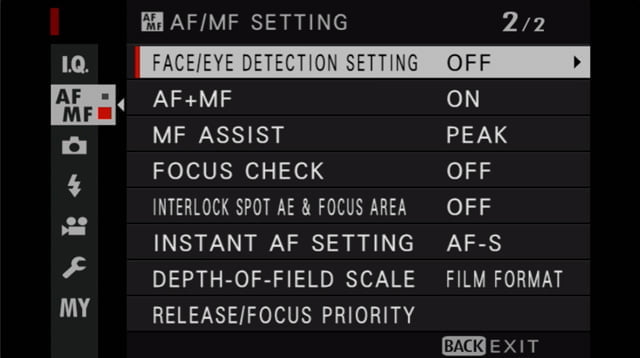
MF Assist
As desired. These are some really cool manual focus tools, and you can read more about them here.
Interlock MF Assist & Focus Ring
ON. If you’re using Manual Focus, those MF Assists can become distracting while you’re composing. Turning this feature ON will hide them unless you’re actively focusing, which is when you really need them.
Focus Check
OFF. Turning this on will magnify your focus area automatically when you touch the manual focus ring. While the magnification is super-helpful, the automatic nature of it can be distracting. I’ve instead programmed my rear command dial to Focus Check.
Interlock Spot AE & Focus Area
OFF. This is another cool feature, but as far as Fujifilm settings for travel, it’s best to leave this off so that you have more consistent exposures as you move that focus point around (if you’re in Spot metering).
Depth of Field Scale
Film Format Basis. I used to have this set to Pixel Basis for “accuracy.” But I never looked at the scale while using Pixel Basis. Whenever I did want the scale was when I needed to focus without bringing my camera to my face, setting a smaller aperture like f/8 or f/11, and guessing my subject’s distance. That’s when Film Format Basis helps.
This technique is called Zone Focus, and you can read this article to learn more about it.
Release/Focus Priority
Release. Sometimes you’ll need to be able to press the shutter all the way for the photo when a focus lock isn’t achieved. You’ll need Release selected to be able to do this.
Shooting Setting
Flicker Reduction
OFF. Only turn this on if you’re shooting under fluorescent lighting.
IS Mode
2 (Shooting Only). This will help you save your battery. It only activates your lens’ image stabilization when actively shooting.
AUTO ISO
My Fujifilm travel settings for AUTO ISO are best explained in this post about AUTO ISO. Watch the video, see what AUTO ISO does, and how to use it.

Flash Setting
TTL Lock Mode
Lock with Metering Flash. That’ll give you more consistent results when you use the TTL-LOCK function. The flash output will be locked based on a pre-flash meter and used for subsequent photos to ensure the same flash output.
User Setting
Format
Be sure to format your memory card every time you use a new one and periodically after that!
It’ll “clean out the digital cobwebs” in your memory card and prepare it for shooting, decreasing the chances of corruption. Just ensure you’ve downloaded all the existing photos first since it will erase the card!
Date/Time
Set your home date and time.
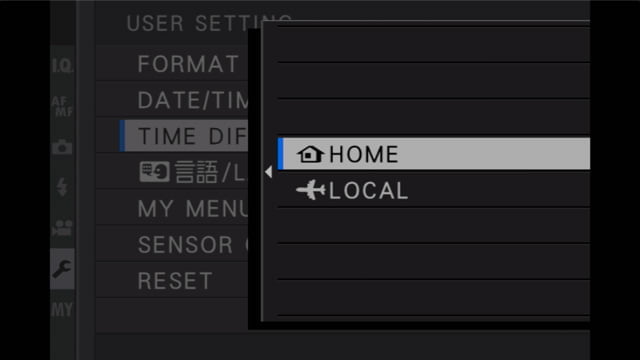
Time Difference
Highlight Local and set the local time whenever you’re traveling. This’ll preserve your home time zone but let you adjust your traveling time zone.
My Menu
Create your own menu of your most commonly-used items in this menu. You get 16 items. Read this article for more information on how to customize My Menu.
Sensor Cleaning
When Switched On. I prefer to do this when switched ON so it’ll get rid of any dust right before I’m shooting, especially after changing a lens. But it does slow down the startup time slightly.
If you’d rather have a faster startup (we’re talking milliseconds, not seconds), switch it to When Switched Off.
Sound Setting
Turn off all sounds. They draw attention to you and, in my opinion, can be pretty annoying. You can capture great travel photographs without them.
Screen Setting

EVF Brightness
AUTO. The camera does a great job of adjusting the brightness automatically, dimming it when able to save the battery.
LCD Brightness
0. As a default, leave it here. Only turn it up when necessary, which will help save the battery.
Image Disp.
OFF. This is the “automatic image review” feature after you capture a photo. Turning this ON will drain your battery faster.
But more importantly, it’s a distraction, and if you’re tempted to review every photo, you’ll miss the moment happening right in front of you. Review them only when you need to, using the Playback button.
Preview Pic Effect
ON. Some Fujifilm cameras have this setting, allowing you to see how all of your image and exposure settings will affect your final JPEG photo. It’s why mirrorless cameras are great. Leaving it ON will let you see what your picture will look like before pressing the shutter.
If you only care about what your RAW file will look like, you can turn it OFF.
Natural Live View
OFF. Cameras that don’t have Preview Pic Effect have this setting, which does the same thing, but when OFF.
If you only care about what your RAW file will look like, you can turn it ON.
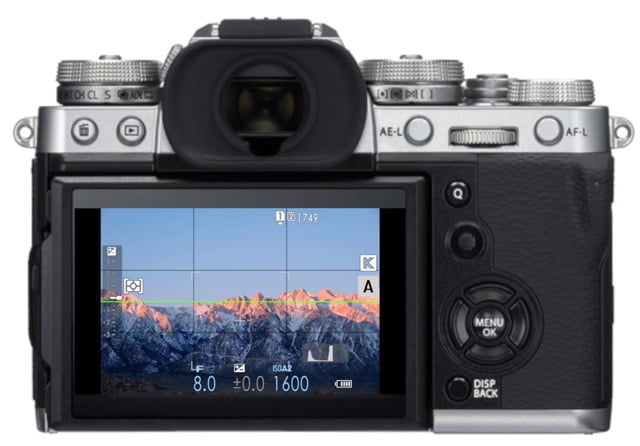
Framing Guideline
Grid 9. There are so many reasons why a simple grid can help your compositions, other than just following that old “rule of thirds.” Grid 9 is the least distracting and most helpful. Be sure to enable Framing Guideline in Disp Custom Settings.
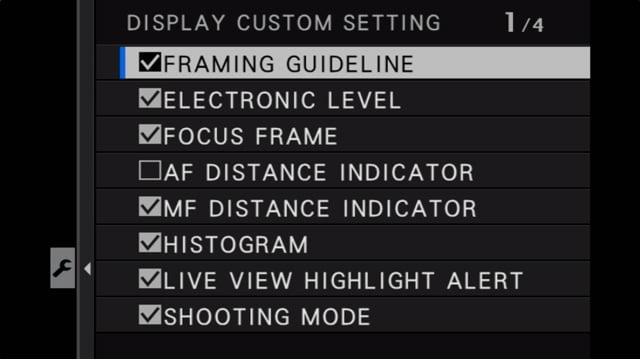
Disp. Custom Setting
I like to enable (check) Framing Guideline, Electronic Level, and Histogram. They’re all off by default.
- The Framing Guideline, as mentioned above, is a handy compositional tool.
- The Electronic Level is beneficial for landscapes and cityscapes, though it can be distracting and unnecessary when you’ve switched to street photography and environmental portraits.
- The Histogram is an essential exposure tool. Learn how to use the histogram in this post.
- You can also enable the Live View Highlight Alert; this isn’t available in all Fujifilm cameras. This will warn you when your highlights (bright areas) are overexposed, or pure white. Those overexposed areas will flash black & white.
You can customize your Fujifilm camera displays in many really cool ways, and you can read all about those here.
Button/Dial Setting
Focus Lever Setting
ON. Enable that focus joystick for cameras that have it. If you don’t have ON here, you’ll instead likely have:
PUSH: CENTER or ZOOM. Push the joystick to recenter the focus area. If you don’t have a rear command dial that you can push in, set it to Zoom so you can push the joystick and zoom in on your focus area to check focus.
TILT: EDIT. Tilt the joystick to move the focus area around the screen, and rotate the command dial to change the size. If AF MODE is set to ALL as recommended, rotating the command dial lets you cycle through all AF Modes.
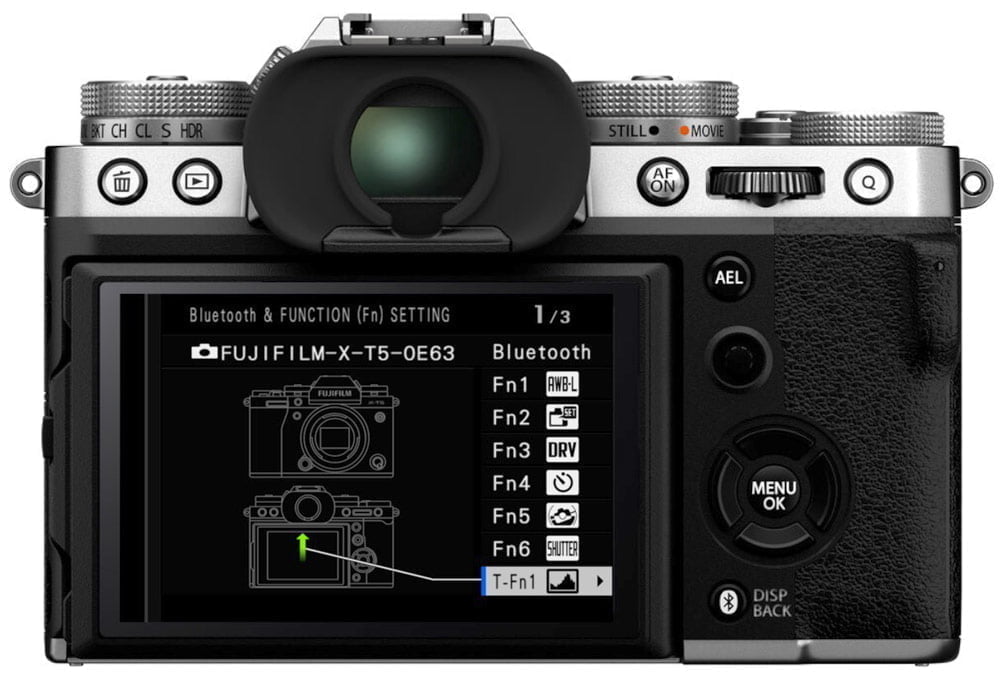
Function (Fn)/AE-L/AF-L Setting
I won’t assume to know how you want all of your buttons programmed. But I do have some recommendations for Fujifilm travel settings you should have quick access to. These are listed in order of what I’d give priority to. Program them how you wish.
- White Balance: Being able to adjust your White Balance quickly is vital in travel photography when you’re in and out of different lighting, especially when recording JPEG. Not so critical if you’re only recording RAW.
- AWB Lock Only: When using Auto White Balance, “lock it in” when it looks right for more consistent colors.
- Histogram: Display a larger RGB histogram and show clipping areas.
- ISO: For cameras without an ISO dial, and even for cameras with, this lets you quickly change your ISO and/or AUTO ISO program.
- Face/Eye Detection Setting: Quickly enable & disable face & eye detection. I only like to have it active when people are in my frame. It misbehaves otherwise.
- Shutter Type: Quickly enable Electronic Shutter when you want to be silent & discreet. Otherwise, you should be using Mechanical Shutter or Electronic Front Curtain Shutter since there are some disadvantages with the Electronic Shutter.
- Focus Check: Magnify your focus area to check your manual focus.
- Self Timer: Set 2 seconds to stabilize the camera before shutter release or 10 seconds to get in the photo.
- Wireless Communication: Transfer photos to your smartphone for quick sharing.
Selector Button Setting
Fn Button. For cameras with the selector button pad, this gives you more options to program custom buttons.
ISO Dial Setting (A)
COMMAND. Allows quick control for changing AUTO ISO programs by pressing & turning the Command Dial.
Shutter AF
As desired. Turning any of these ON will enable autofocus when you press the shutter halfway.
If you’d rather use the AF-L/AF-ON button on the back of the camera to command autofocus instead of the shutter (back-button focus), turn these OFF. This gives you better control over focus.
Shutter AE
ON. For travel photography, it’s best to lock the exposure when the shutter is pressed halfway. Other types of photographers are better off not locking the exposure, but this is good for travel photography.
Shoot Without Card
OFF. A good, “hey dummy, you don’t have a memory card installed” reminder.
Shoot Without Lens
ON. Many travel photographers use third-party lenses, and if that lens doesn’t “talk” to the camera, you’ll need this On.
AE/AF-Lock Mode
WHEN PRESSING. To lock both the focus and exposure while holding down the AEL and/or AFL/AF-ON buttons.
AWB-Lock Mode
ON/OFF SWITCH. To push your custom-assigned Auto White Balance Lock button and lock the auto white balance when it looks good.
Aperture Setting
AUTO+MANUAL. To give you full control of lenses without aperture rings on the lens barrel.
Power Management
Auto Power Off
1, 2, or 5 Min. I prefer the camera to shut off after 2 minutes of inactivity. I can always wake it back up with the shutter button. But turning this OFF is a good way to waste your battery!
Performance
Standard/Normal. The High/Boost settings are great for sports & action photographers, but for travel photography, Standard/Normal is perfectly fine. And it’ll make your battery last longer.
Save Data Settings
Frame No.
CONT. You’ll probably be taking many photos and changing memory cards at some point during your travels. Setting this to Continuous will keep a sequential file numbering system even after you switch memory cards. This helps with organization, rather than resetting the file number to 0000 after changing a memory card.
Card Slot Setting
As desired. If you have a camera with multiple card slots, you have the option of duplicating everything to two cards (BACKUP), RAW on one card and JPEG on another (RAW/JPEG or SEPARATE), or just recording everything sequentially from one card to another when the first one is full (SEQUENTIAL). I’ll do SEQUENTIAL unless I’m doing commissioned work, in which case I’ll use BACKUP.
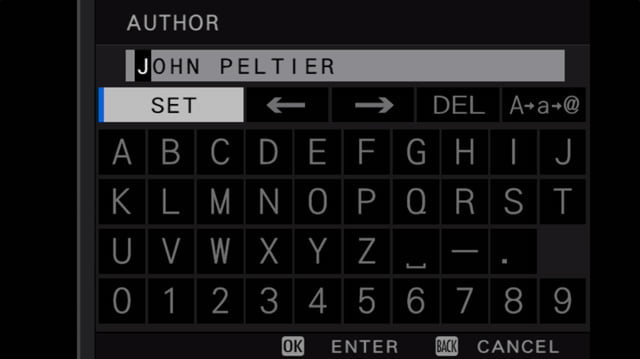
Copyright Info
Author/Copyright Set. Make sure your name is recorded in the file’s metadata! It’s helpful to be able to prove ownership when your photos are poached.
Connection Setting or Network/USB Setting
Bluetooth Settings
Bluetooth ON. This is a very low-power draw connection. You won’t use it all the time, but it’s OK to leave it on.
Auto Image Transfer
OFF. You don’t want every picture you take to be automatically transferred to your phone. Not only will it waste your battery, but it will quickly fill up your phone!
Smartphone Sync Setting
TIME & LOCATION. It’s helpful to have an accurate time stamp. I also enable location syncing (for geotagging) here, for when I want my photos to be geotagged, but use the GEOTAGGING menu option below to disable it. I disable geotagging when I’m working in environmentally sensitive areas or with vulnerable populations.
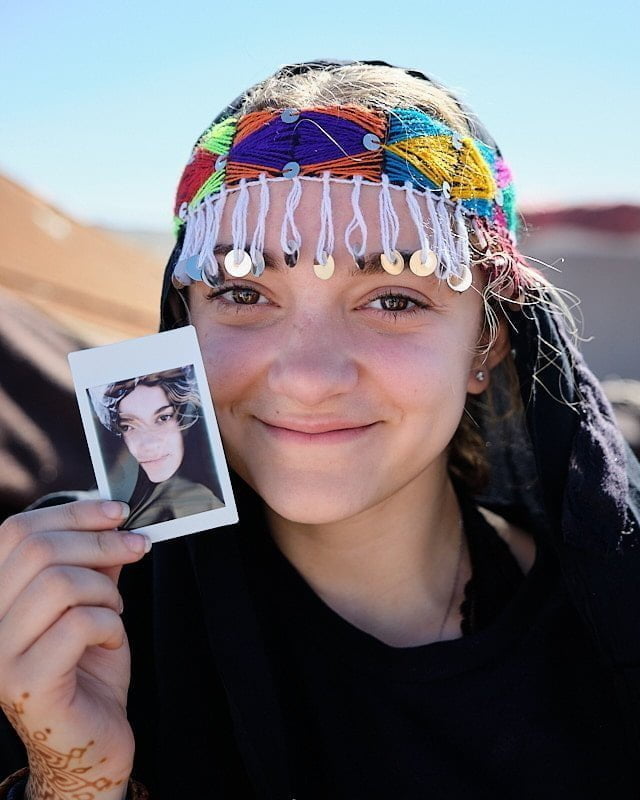
Instax Printer Connection Setting
If you have a portable Instax printer like the SP-2, enter its PIN here. Are you not traveling with an Instax? You should! It’s a great way to make friends and build international relations!
Resize for Smartphone
ON. Photos will be downsized to 3MP for transferring to your smartphone. This won’t affect the original file. But it will speed up transfers, saving the battery, and the photos are perfectly sized for social media posting.
Geotagging
OFF. See my above reasons for keeping geotagging off. I think travel photographers are responsible for respecting the places they travel to and the people they meet, and geotagging has made things out of control. I only turn this on when it really doesn’t matter.
The Quick Menu
Read this post for ideas on programming the Q menu.
These Fujifilm settings for travel photography are recommendations only
Did this get you on the right track to set up your Fujifilm camera to make it a travel photography machine?
These settings are my recommendations. I surely don’t think that things must be done this way. But I hope my experience and my reasoning help you make your own decisions.
Learn about all of these settings and more, in-depth, in the Fujifilm Photographer Membership – click here to get 20% off your first three months.
Anthony
Thursday 10th of July 2025
John, as a retired senior I love to read your articles on Fuji x series. Keep up the blobs.
universeasortofbook
Friday 31st of January 2025
I love this page. I used your guide years ago to set up my new X-T3 and today I am using it again to set up my new-to-me X-H1. I really appreciate the way you offer your reasoning behind each choice, which prompts me to think about what is driving my own preferences. One thing that I will offer to people who read this... consider trying out "front-button focus," i.e. assigning focus lock to the Fn button on the front of the camera (near the grip). It has all the advantages of back-button focus (well-explained elsewhere by you, John), and it's always felt more natural to me to use my middle finger on the front Fn button to control focus lock, my index finger on the shutter release, and my thumb on the back of the camera body to maintain a firm grip. I've been surprised how few FujiFilm people online seem to mention this as an option, but I saw a YouTuber talking about front-button focus yesterday and said to myself, "Look, I'm not crazy for preferring this!" Just my two cents, offered in the spirit of community.
John Peltier
Friday 31st of January 2025
That's a good alternative for those who find BBF tough ergonomically, thanks!
John
Monday 11th of March 2024
I just got an XE4, and this was very useful, thank you.
Ernest Phillips
Tuesday 5th of December 2023
Thanks, this is very helpful information.
TB
Tuesday 8th of August 2023
Hi John, just wanted to say Thanks - you're a lifesaver! I've been shooting on the same Canon DSLRs for over a decade now, and bought a Fujifilm (X-T30II) just before a vacation to 'lighten the load' with some smaller glass, but no time to get familiar with it. Not only is my muscle memory completely off, but there's so many different configurable buttons and settings that I was completely overwhelmed and got lost in the menus trying to wrangle out the experience I was looking for.
Your guide cleared everything up and got me on the right track quickly, so thanks again!
John Peltier
Thursday 10th of August 2023
Glad it helped, enjoy!