Fujifilm X-S10 Setup Guide & Menu Walkthrough
Disclosure: This post may contain affiliate links. I earn a small commission of product sales to keep this website going.
X-S10 Setup Guide
This is just a basic Fujifilm X-S10 setup guide to take you through the menus and get your camera set up for shooting.
Please realize that there's no one way of setting this up that will work for everyone, so this is actually the way I have my X-S10 setup. I primarily use it as my video camera but have it set up for stills when the situation warrants it. This article will take you through a basic still photography setup.
I will explain my reasoning why for each selection and some alternatives for you.
Also, please note that this won't go over every single menu setting. Some are scenario-dependent based on what's in front of your lens and will be omitted from this list. The options listed here are more of my "base" X-S10 settings for general photography.
This is taken from my full Fujifilm X-S10 Tutorial course; which is available at 20% off for blog readers using this link. This course goes into each one of these settings in further detail and much more.
Some of these settings will be disabled if the Mode Dial is set to anything else but P, A, S, or M. I'd recommend putting the Mode Dial in P just to see most of these menu settings.
Image Quality Setting
Image Size: Only affects your JPG file. I prefer the 3:2 aspect ratio to give me the full sensor shape, and I can crop later if needed. Medium is usually plenty fine if your JPGs are going to the web or social media. I'd only recommend Large if you're not recording the RAW file also.
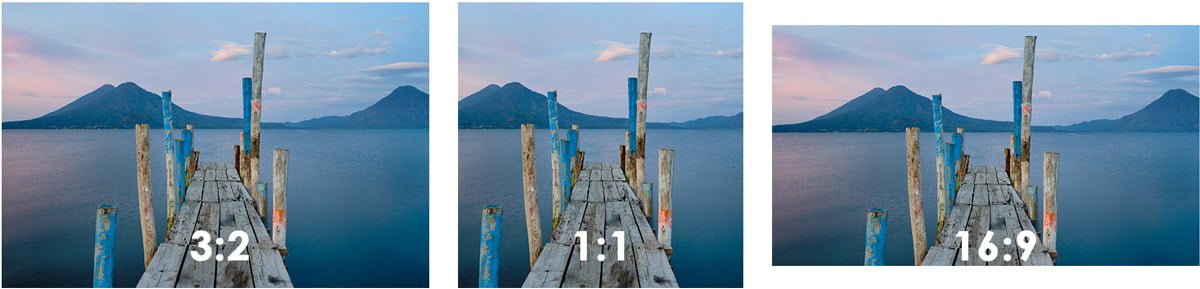
Image Quality: I like FINE+RAW to give me both a high-quality JPG and a RAW file. I try to nail my JPGs in the camera, but I also have the original RAW file for re-processing options later, and RAW is also almost a necessity when doing client work.
RAW Recording: Lossless Compressed. This gives you an original RAW file using Fujifilm's RAW compression algorithm but at half the storage size of the Uncompressed. However, some file browsers like Mac Finder won't display the thumbnail.
The following handful of Image Quality settings is all about styling your JPG photo. Read more about:
Long Exposure NR: I keep this off; it's really only beneficial if you're doing long exposures (>8 sec) and are only recording the JPG file format.
Lens Modulation Optimizer: Keep this on so the camera can fix known lens characteristics like distortion & aberrations.
Color Space: This one is controversial, but I recommend sRGB unless you're doing color-managed printing at home. sRGB ensures that your colors will be consistent across all digital display devices.
AF/MF Setting
AF Mode: ALL allows you to cycle through all Autofocus Modes by simply using the joystick & command dial while shooting. This requires a certain Focus Lever Setting we'll look at shortly.
AF-C Custom Setting: 1 is a good general setting for tracking moving objects unless you need the specialty settings of the others.
Store AF Mode By Orientation: I like Focus Area Only so I can have my focus area uniquely saved between horizontal and vertical orientations.
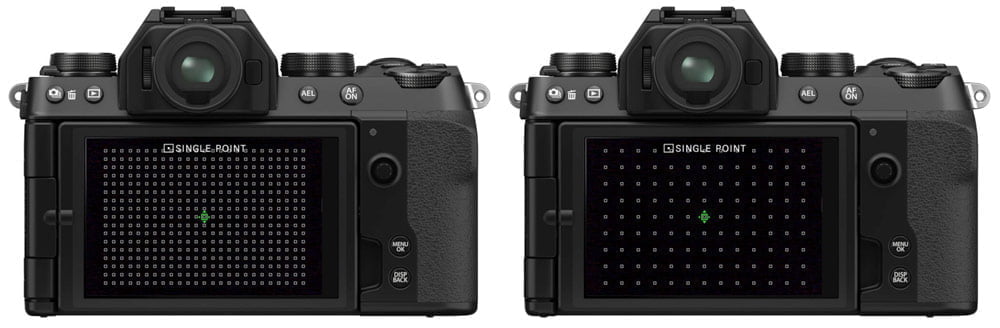
AF Point Display: Off. Otherwise, you'll see an overlay of every available focus point in Zone & Wide and I think this is a bit unnecessary and distracting.
Number of Focus Points: I prefer 117 because it allows me to move my focus point around the screen faster than 425. If you're locked down on a tripod and need much more precision in where your focus point is, you can select 425 for your X-S10 setup.
Pre-AF: Off. Otherwise, your autofocus motor will always be working even if you're not commanding autofocus yourself. This can drain your battery really fast and doesn't buy you a significant amount of focus time to be worth it.
AF Illuminator: Off. This is really only helpful when you're photographing something close to your camera in low light. And if that's a person, if they're expecting it. It can be an unnecessary surprise to people otherwise.
AF+MF: On allows you to refine your autofocus using the manual focus ring if you need to "correct" the camera.
MF Assist: While what you choose is situation-dependent, I prefer Monochrome for the digital split image. Learn more about these manual focus assists here.
Focus Check: Off. This "automatic zoom" while using manual focus is a bit distracting. I prefer to zoom in to check my focus manually when I want to, pressing the rear command dial.
Interlock Spot AE & Focus Area: Off so the exposure isn't changing as you move your focus area.
Instant AF Setting: I prefer AF-S to get single-shot autofocus when pressing the back AF-ON button, rather than continuous.
Depth of Field Scale: Film Format Basis to be able to use something called "zone focusing," focusing by estimating your subject's distance. I don't think you can use Pixel Basis accurately enough to make it worth using.
Release/Focus Priority: Release for both, so I can trip the shutter when I want to, and not wait for the camera to confirm a focus lock. This requires good shutter discipline.
Touch Screen Mode - Still Photography: Off, Area, or AF. Set the focus area using the touchscreen, or turn it off. I find there's a lot of lag when set to Shot, so I think the shutter button is better for tripping the shutter than using the touchscreen.
Shooting Setting
Photometry: Multi. This will keep your exposures consistent as you make small changes in composition; the other metering methods have special use cases but are largely irrelevant today if you use the histogram for exposure.
Flicker Reduction: Off. Only turn it on if you're photographing under fluorescent lighting and notice banding in your photos.
IS Mode: 2 - Shooting Only. This will help conserve your battery with image stabilization by only activating the stabilization when you press the shutter button, rather than always on.
ISO: See this post for information about programming & using AUTO ISO with your X-S10 setup.
Flash Setting
Red Eye Removal: I like to leave it off because it can cause more problems, but if you're using the on-camera flash you can set it to one of the flash/removal options.
TTL Lock Mode: Lock with Metering Flash will give you more accurate results when changing compositions; requires a button programmed to TTL Lock.
Movie Setting
We're going to keep this X-S10 setup limited to the still photography settings. The X-S10 Tutorial Course goes into the Movie settings.
Set Up
There's a lot to go through in the Set Up menu. We'll just hit the highlights for your X-S10 setup.
User Setting
Format. You should format your memory card the first time you use one with your X-S10 and periodically after that. This helps prevent corruption, but be aware that it will wipe the entire card clean.
My Menu Setting. I recommend setting this up; you can read how here.
Sound Setting
Adjust the sounds as necessary. I usually turn them all off except for the Electronic Shutter.
Screen Setting
View Mode Setting: A good starting point is Eye Sensor for shooting mode and LCD Only for playback. During shooting the LCD will be on until you bring the EVF up to your eye, then the EVF will turn on. Playback will be on the LCD.
EVF Brightness: Auto will automatically adjust the brightness based on the ambient light.
LCD Brightness: 0 is a good start for normal situations; you can turn it up in bright light or down in dim light.
Image Disp: Off will prohibit automatic image playback after each photo. This will help you save your battery and will minimize the distraction of "chimping." You can always use the playback button to review your images manually.
Autorotate Displays: On helps you read your displays when you rotate the camera.
Preview Exp/WB in Manual Mode: Preview Exp/WB will let you preview your exposure and white balance settings while in manual exposure mode. I'd recommend turning this off if you're working in studio strobe lighting.
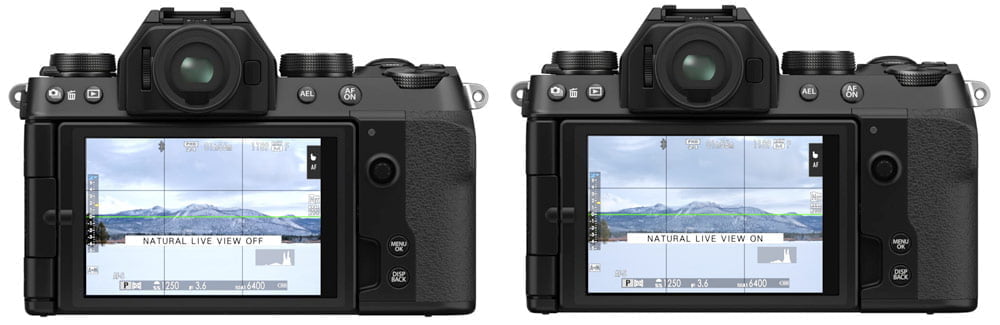
Natural Live View: Off if recording JPGs, to see what your Image Quality settings are doing. On if only recording the RAW format to see the "raw" picture.
Framing Guideline: Grid 9 will give you a standard "rule of thirds" grid to help with composition and framing. The Grid 24 is far too busy.
Autorotate PB: Off to have your "vertical" pictures take up the whole screen during playback.
Disp. Custom Setting: From the defaults I recommend enabling the Framing Guideline, Electronic Level, Histogram, and Live View Highlight Alert.
Button/Dial Setting
Focus Lever Setting: Push to Edit allows you to push the joystick and use it and the command dial to change your focus area. Tilt to Direct AF Point Selection/Face Select allows you to just tilt the joystick to move the focus area, or select a different face when face & eye detection is working.
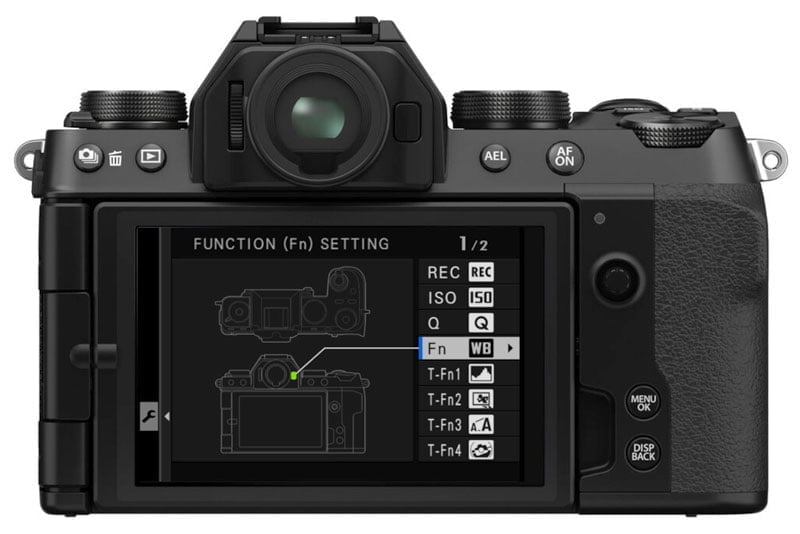
Function (Fn) Setting: Customize your camera controls to help you work more efficiently.
Shutter AF: AF-S On, AF-C On is the standard setup. Turn these off for the respective autofocus mode if you want to use back-button focus.
Shutter AE: On for either of these will lock the exposure when the shutter is pressed halfway. If you constantly track moving subjects across different lighting, turn AF-C off.
Shoot Without Lens: You'll need this On if you using a third-party lens.
Shoot Without Card: Off will help remind you that you don't have a memory card installed.
Focus Ring Operation: Nonlinear for more precise focus control in manual focus.
AE/AF Lock Mode: AE&AF On When Pressing is my preference so auto exposure lock is only activated when pressing the AEL button.
AWB Lock Mode: For this one, I prefer AWB On as Switch so I can use auto white balance lock as an on-off switch.
Power Management
Auto Power Off: 1, 2, or 5 Minutes. This will help you save your battery by putting the camera to sleep. You can always wake it up with a button push.
Performance: Normal is a good everyday setting to maximize battery life while still giving you good performance.
Save Data Setting
Frame No.: Continuous will maintain the image ordering sequence when a new memory card is inserted and this can be useful for organization if using multiple memory cards.
Save Org Image: Set On in case you use Red Eye Removal, to save an original image without red-eye removal applied.
Copyright Info: It's a good idea to put your info for the Copyright and Author fields so this information is written to every image you create.
Connection Setting
Bluetooth Settings - Bluetooth On/Off: On gives you a number of useful features using the Fujifilm Cam Remote App on your smartphone.
Auto Image Transfer: Off to inhibit automatic image transfer to your smartphone whenever your camera is shut off. This can be intrusive; you can do it manually if you want to.
Smartphone Sync Setting: Time&Location is useful to have this information pulled from your smartphone. It won't be attached to every photo unless enabled in the General Settings submenu.
Connection Mode: USB Card Reader means you can transfer images directly from your camera to your computer via a USB cable. The others are for using X RAW Studio and other special features.
General Settings - Resize Image for Smartphone: On to downsize your pictures before sending them to your smartphone. This is probably the best choice for most situations, assuming you're sending them to social media or friends. You're not transferring the full-sized images to your phone, which will slow down transfer and take up storage space.
General Settings - Geotagging: Keep this Off unless you want all pictures to have coordinates attached to them.
General Settings - Location Info: Off so you don't have your coordinates displayed on your screen - unless you really need that?
General Settings - Button Setting: Wireless Communication will start a connection with your smartphone.
X-S10 Setup Final Thoughts
There is, of course, a lot more to the X-S10 than what we discussed here! But I hope this menu walkthrough, and all associated links, can get you started with this capable camera.
You can check out the X-S10 tutorial course to go even further in-depth.