Nikon Z AF Area Modes: Which One to Use and When
Disclosure: This post may contain affiliate links. I earn a small commission of product sales to keep this website going.
The autofocus area mode controls where your camera looks for focus, and choosing the right one for your subject is just as important as choosing between single-shot and continuous AF. If you've been defaulting to one or two modes and ignoring the rest, here's what you should know.
A Quick Terminology Note
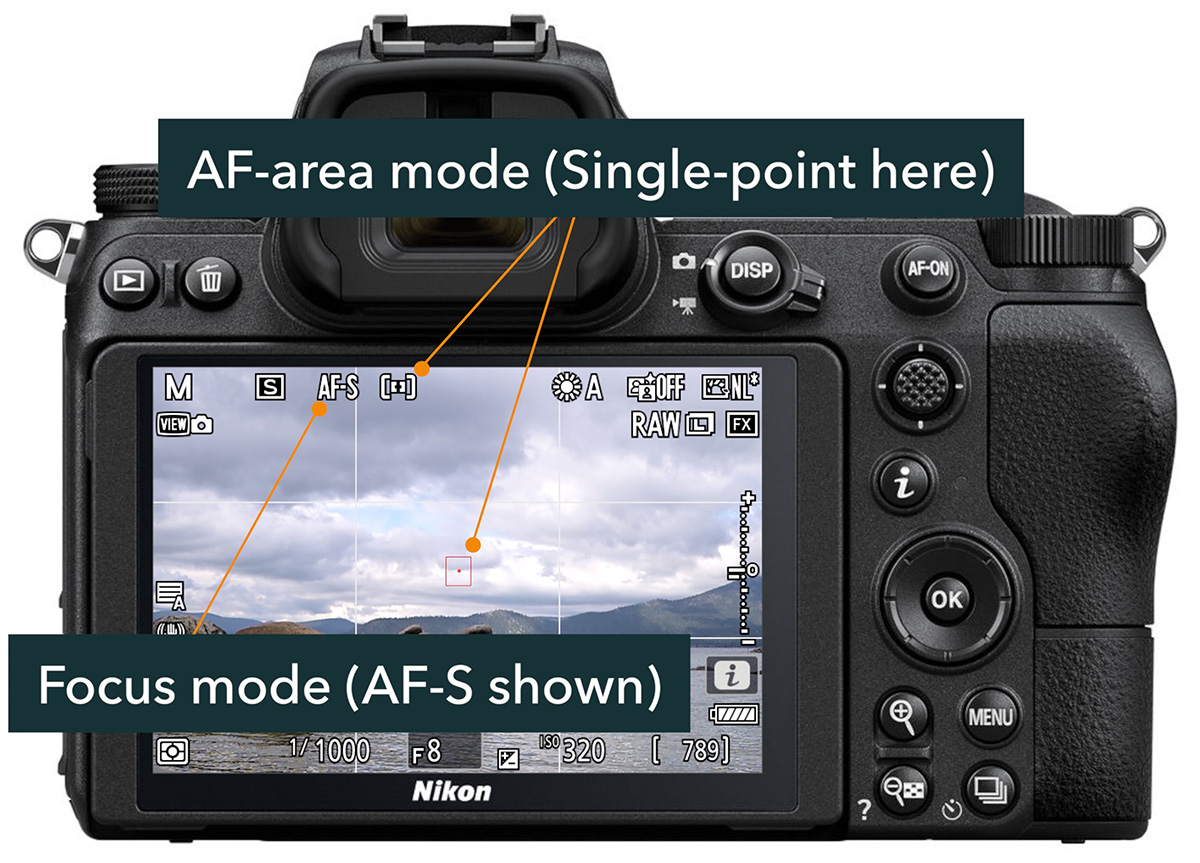
Focus mode (AF-S or AF-C) controls how the camera focuses, meaning either for a single shot or continuously. AF area mode controls where the camera looks for focus. This article is about the latter.
The AF Area Mode Differences
Pinpoint AF
The smallest, most precise focus zone available. Pinpoint uses every AF point on the sensor regardless of your custom settings, which is what makes it so accurate. But it's also slower to move around the screen, and nearly impossible to track anything moving.
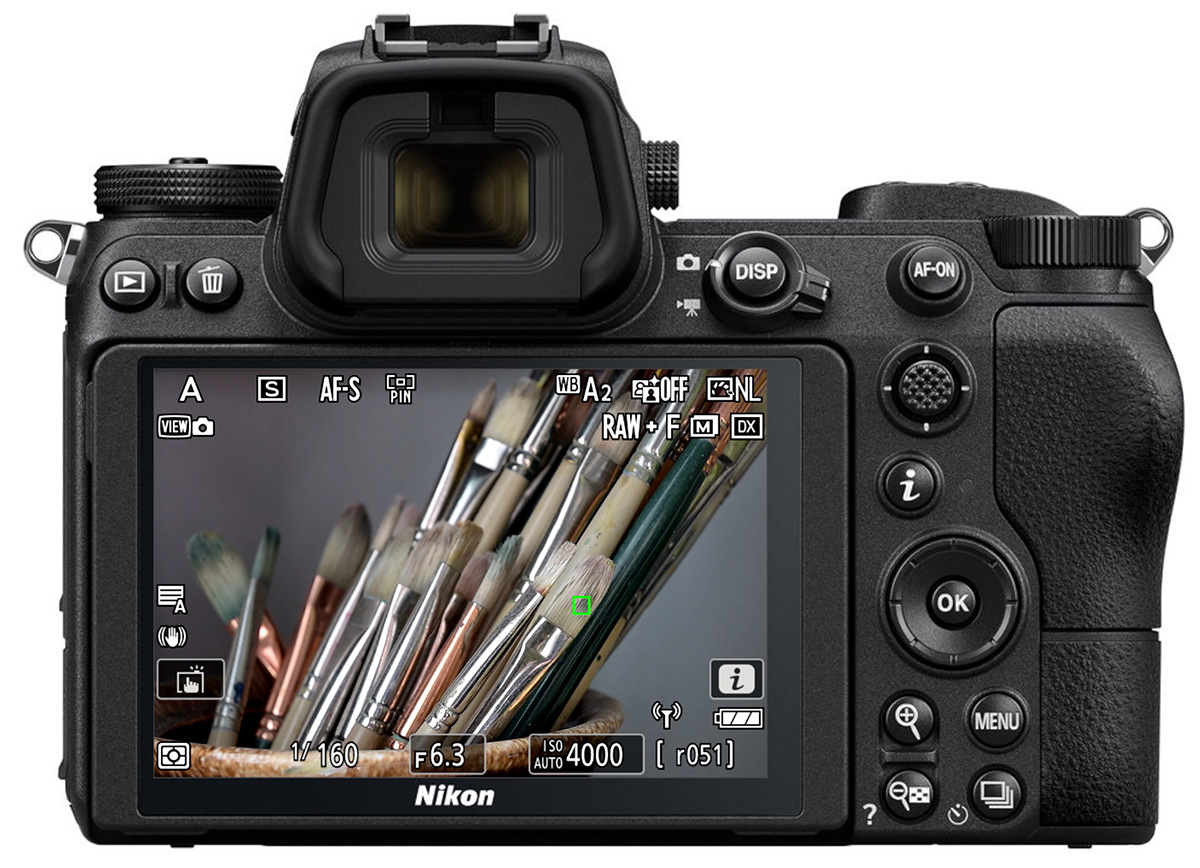
Only available in AF-S (single shot). Best for stationary subjects where precise focus placement is critical, such as macro or product photography with a shallow depth of field. Not suitable for moving subjects.
Single-point AF
The standard small focus point. Like Pinpoint, it locks onto whatever falls under the point and ignores everything around it. But you can move it around the screen faster, it uses phase detection, and overall can be better than Pinpoint when you don't need ultra-precision.
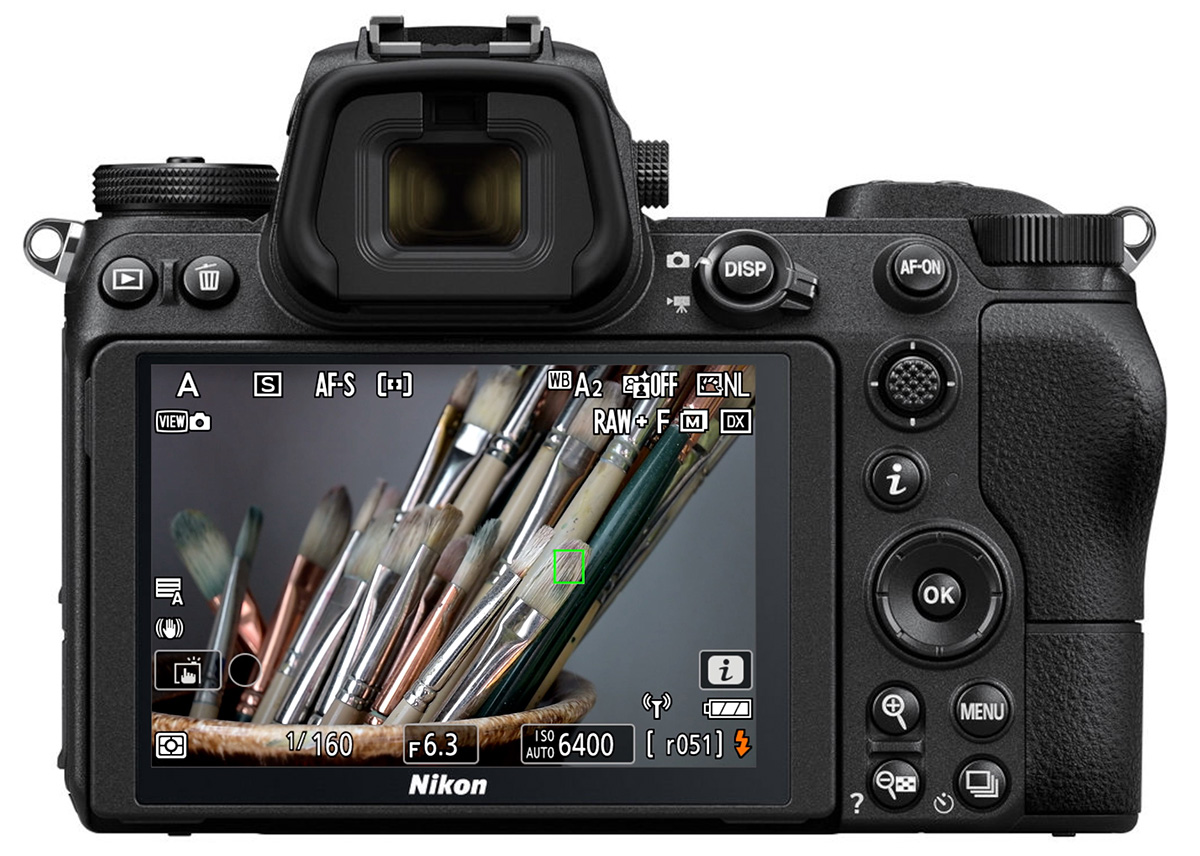
Available in AF-S and AF-C. Best for stationary subjects where you want control over focus placement. For most situations requiring a small, exact focus point, Single-point can be the more practical choice over Pinpoint simply because it's easier to reposition quickly.
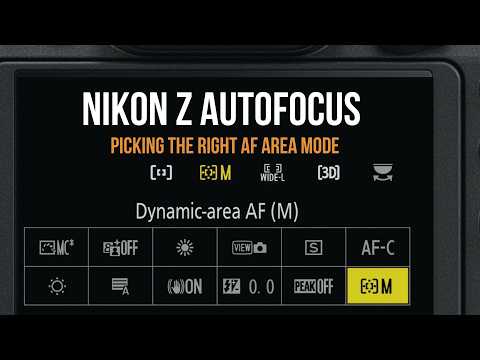
Dynamic-area AF
Looks similar to Single Point in size, but surrounded by a cluster of smaller backup points. If your subject moves slightly out of the main focus point, one of those surrounding points takes over to maintain focus.
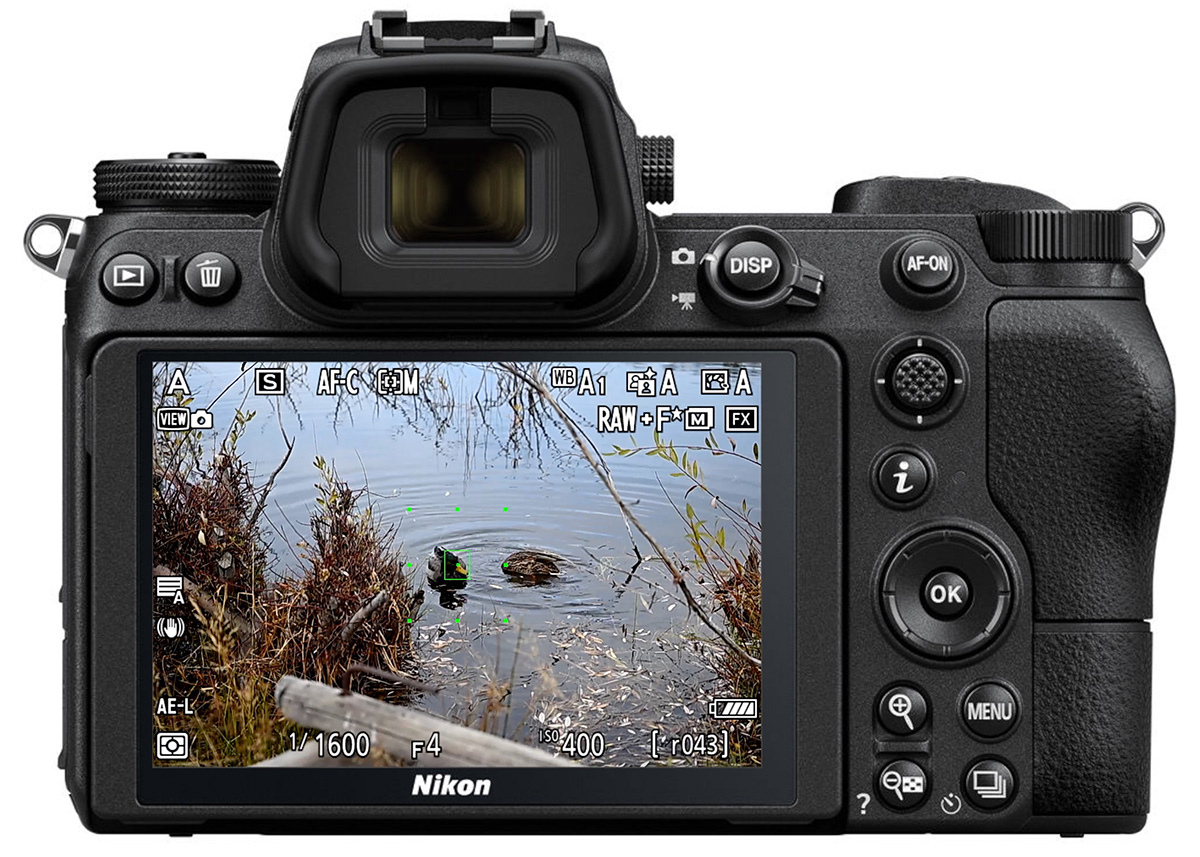
Only available in AF-C. Best for subjects moving at a moderate pace, or moving predictably, like toward or away from you, or staying within a limited area of the frame. Think a cyclist coming straight at you, or a bird perched but shifting position. Some cameras offer multiple Dynamic-area sizes for more or less coverage. Not ideal for subjects darting unpredictably across the frame.
Wide-area AF (Small and Large)
Rather than a precise point, Wide-area lets you define a region of the frame and the camera selects focus within it, prioritizing whatever is closest to the camera if multiple distances are detected.
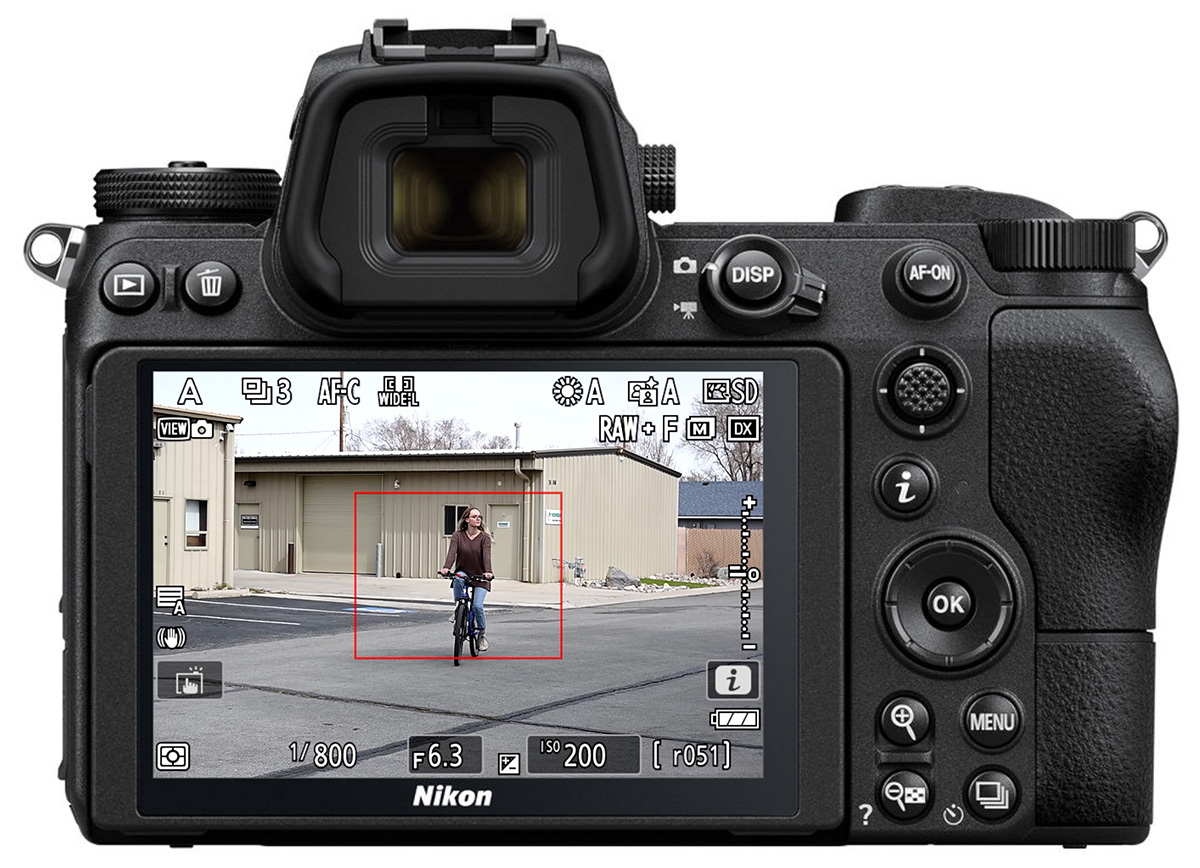
Available in all focus modes except MF. The small option is only slightly larger than Single-point. The large option covers roughly 10% of the frame as a rectangle. Newer cameras add two customizable sizes (C1 and C2).
Wide-area is useful when movement is less predictable than what Dynamic-area can handle, or when you want to cover a broader zone without caring exactly where within it the camera grabs focus. It's a natural fit for sports. The trade-off: that closest-subject bias can backfire if something intrudes between you and your desired subject, like a branch, a fence, or another player. Not the best choice for still-life or precision work.
3D-tracking
A small point similar in size to Single-point, but once you place it on a subject and command AF, the camera uses both color and contrast to track that subject across the entire frame.
Only available in AF-C on newer Nikon Z cameras. Works well for tracking athletes, wildlife, or any fast-moving subject that crosses the frame. Also useful for focus-and-recompose on static subjects when shooting handheld. Tracking stops the moment you release the AF button or shutter.
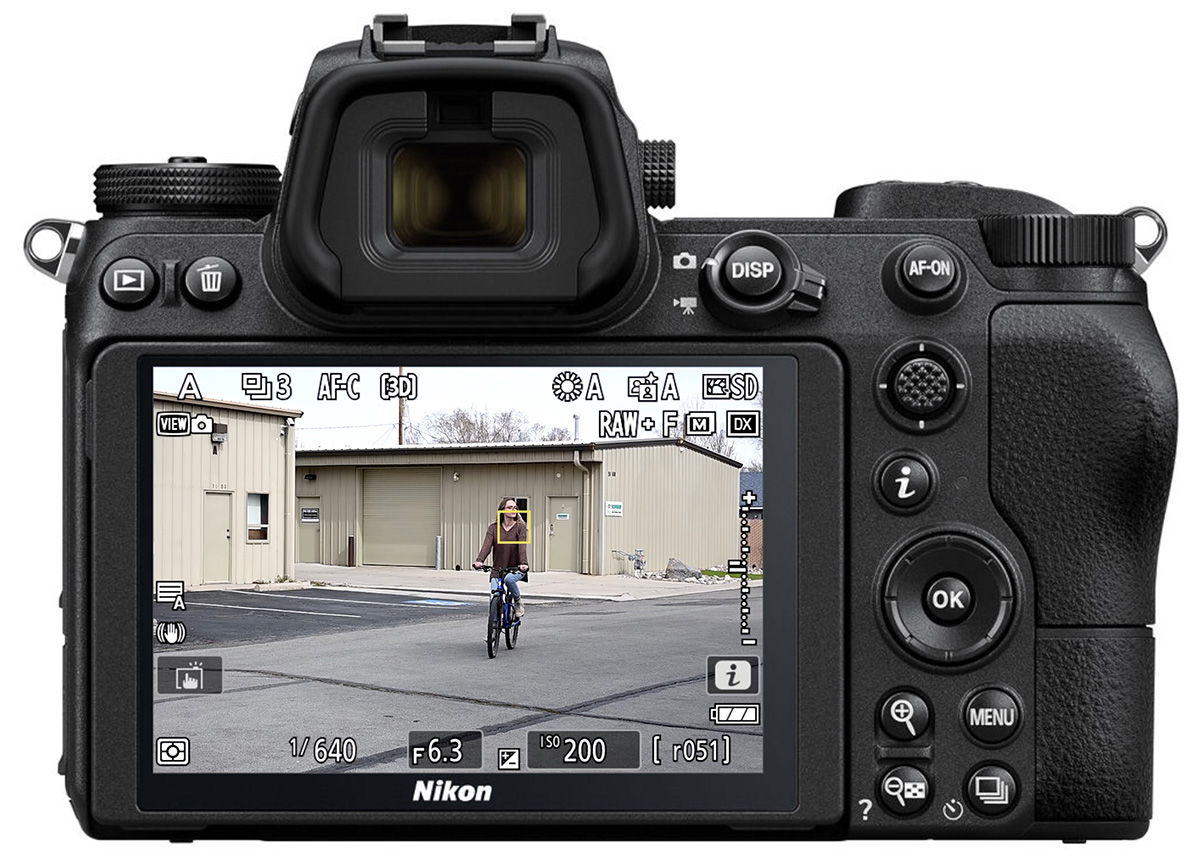
Be aware that 3D-tracking relies on color and contrast differences between the subject and background. If those are similar, the tracking point can drift to the wrong subject. Placing the box on an area with strong color or tonal contrast improves reliability. If it consistently fails, Dynamic-area or Wide-area are more dependable alternatives.
In video, 3D-tracking becomes Subject-tracking AF. Press OK to lock onto a subject, press again to release.
Auto-area AF
The camera uses the entire frame and decides on its own where to focus. No focus box is displayed (on newer cameras). You'll see multiple green boxes appear where the camera has locked on.
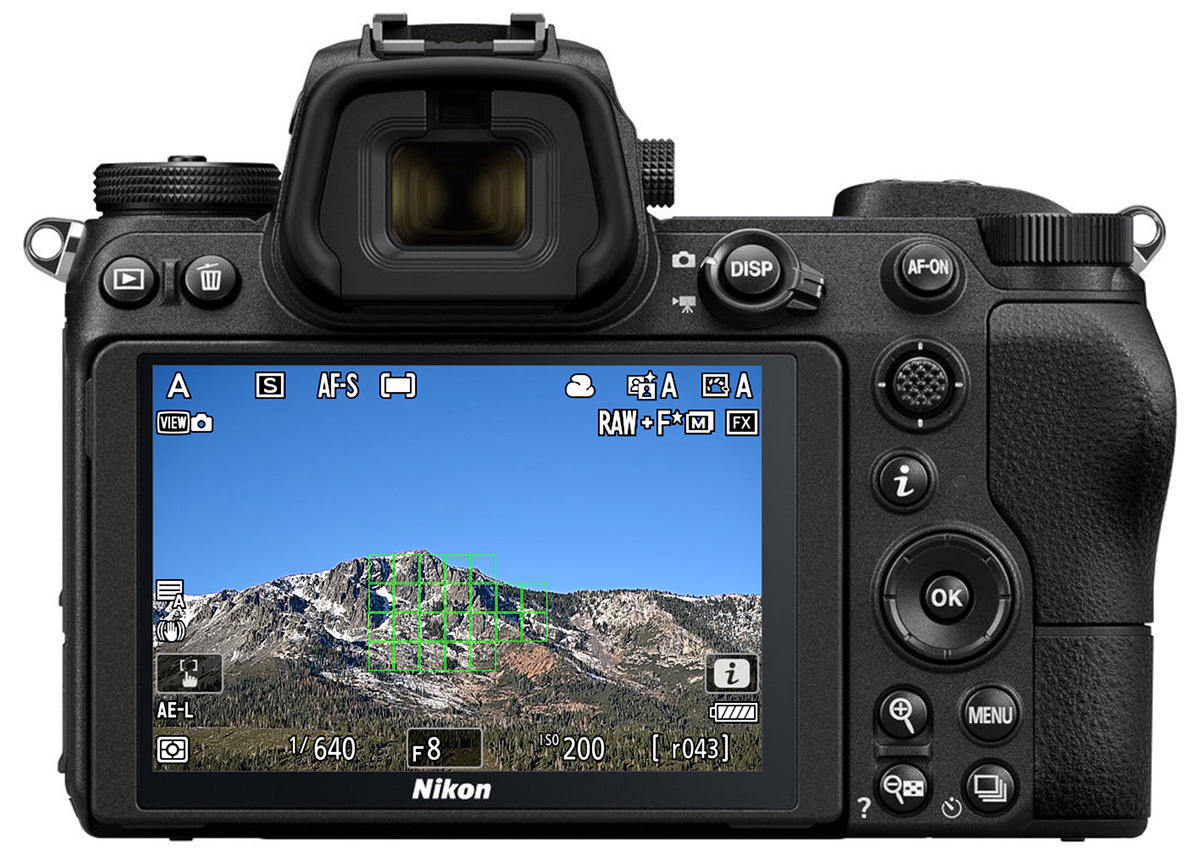
Available in all cameras and all modes except MF. This is the mode to use when you genuinely don't need precision, like for a simple distant landscape, a quick snapshot, or a situation where there's one obvious high-contrast subject and nothing else to confuse the camera.
It works well with subject detection: when detection is active and recognizes a subject, it overrides the AF area selection to prioritize that subject. If detection loses the subject, the camera falls back to Auto-area behavior.
However, you can never be entirely sure what the camera will latch onto, which makes it a last resort rather than a go-to.
Subject Detection: An Extra Layer on Top
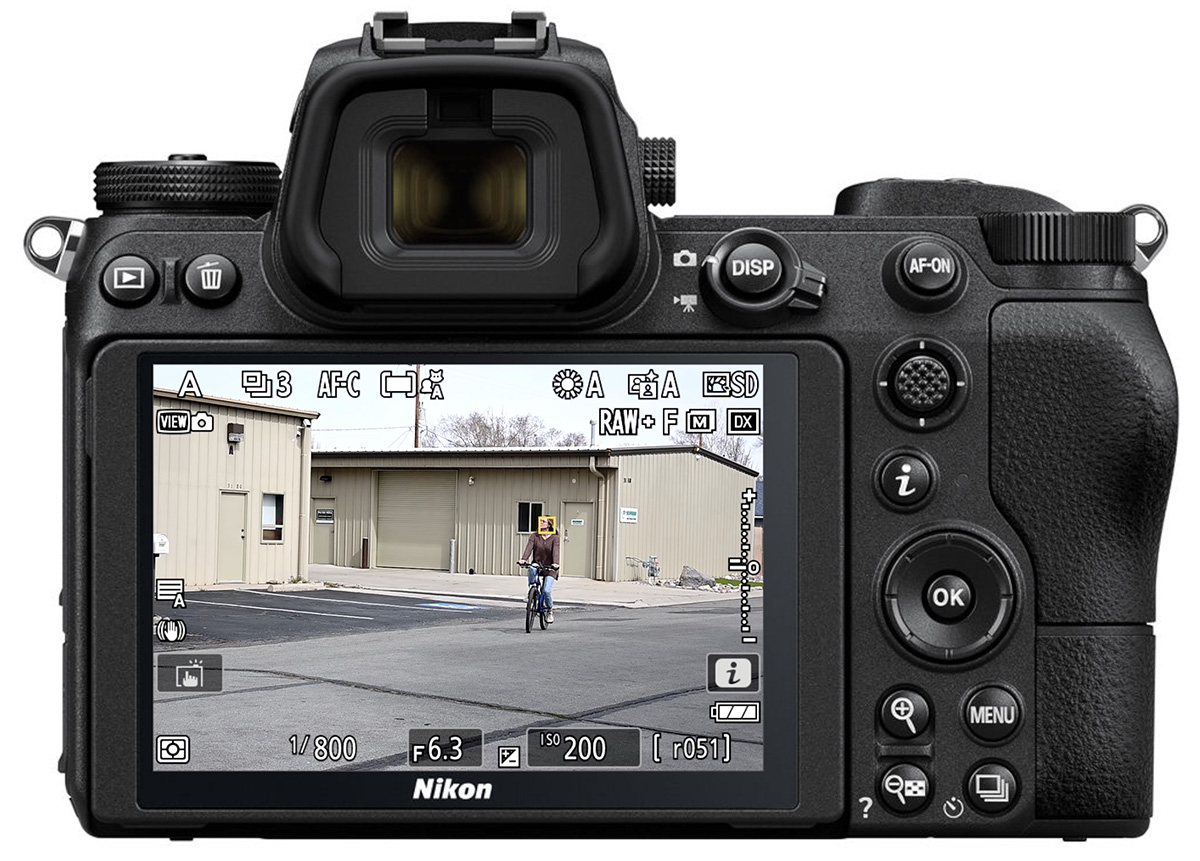
On newer Nikon Z cameras, Subject Detection is a separate setting from AF area mode. You can think of it as an additional layer that sits on top of whichever AF area mode you've selected - except it's unavailable in Pinpoint, Single-point, and Dynamic-area.
When the camera detects a recognized subject type (people, animals, vehicles) within or near your focus area, it overrides the normal AF area behavior to prioritize that subject. If detection is lost, the camera falls back to the selected AF area mode.
Limit the List to What You Actually Use
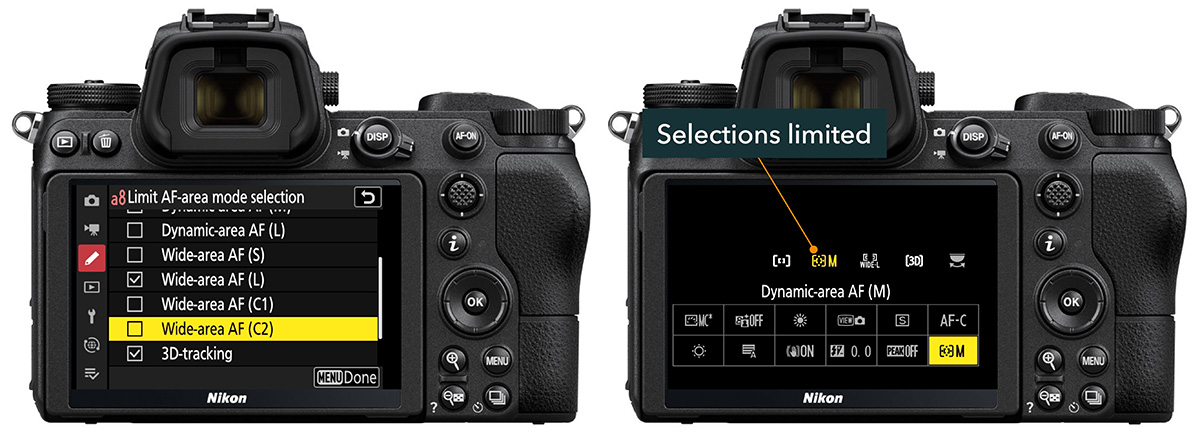
With up to 11 AF-area modes available on some cameras, scrolling through all of them mid-shoot can waste precious time and brainpower. Nikon lets you remove the modes you never use from the selection menu.
Go to Custom Settings > a Group > Limit AF Area Mode Selection and uncheck anything you won't use. As a reference point, a versatile everyday selection might include Single-point, Medium Dynamic-area, Large Wide-area, 3D-tracking, and Auto-area.
Once trimmed, you can cycle through just your active modes quickly via a custom control button or the i menu.
Assigning AF Area Mode to a Custom Button
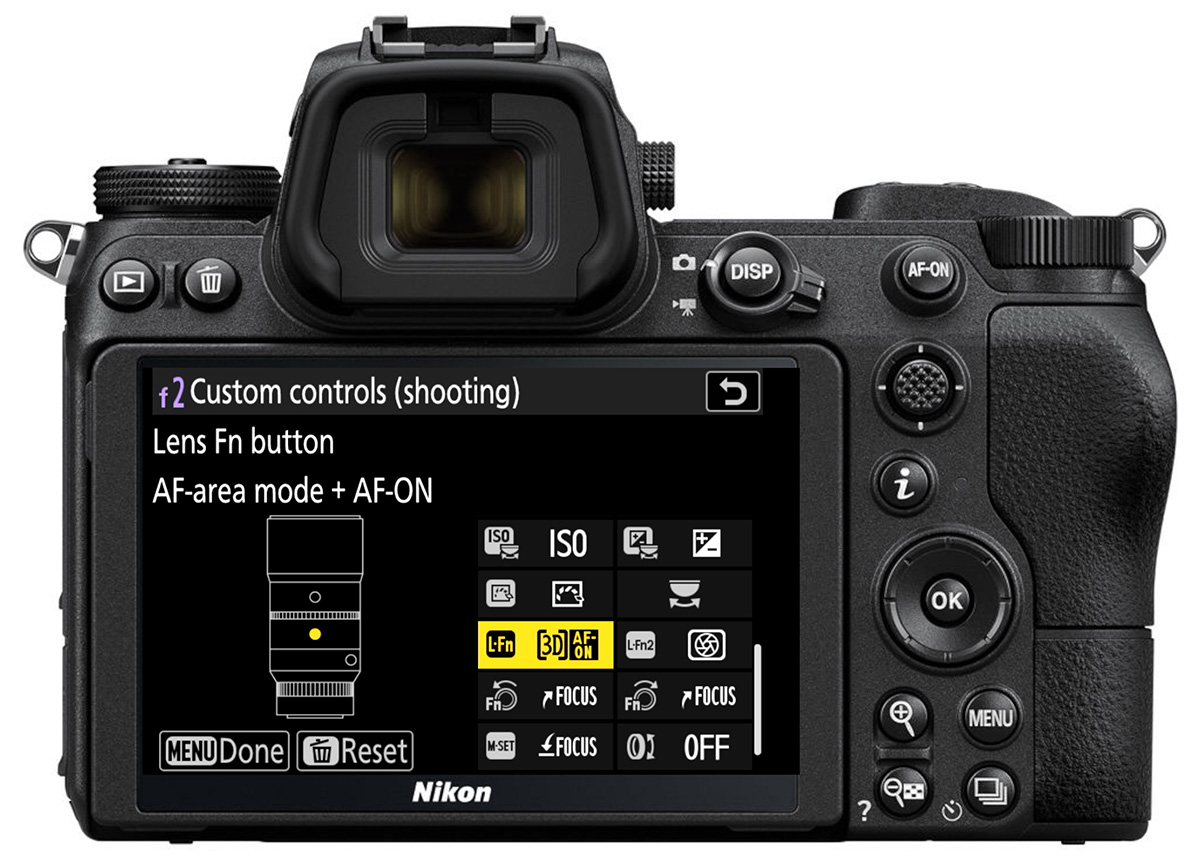
The default setup on many Nikon Z cameras assigns a custom button to Focus Mode/AF Area Mode selection. You hold that button and rotate the sub-command dial to change the AF-area mode. You can also configure it to cycle through your enabled modes with each press, recall a specific mode instantly, or recall a mode and activate AF simultaneously.
These can be useful to assign to the L-Fn button (Custom Settings > f Group > f2 Custom controls (shooting)). Choose Cycle AF-area mode, AF-area mode, or AF-area mode + AF-ON.
That last option is particularly useful: programmed to the lens function button, for example, you can hold it to immediately switch to 3D-tracking and start commanding AF. Then release to return to your previous AF-area mode.
Quick Reference
| Mode | Best For | AF-S / AF-C |
|---|---|---|
| Pinpoint | Macro, product, maximum precision | AF-S only |
| Single-point | Stationary subjects, general precision | Both |
| Dynamic-area | Moderately moving, predictable subjects | AF-C only |
| Wide-area | Faster/less predictable movement, sports | Both |
| 3D-tracking | Fast subjects crossing the frame | AF-C only (newer cameras) |
| Auto-area | Distant landscapes, snapshots, subject detection | Both |
Want to go deeper into Nikon Z autofocus? The Nikon Z Photography Fundamentals course covers the full AF and manual focus systems, all menus and exposure modes, with video lessons, text outlines, assignments, quizzes, and downloads. Use code BLOG20 for 20% off.
Questions or comments? Please leave them below.