How to Set Up My Menu on Canon R Series Cameras
Disclosure: This post may contain affiliate links. I earn a small commission of product sales to keep this website going.
If you find yourself digging through tabs and categories every time you need to change a common setting, My Menu is the fix. It's your own custom menu where you put just the settings you use the most, organized however it makes sense for you. Here's how to set up My Menu and get the most out of it.

Finding My Menu
My Menu lives at the end of the menu list on nearly all Canon R-series cameras. If you haven't set it up yet, the first screen you'll see is the general configuration page where you can add tabs, clear everything out, or control how the Menu button behaves.
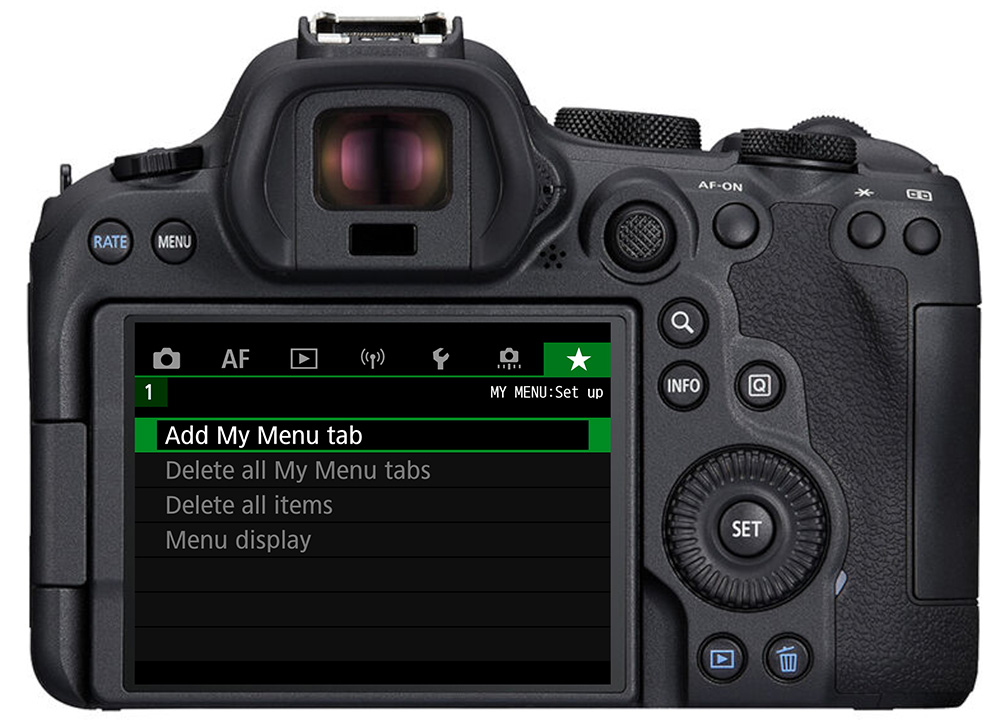
Adding Your First Tab
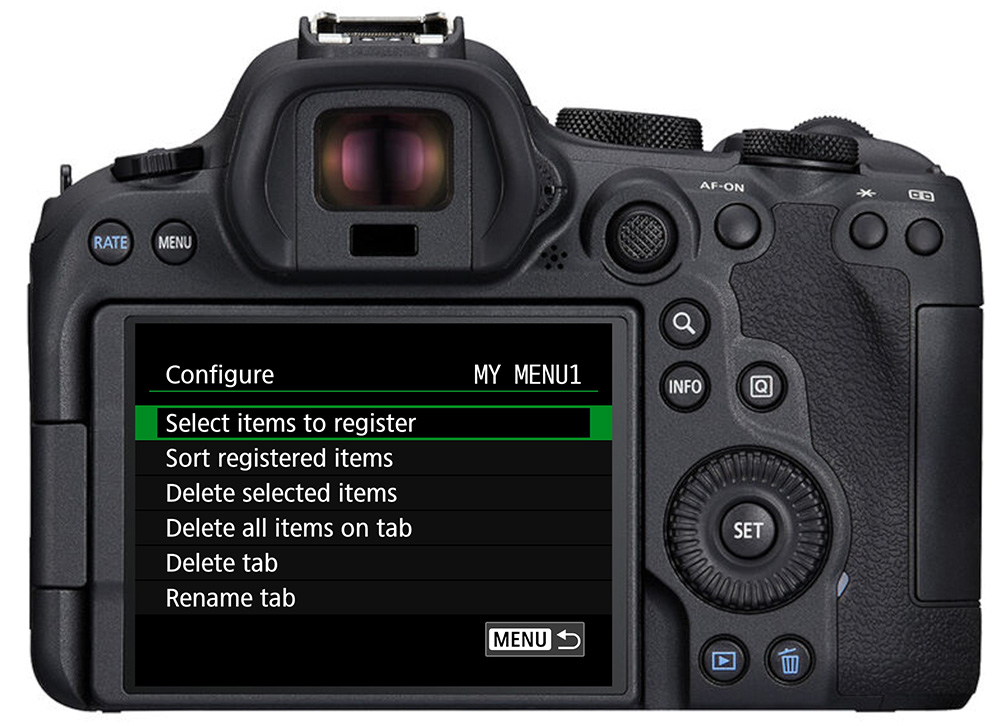
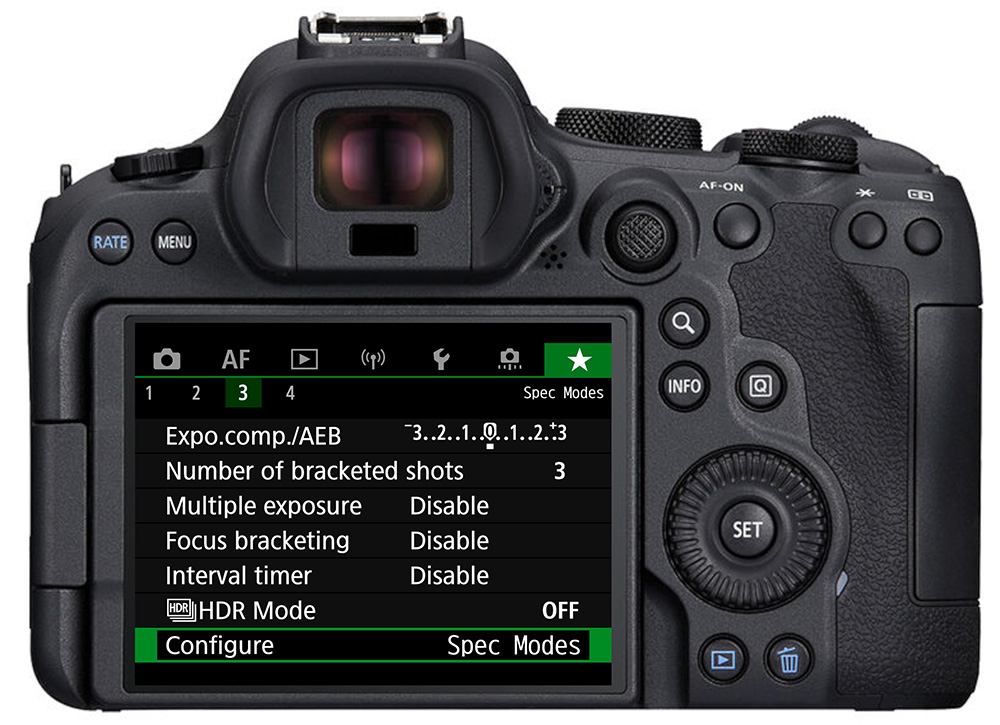
Select Add My Menu Tab and press SET, then highlight OK. You'll see a new empty tab appear. Each tab has its own configuration page. Highlight Configure and press SET to open it.
From there, choose Select Items to Register. You'll see a list of all available menu options in the same order they appear throughout the camera menus. Scroll through, select what you want, and press SET. You can add up to 6 items per tab and up to 5 tabs, for a total of 30 items.
Plan Before You Build
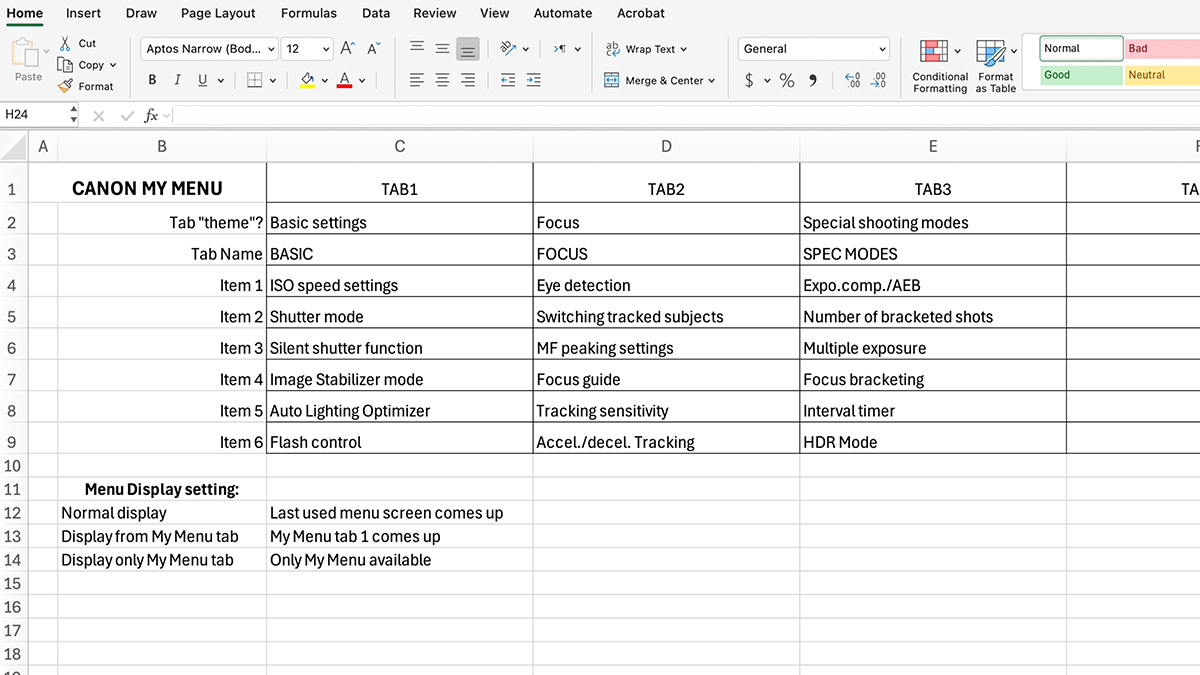
It's worth taking a few minutes to map out your tabs before you start adding items. Think in themes, like one tab for basic shooting settings, one for focus options, one for special shooting modes. Here are a few examples to illustrate:
- Basic Settings: ISO speed settings, shutter mode, image stabilization mode, Auto Lighting Optimizer, flash control
- Focus: Eye detection, subject tracking, MF peaking settings, focus guide, tracking sensitivity
- Special Modes: AE bracketing, multiple exposure, focus bracketing, time-lapse
I'd recommend putting your second-tier settings in My Menu. These are the ones you don't need to change on the fly while shooting, which you're likely accessing via a custom control, the Quick Control menu, or M-Fn button. Things like your AF operation or AF area - those are your first-tier settings and will only take up unneeded space in My Menu.
This spreadsheet is included as one of the downloads in the Canon R Photography Fundamentals course:
Managing Your Tabs
Once a tab is set up, you can do all of the following from its configuration screen:
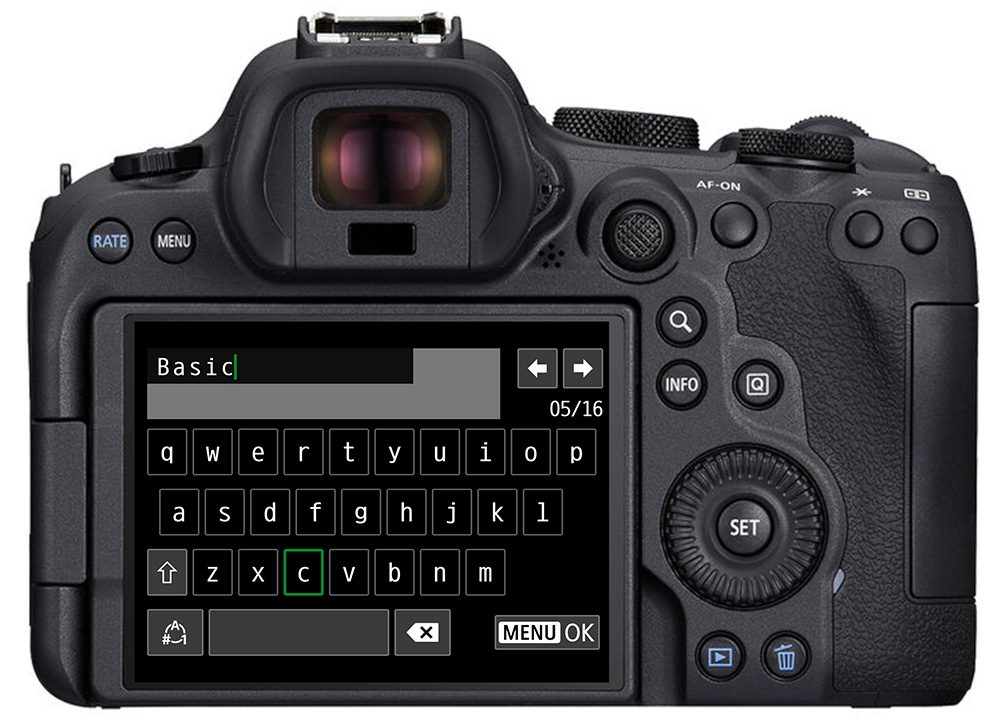
- Rename the tab: Give it a meaningful label like "Basic," "Focus," or "Special Modes" so it's easy to navigate at a glance.
- Sort registered items: Select any item, press SET, and use the arrow keys to move it up or down the list. Your most-used items should sit at the top so you're not scrolling.
- Delete selected items: Remove anything you're no longer using and add something more useful in its place.
- Delete all items: Wipes the tab clean without removing the tab itself.
- Delete tab: Removes the tab entirely.
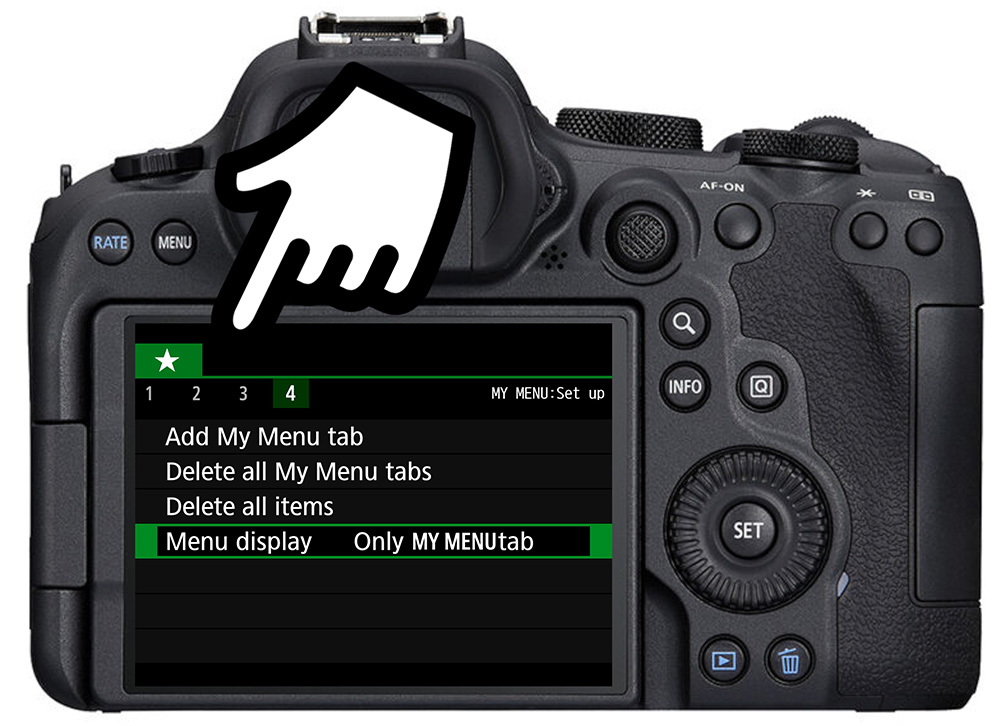
From the general configuration screen at the end of the tab list, you can also Delete All Menu Tabs to start completely fresh or Delete All Items to keep your tab structure but blank out the contents.
Menu Display Options
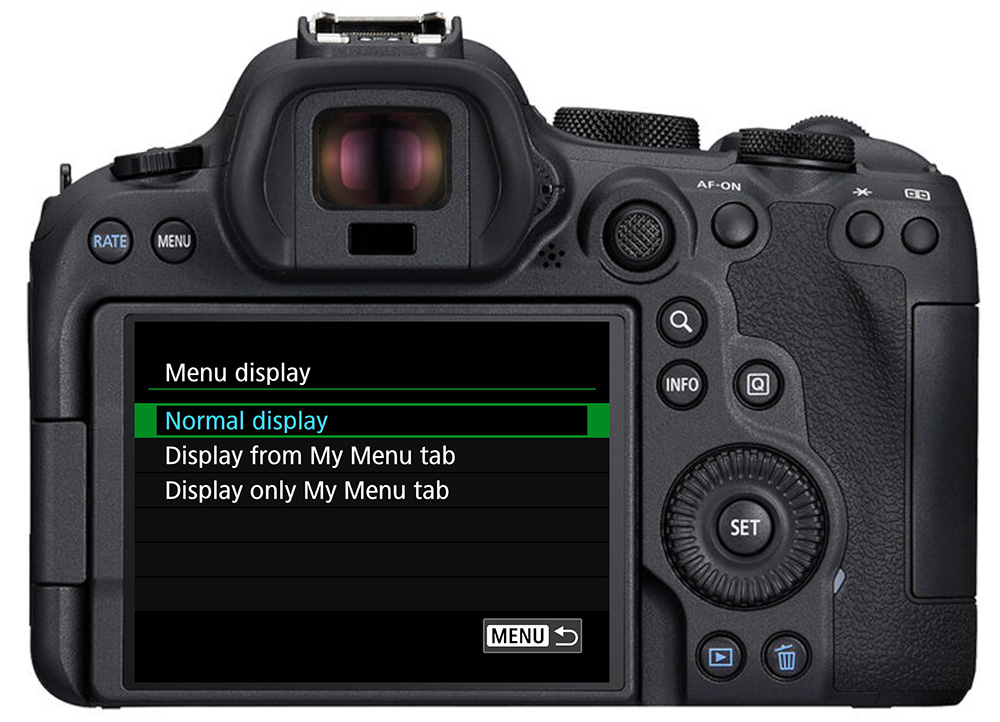
This setting controls what appears first when you press the Menu button while shooting. There are three options:
- Normal Display: Opens whichever menu screen you were on last. Useful if you want to return to the last menu option you were on.
- Display from My Menu Tab: Always opens My Menu first, regardless of where you were before. This is the recommended setting if you've taken the time to set up My Menu properly. It means your most-used settings are one button press away every time.
- Display Only My Menu Tab: Restricts the Menu button to My Menu exclusively. The rest of the camera menus become inaccessible unless you change this setting first. Only use this if you're confident every setting you'll ever need is already in My Menu.
The More Thought You Put In, the More Time It Saves
My Menu is only as useful as the planning behind it. A few minutes of thought about how you shoot and which settings you actually reach for will pay off every time you pick up the camera. Set it up once, refine it as you go, and you'll find that using the Canon R menus becomes frictionless.
For more about how to set up your Canon R-series camera, as well as using the focus and exposure tools, check out the Canon R Photography Fundamentals course. Save 20% with the code "blog20".