Manual Focus Tools on Canon R Series Cameras: Focus Guide, Magnification, and Peaking
Disclosure: This post may contain affiliate links. I earn a small commission of product sales to keep this website going.
Autofocus on Canon R cameras is excellent, but there are situations where manual focus is the better - or only - option. Low light and low contrast scenes where autofocus hunts, third-party manual-focus-only lenses, and older Canon lenses on mount adapters without AF support are all common reasons to switch to manual focus. Here's how to get into it and how to use the three tools Canon provides to make it easier.

Getting Into Manual Focus
There are a few important things to know about Manual Focus (MF) mode:
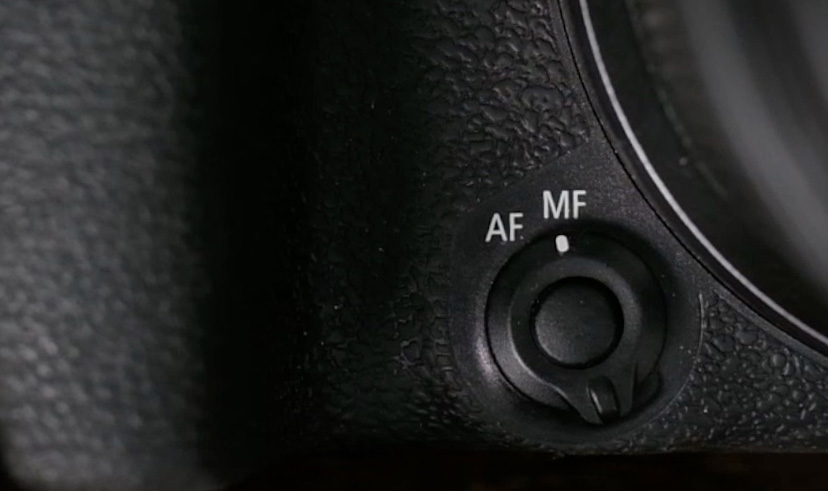
- Enable MF by pressing Menu > AF Menu > Focus Mode > MF. If your camera body or lens has a physical AF/MF switch, that takes priority. The menu option will be unavailable, and you'll need to use the switch.
- If your lens has a combined focus and control ring (one ring with two available functions), make sure it's set to the Focus function before you start. You can do this via Menu > AF Menu (or Control Customization) > Focus/Control Ring > Focus, or set it up as a toggle on a custom button. Some lenses handle this with a physical switch on the barrel.
Manual Focus Technique
Before getting into the assist tools, it's important to understand the technique itself. Don't slowly sweep the focus ring from blur to sharp. Start with large, fast rotations to get close quickly, then refine with smaller back-and-forth movements until you find the point of maximum sharpness. Think of it as making the first cut with an axe, then refining with a scalpel. Your eyes detect the transition between blur and sharpness much more reliably when you're moving past the sharp point than when you're creeping up to it slowly.
Tool 1: Focus Guide
The Focus Guide is a small box on screen, similar in appearance to the 1-point AF area. This gives you a directional display showing which way to turn the focus ring and by how much. Enable it in the AF Menu > Focus Guide.
Once active, you can position the box anywhere on the frame using the joystick, cross keys, or touchscreen (just make sure Touch Shutter is disabled first - tapping the screen to move the focus point will otherwise trip the shutter). You can also adjust the size of the box using the AF point selection button.
Using the guide:
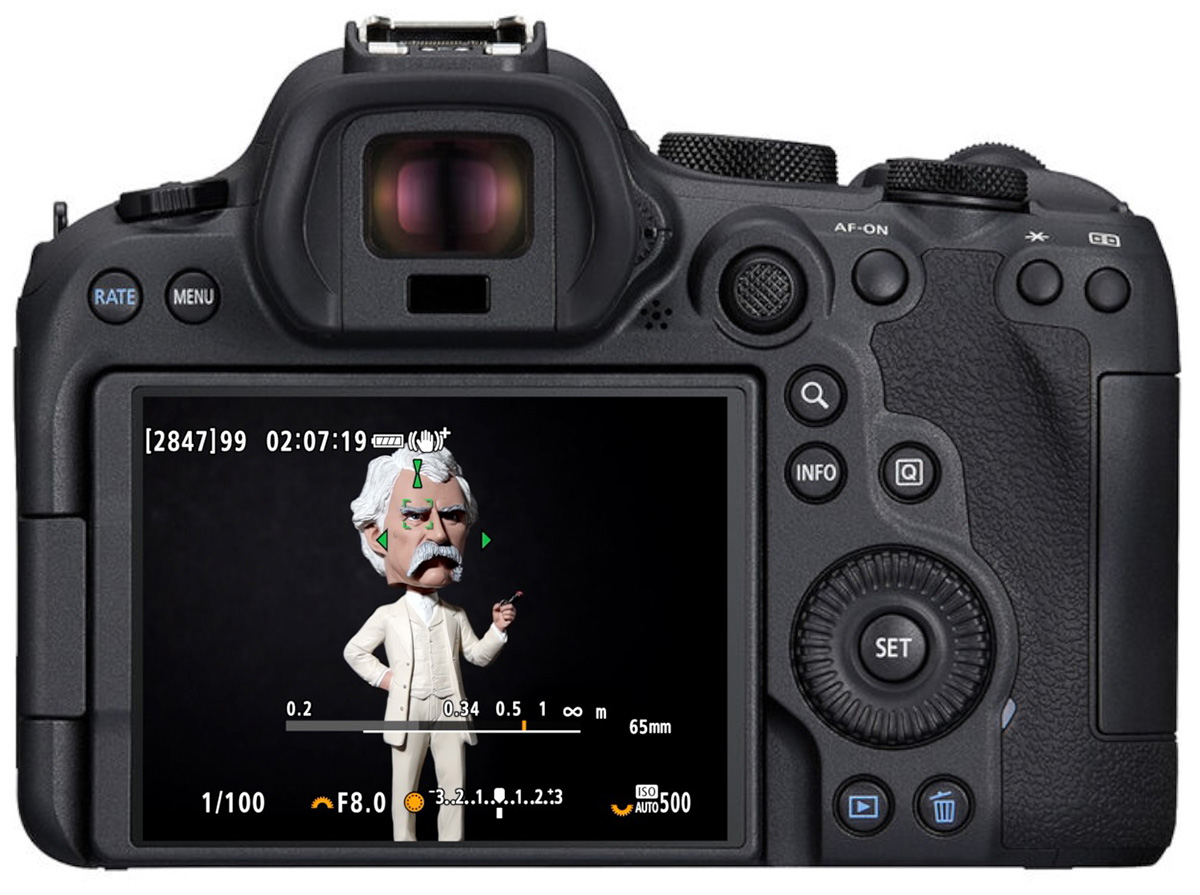
- Two arrows pointing inward + green box: Subject under the box is in focus
- Two arrows at the top: Increase focus distance (toward infinity)
- Two arrows at the bottom: Decrease focus distance (toward you)
- Three gray marks: Camera can't determine focus - keep moving the ring until arrows appear
- Arrows far apart: Large adjustment needed; arrows close together mean you're nearly there
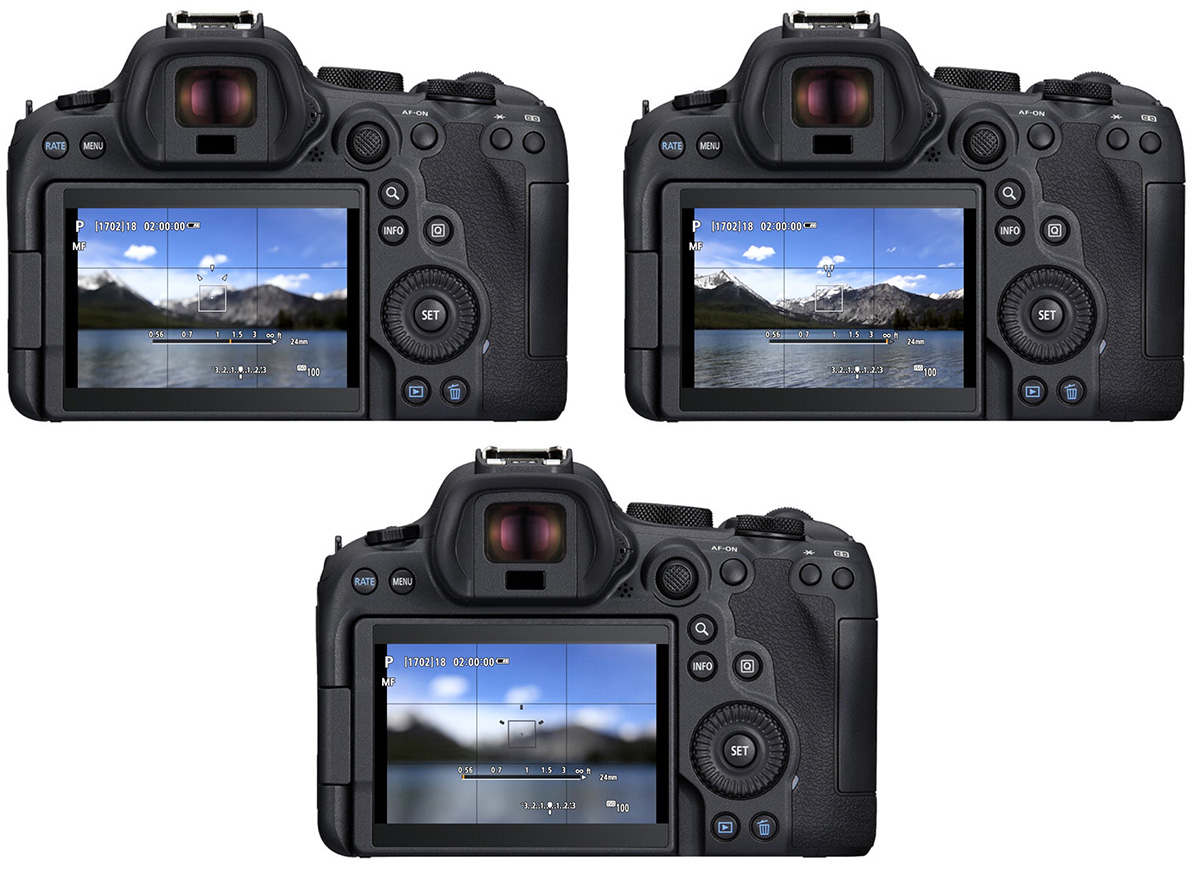
The Focus Guide can also be toggled on and off via a custom button assignment, which is nice if you don't want to see it all the time but might need to enable it quickly without going into the menus.
Some Canon R cameras can automatically place the Focus Guide box over detected faces and eyes. To enable this, turn on Subject Tracking in the AF menu and set Subject to Detect to People. Add Eye Detection if you want the box to prioritize eyes specifically. This can significantly reduce workload when photographing people with manual focus.
Tool 2: Focus Magnification
Magnification zooms in on the area under your focus point so you can verify sharpness more precisely. This is especially useful with a shallow depth of field, where small focus errors are obvious. It's available in autofocus modes too, but it's most valuable in manual focus.
To enter magnification mode, use any of these methods:
- Tap the magnifying glass icon on the touchscreen
- Press AF Point Selection > Info (or look on the screen to see which button to press to zoom)
- Use the dedicated magnify button if your camera has one
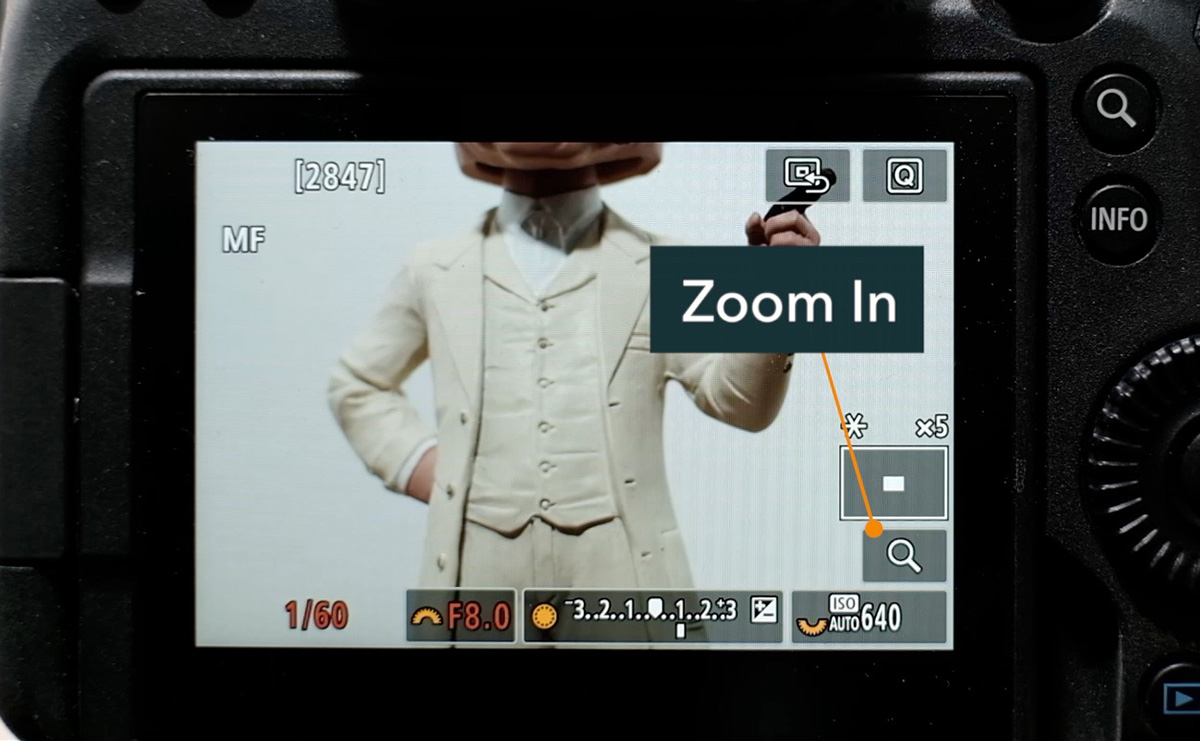
Once zoomed in, use the cross keys or joystick to move the magnified view around the frame. A small indicator in the lower right shows where in the composition you're currently viewing. Cycle through zoom levels to find the level of detail you need to confidently confirm focus.
If your camera doesn't have a dedicated magnify button and you use this feature frequently, you can assign Magnify/Reduce to a custom button.
Tool 3: Focus Peaking
Focus Peaking outlines the in-focus areas of the frame in a color you choose, giving you a quick at-a-glance idea of what's sharp without needing to zoom in. Find it under AF Menu > MF Peaking Settings (in the Shooting Menu on the R100).
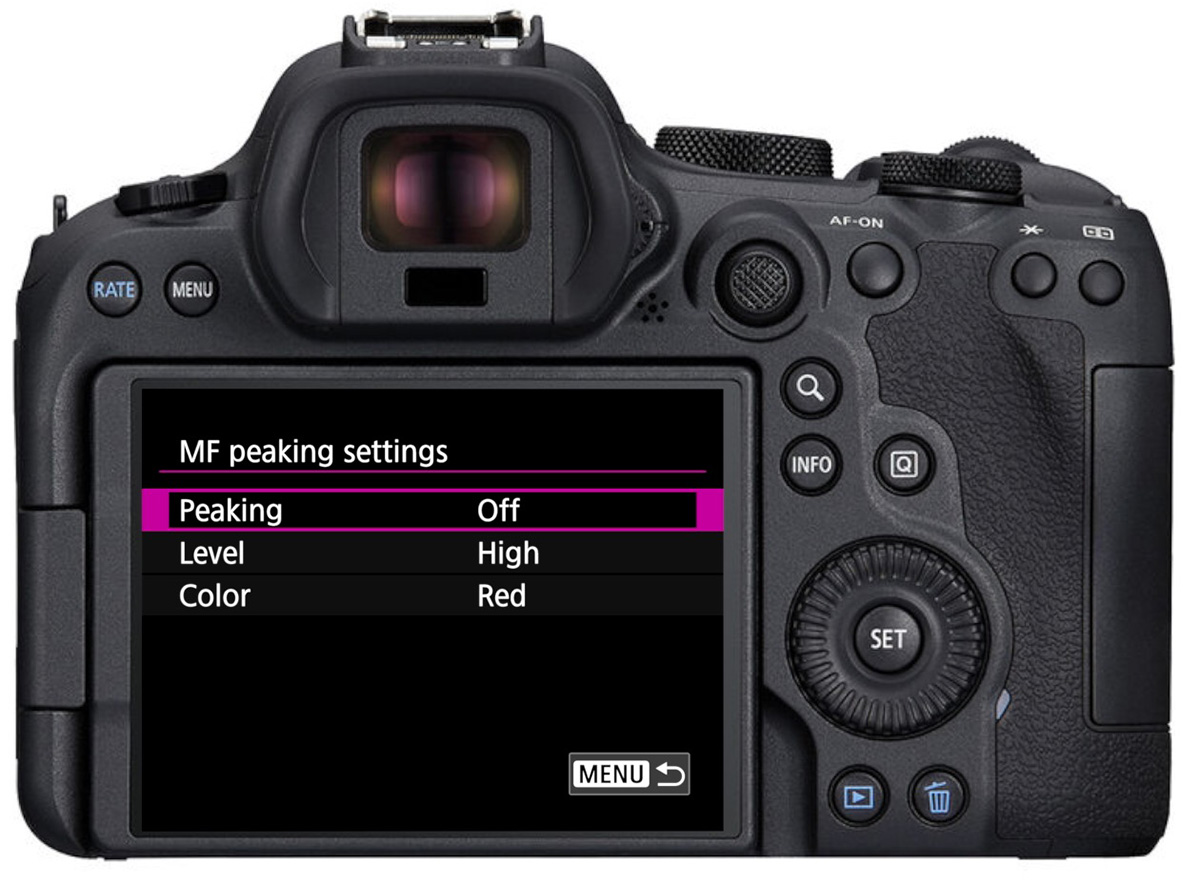
Settings to configure:
Peaking On/Off: Toggle the outlines on or off.
Level (High or Low):
- High is easier to see but less precise. It can bleed onto areas that are close to sharp but not exactly sharp, and it may obscure fine details.
- Low is more precise but subtler and harder to read at a glance.
Try both and see which suits your subject matter and lighting.
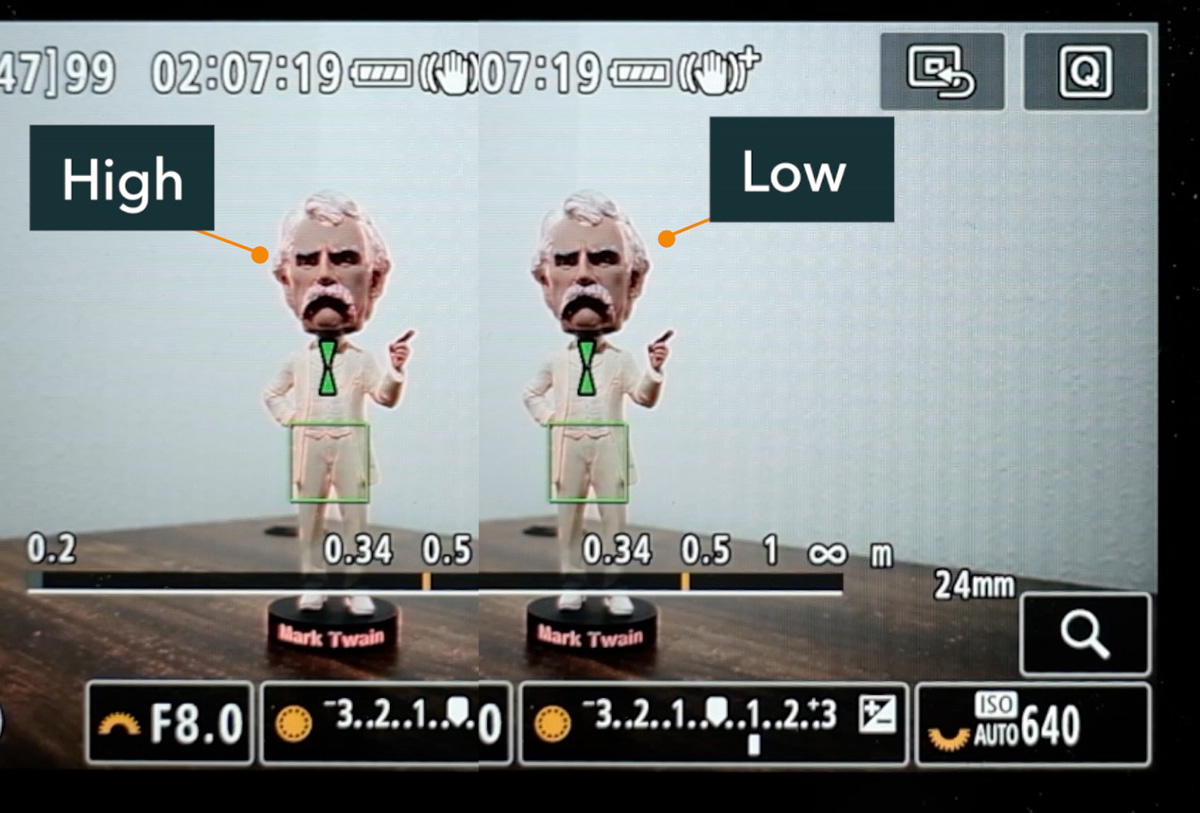
Color: Choose a color that contrasts well against your subject. If you're shooting a red subject, red peaking will disappear into it. Blue or white tends to work better in that case.
To use it, rotate the focus ring until the peaking color around your subject is as bold and bright as possible. When the outlines are at their most vivid, you're at peak sharpness.
One important limitation: peaking relies on contrast detection. If your subject lacks contrast or fine detail, like a smooth skin tone or a plain background, peaking may show little or nothing. In those cases, fall back to magnification instead.
You can assign Focus Peaking to the Quick Control menu or a custom button for faster access while shooting.
How the Three Tools Work Together
Each tool serves a distinct purpose, and they complement each other well:
- Focus Guide for directional guidance (which way to turn the ring and how far to go)
- Focus Peaking for a fast at-a-glance check that your subject is roughly in focus
- Focus Magnification for precise verification, especially with shallow depth of field
A typical workflow might be: use the Focus Guide or Peaking to get close quickly, then punch in with Magnification to confirm and fine-tune before shooting. With practice, you may find manual focus more reliable than autofocus in certain situations. And for some lenses, it's the only option anyway.
To learn more about your Canon R-series focus system, along with basic configurations and exposure tools, check out the Canon R Photography Fundamentals course. Get 20% off with the code "blog20".