Disclosure: This post may contain affiliate links. I earn a small commission of product sales to keep this website going.
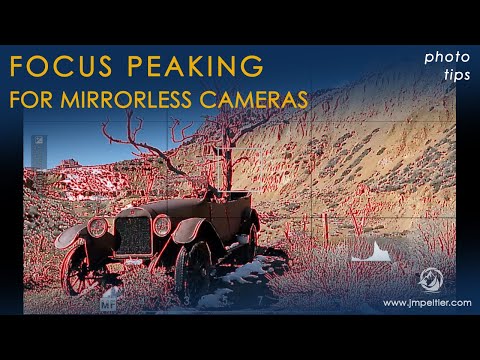
Focus peaking is a useful, popular manual focus assistant found in all of today’s mirrorless cameras. Focus peaking, also called “peaking highlights,” is an extension of a long line of focus aids going back to prisms found in older film cameras.
Focus peaking can really speed up your manual focusing and help you focus more accurately. It can also be a real nuisance. Let’s take a closer look.
How Focus Peaking Works
Focus Peaking outlines edges that are in focus for you.
The camera looks for “sharp” edges by analyzing contrast. If there’s a hard edge, which will only happen when something is in focus, there will be high contrast. When the camera sees enough contrast, it will overlay a color on top of the edge.
Let’s look at a very basic example:
This box is out of focus. The edges are blurry and run in to the background. There is no contrast between the box and the background, thus no defined edge.

As the box comes in to focus, now there’s a distinct edge between it and the background – contrast. Enough for the camera to say, “hey, there it is! Let’s highlight this.”


The stronger the contrast, the bolder the lines are going to be. You’re just going to slowly refine that manual focus ring until the lines are boldest over your subject.
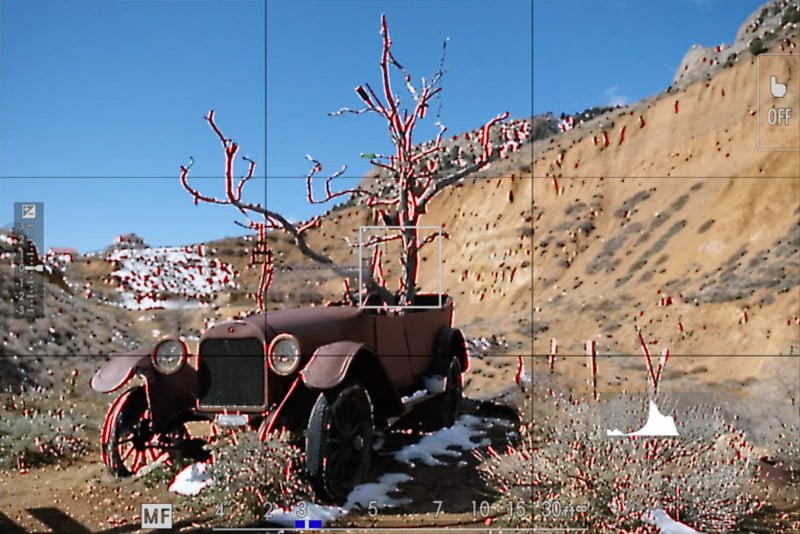

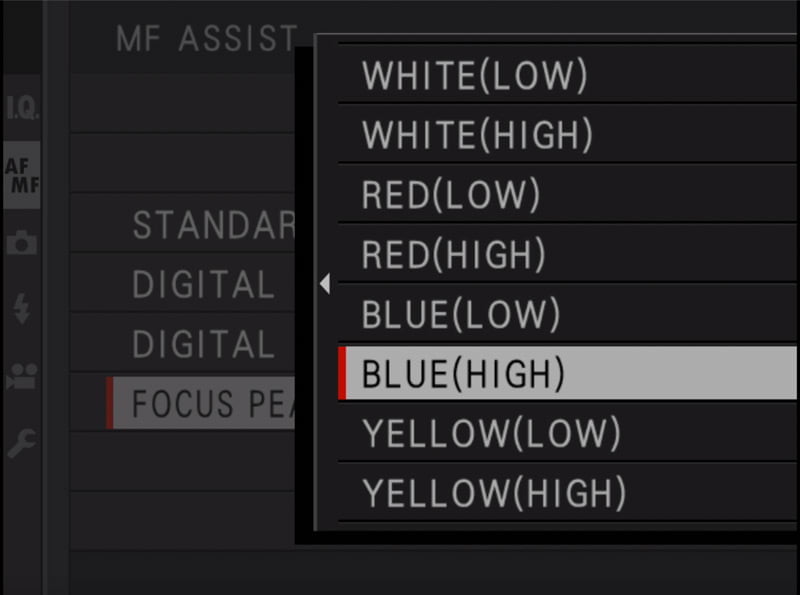
Cameras typically offer a selection of colors for you, based on what you prefer and see the best based on what you’re photographing. Colors often include red, blue, white, green, and yellow, depending on the camera.
You’ll also be able to set a peaking sensitivity, which we’ll look at soon.
And this technology will work with any lens, since the magic happens after the light has hit the sensor.
When to use Focus Peaking
This is a great manual focus assist tool but you don’t want to use it all the time.
Times where Focus Peaking helps:
- To get rapid focus at moderate to deep depths of field.
- When there’s a lot of fine details like in embroidery, flowers, tree leaves, etc.
- To quickly find Hyperfocal Distance without using a focus magnification on the horizon.
- In low light when your eyes can’t make out the edge contrast on their own, as long as there’s enough contrast for peaking to work.
When to turn it off:
- When you have an extremely shallow depth of field where you need absolute precision; the highlights can actually obscure too much.
- When it distracts from your composition.
How to Set Up Focus Peaking
To effectively use Focus Peaking you’re going to need to set it up properly. This guidance will cover generics; check your own mirrorless camera manual for specifics.
You’re going to want to consider three things:
1: How will you enable/disable Focus Peaking?
It really sucks to have to go deep into menus to turn this on and off. It’s beneficial to be able to do this with just a couple of easy button pushes.
Here are a couple of options for quickly accessing Focus Peaking:
- Program a button to quickly change Manual Focus Assist modes/Focus Peaking.
- Program it into some kind of Quick Menu, My Menu, or Function Menu.
On my Fujifilm cameras, I’ve programmed my Rear Wheel to cycle between the different Manual Focus Assist tools, which include Focus Peaking. When I used Sony cameras, I put the Peaking On/Off setting in the Function Menu.
2: Which colors should you use for Focus Peaking?
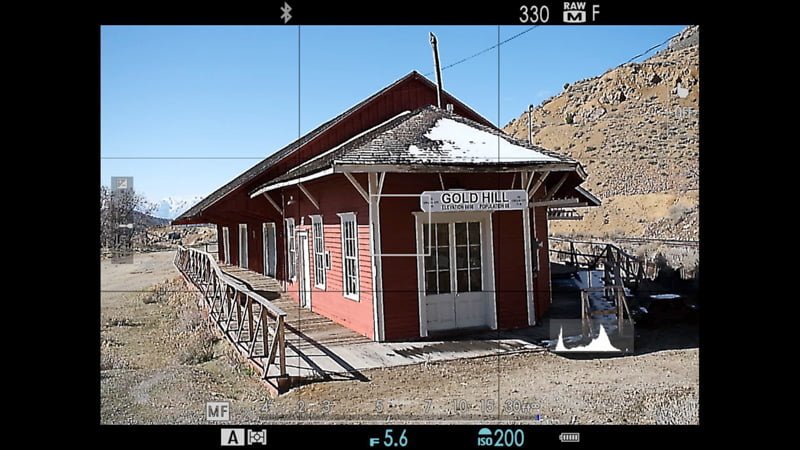
This isn’t a one-size-fits-all solution, but you’ll probably find at least one color that works for most things. You may have to change to a different color on occasion. I’ve found that Red offers the best contrast and is easiest for me to see in most situations. Sometimes I’ll switch to Blue.
But a lot of it also depends on the subject too.
In the first photo below, I have white focus peaking set. The outlined edges are very difficult to see. In the second photo, I’ve switched to red. But the building is also red, so that may not be the best option. Finally, in the third photo, I’ve switched to blue. It’s very easy to see! From a Fujifilm X-T30.
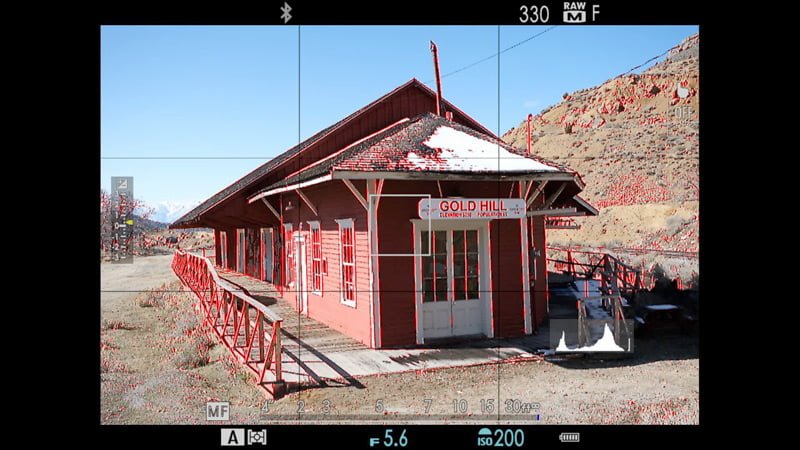
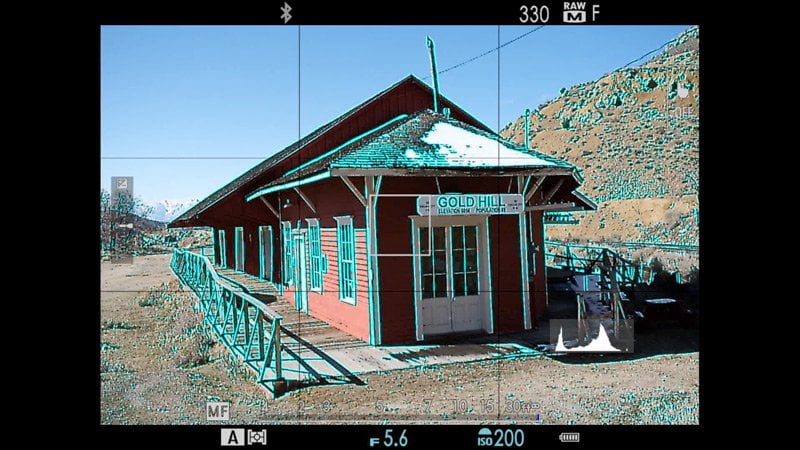
Cyan is actually opposite red on the color wheel. You can’t get much more color contrast than this! That’s something to keep in mind when choosing a focus peaking color.

3: Which Peaking Sensitivity Should You Choose?
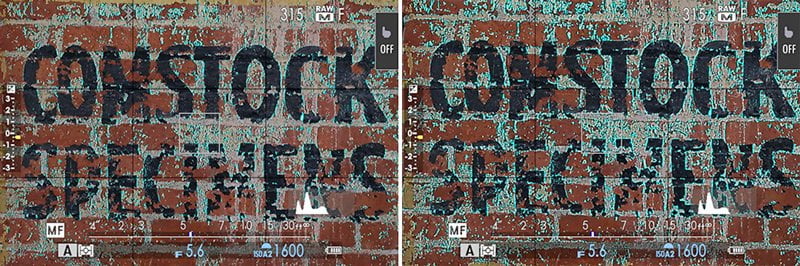
The focus peaking sensitivity, often called the Level, determines how much is highlighted.
Most cameras have two levels: High and Low.
- Low gives you absolute precision, only highlighting the absolute sharpest areas of the photo. The lines will be less obvious and more difficult to see. But they won’t obscure as much.
- High means that the camera is going to highlight more. The lines will be bolder, and it will show more “in-focus” areas than low.
In the photo below, the photo on the left is using Low while the photo on the right is using High (from a Fujifilm X-T30):
Go out and practice!
Focus peaking does take some practice to become proficient at it; it’s not just a magic tool that will immediately improve your manual focus abilities.
- Experiment with different colors over different subjects, and do the same with the sensitivity levels.
- When does it help you and when does it distract you?
- Practice quickly enabling and disabling it.
- And finally, practice refining your manual focus technique to get the boldest lines possible over your subject.
Watch the video: