Disclosure: This post may contain affiliate links. I earn a small commission of product sales to keep this website going.
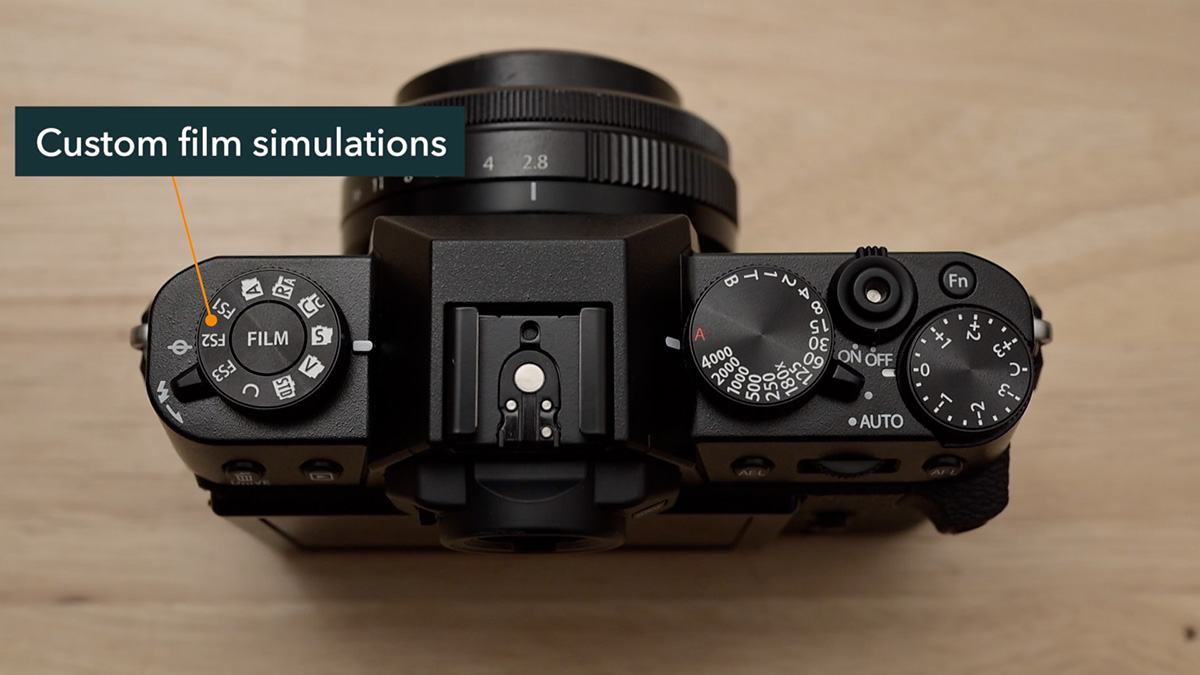
The X-T30 III has a dedicated film simulation dial on the top left of the camera. This physical control lets you quickly switch film simulations without digging into any menus. But it comes with some quirks that can catch you off guard if you don’t know about them. Here’s a full orientation of the dial, how to program it, and what to watch for while shooting.

What’s on the Dial
The dial has six preset film simulation positions: Acros, Reala Ace, Classic Chrome, Astia, Velvia, and Provia. It also has three programmable positions: FS1, FS2, and FS3. There’s also a C position, which we’ll come back to shortly since it’s one of the most important things to understand about this dial.
For the fixed positions, just click the dial to whichever simulation you want, and you’re shooting with it – no menus required.
The Acros position specifically loads Acros without any color filter. If you want Acros with a yellow, red, or green filter applied, go into Menu > Image Quality Settings > Film Simulation Dial Setting > Acros. Select your preferred filter, and from then on, that Acros dial position will use Acros with your chosen filter.
Programming FS1, FS2, and FS3
These three positions are where the dial gets really interesting. Each can be programmed to any film simulation, including those not on the dial, such as Nostalgic Neg. You can also customize them further with a full “film recipe.”
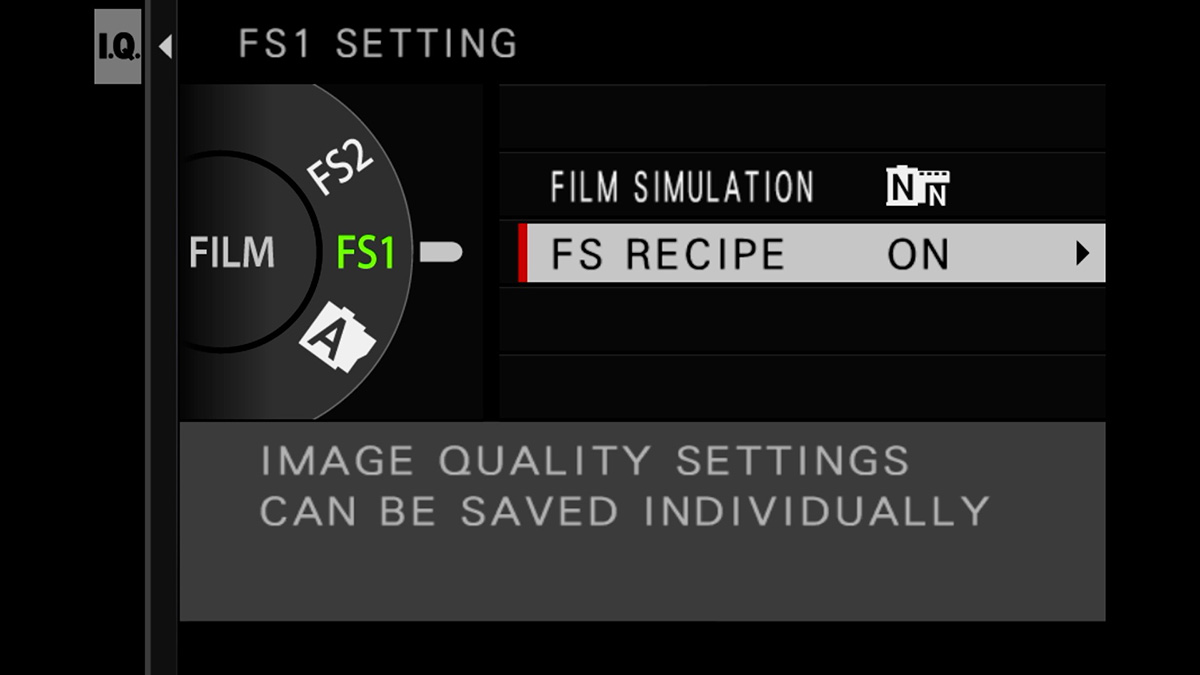
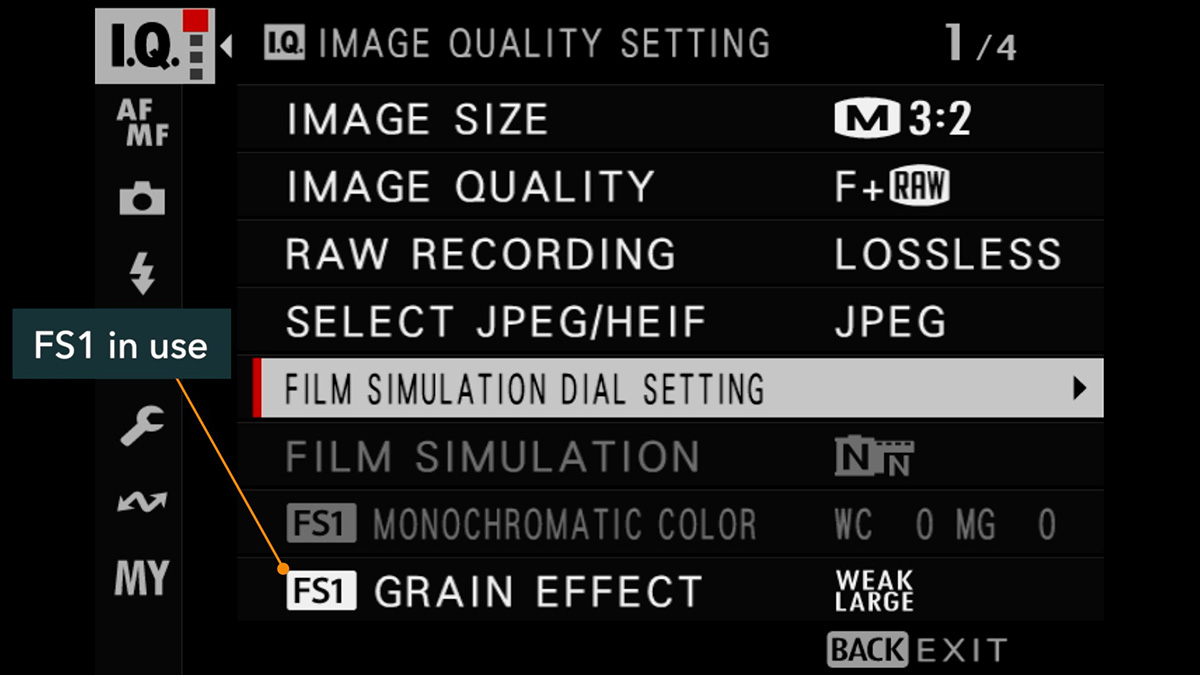
Go to Menu > Image Quality Settings > Film Simulation Dial Setting, then select FS1, FS2, or FS3.
To assign a film simulation: Select a film simulation from the list. Any simulation available on the camera can be assigned here, so if Nostalgic Neg is one of your favorites, assign it to one of these slots, and it’ll be ready whenever you click to that position.
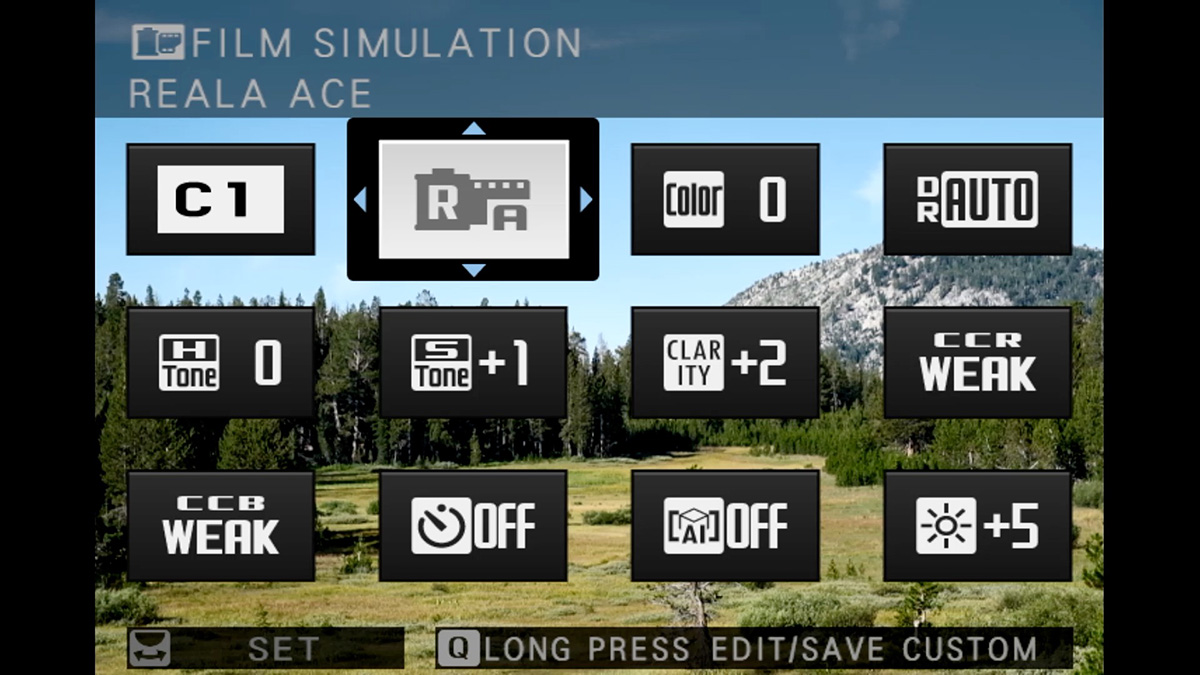
To build a film recipe on top of it: After selecting the base film simulation, select FS Recipe > On, then push the joystick right to access the customization options. From here, you can adjust film grain, Color Chrome settings, highlight and shadow tone, white balance, dynamic range, and more. If you’re looking for a starting point, Ritchie at Fuji X Weekly has an extensive library of recipes worth exploring. Or, you can have fun experimenting with and building your own.
You can save a different setup to each of the three positions, giving you three custom recipes instantly accessible on the dial.
FS1-3 vs. C1-C7: What’s the Difference?
The FS positions save image styling only. Those are the film simulations plus any recipe adjustments. The C1-C7 custom settings also save image styling, but on top of that, they store focus and shooting settings. Think of C1-C7 as full camera presets, while FS1-3 are pure film recipe slots.
Between the two systems, you can have up to 10 different film recipes saved on the camera at once. Three in FS1-FS3 and seven in C1-C7.
The Most Important Thing to Know: The Dial Overrides Everything
This is the biggest gotcha with the film simulation dial: whatever position the dial is in, that film simulation is what the camera uses, regardless of what’s set in any menu, the Q menu, or your C1-C7 custom settings.
For example, if your C1 preset has Astia saved as the film simulation but your dial is sitting on Reala Ace, the camera will use Reala Ace. The custom setting is effectively ignored for film simulation when the dial isn’t on C.
The C position is how you give control back to the menus. When the dial is set to C:
- The Film Simulation option in the Image Quality menu becomes accessible again (it’s grayed-out otherwise)
- Your C1-C7 custom settings use their saved film simulations as intended
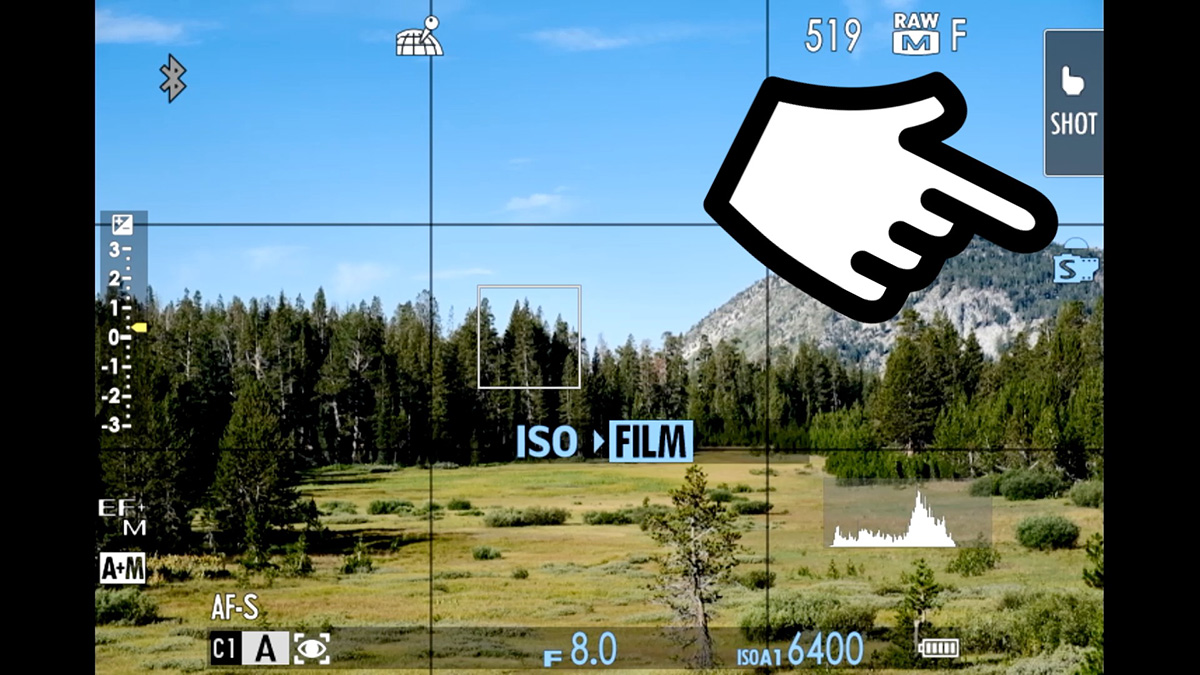
- You can use a command dial to change film simulation on the fly (press and release the front command dial until FILM is highlighted, then rotate)
- Film simulation in the Q menu becomes available to change
A Few More Things to Know
Editing FS recipes on the fly: When you’re using an FS1-FS3 position and go into the Image Quality menu, you’ll see the adjustable settings for that recipe. Changing anything here saves it to that recipe permanently. This is useful for fine-tuning your recipe, but be aware that if you only want a temporary change, you’ll need to change it back manually afterward.
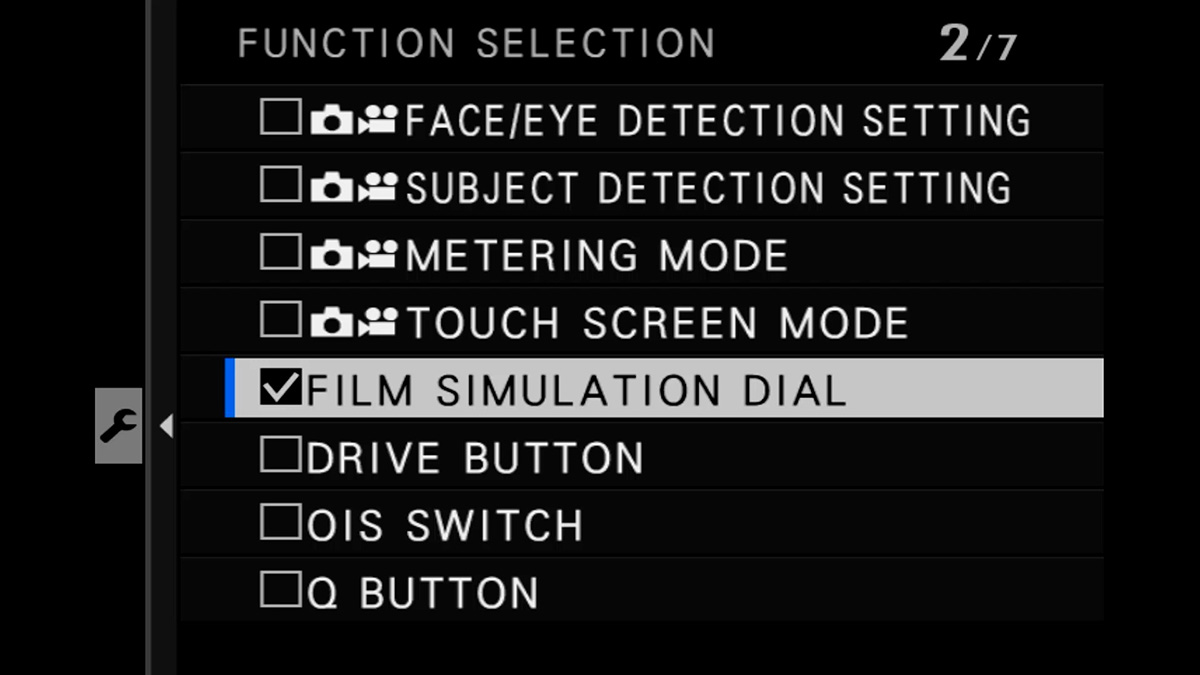
Want to disable the dial entirely? Set it to C, then use the camera’s Lock feature to lock it in place. That effectively lets you manage film simulations through menus and custom settings as you would on cameras without this dial.
Quick Reference
| Dial Position | What It Does |
|---|---|
| Acros, Reala Ace, Classic Chrome, etc. | Loads that fixed film simulation, overrides all menu settings |
| Acros | Loads Acros with filter set in Film Simulation Dial Setting menu |
| FS1 / FS2 / FS3 | Loads your custom-programmed film simulation or recipe |
| C | Returns film simulation control to menus and C1-C7 custom settings |
This is just one of the many things to know about the Fujifilm X-T30 III. For a full menu walkthrough, along with how to use the focus and exposure systems and customize your camera further, check out the X-T30 III Tutorial Course. Save 20% with the coupon “blog20”.