Disclosure: This post may contain affiliate links. I earn a small commission of product sales to keep this website going.
Fujifilm cameras can feel overwhelming. Displays are packed with information, there are dozens of controls, and menus seem to go on forever. If all of that is getting in the way of the photographs you want to make, here’s how to strip your Fujifilm camera down to the essentials so you can focus on what actually matters (no pun intended).

Simplify the Displays
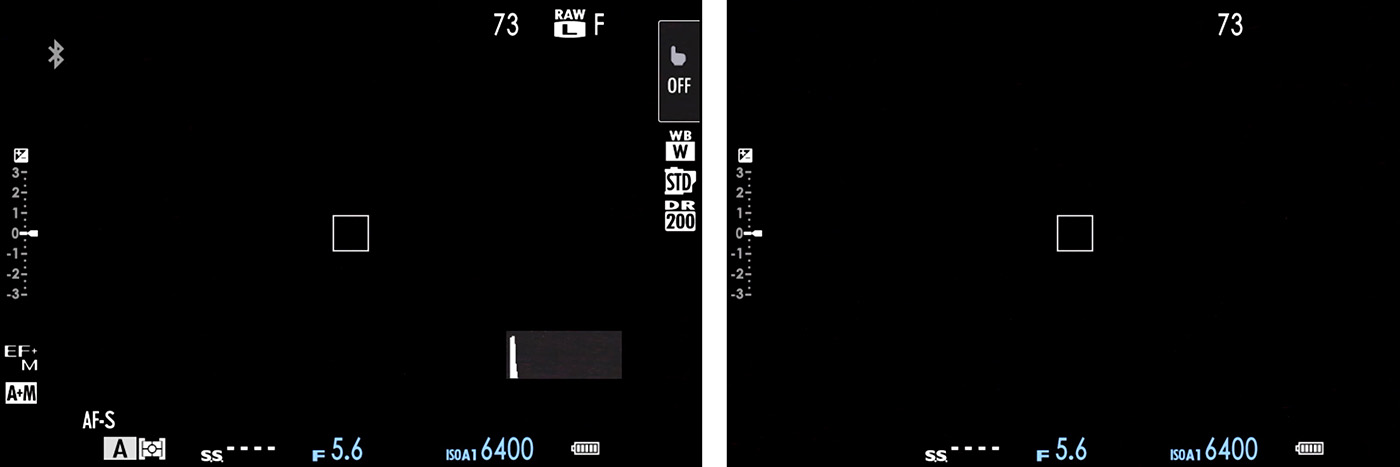
The shooting screen on most Fujifilm cameras shows far more information than you actually need. Here’s how to strip it down to something similar to the X-E5 Classic Display.
If you use the Large Indicators Display, go to Screen Settings > Large Indicators Disp. Setting. Keep your shutter speed, aperture, ISO, and exposure scale or digit. For the remaining 8 slots (L1-L4 and R1-R4), select each one and choose None from the bottom of the options list. The result is a clean screen showing only your exposure variables.
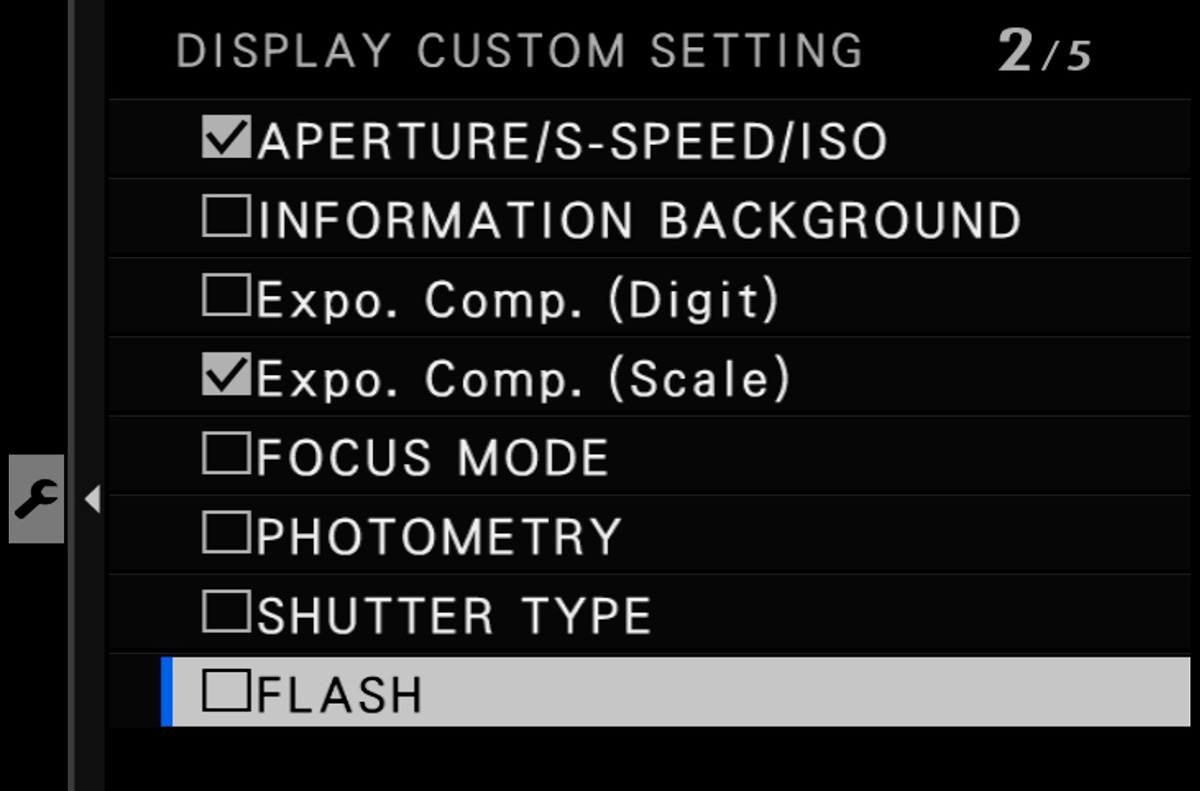
If you prefer the standard display, go to Screen Settings > Disp. Custom Setting and uncheck everything you don’t need. At a minimum, keep your Focus Frame, Aperture, Shutter Speed, ISO, Exposure Scale, Frames Remaining, and Battery Level. That’s roughly what an analog camera would show you. Everything else can go.
Use Only the Viewfinder
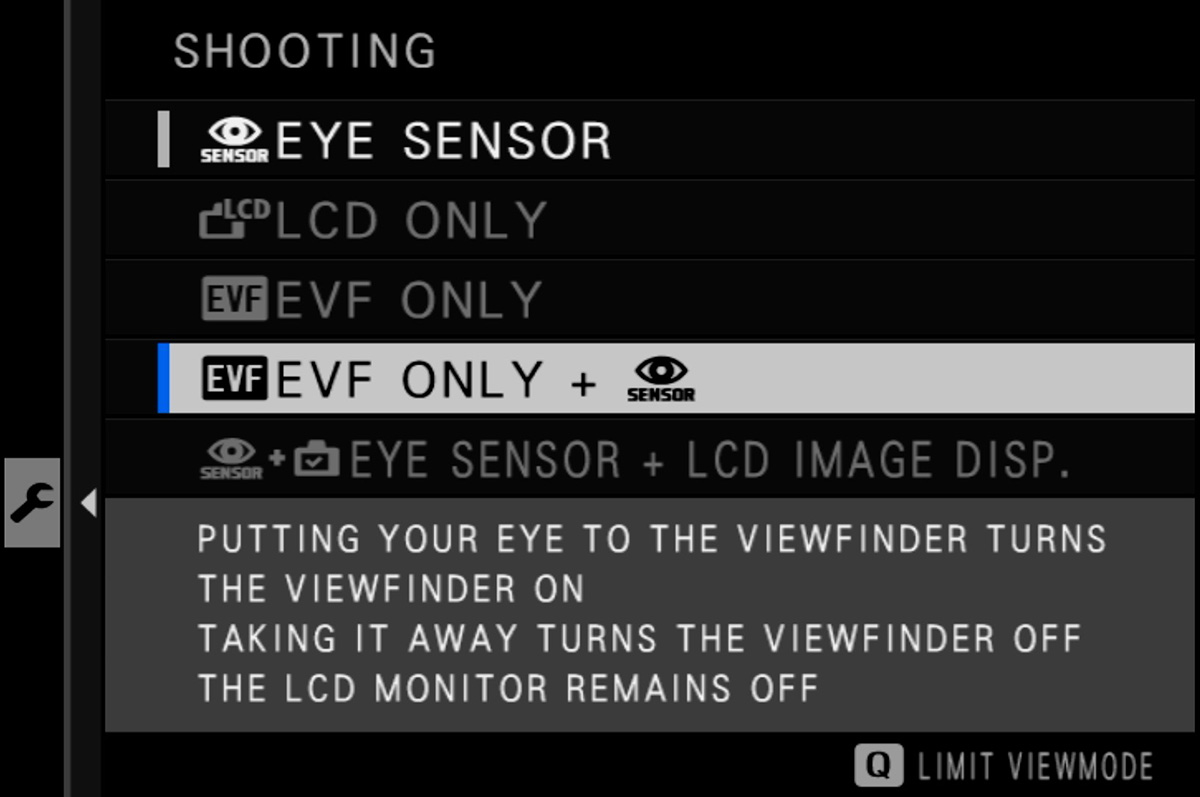
Once your display is simplified, go a step further and eliminate the rear LCD entirely while shooting. Go to Screen Settings > View Mode (some cameras have a switch on the viewfinder housing instead) and set it to EVF Only + Eye Sensor. All displays stay off until you raise the camera to your eye, then the viewfinder comes on, you shoot, and everything turns off again when you lower it.
If your camera has a flip-out LCD, tuck it face-in against the body. It protects the screen and removes the temptation to chimp.
Clean Up the Physical Controls
Many Fujifilm cameras have dedicated dials for aperture, shutter speed, ISO, and exposure compensation, which is one of the main reasons photographers love them. If yours does, lean into those and get the command dials out of the way.
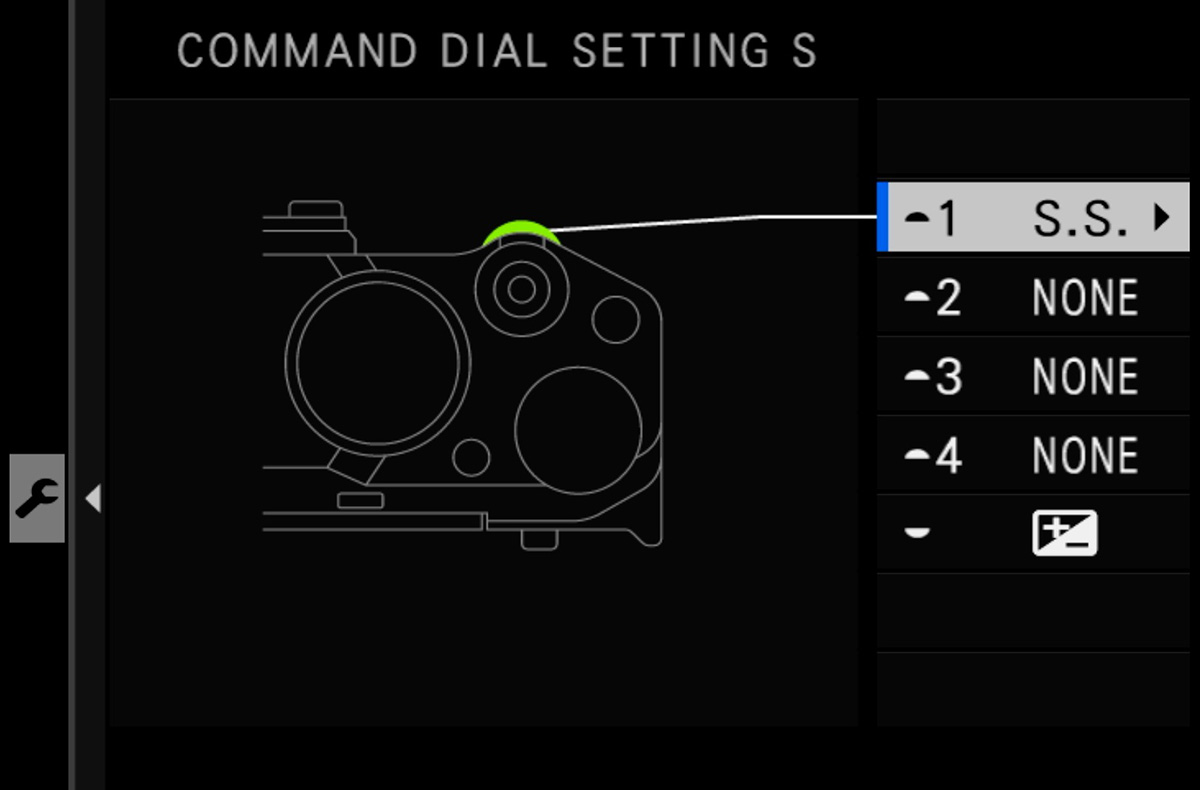
Go to Button/Dial Setting > Command Dial Setting and set the front and rear command dial functions to None (or as close to None as your camera allows). With dedicated physical controls handling all four exposure variables, the command dials become unnecessary and a potential source of accidental changes.
If your camera is missing one of those dedicated dials – no ISO dial, for example, or a mode dial instead of a shutter speed dial – you’ll need to keep that function on a command dial. Just be deliberate about which one.
A note on ISO: Avoid using a command dial for ISO if you can. It’s too easy to accidentally shift and too easy to lose track of. A better approach is covered in the menu section below.
Tame the Touchscreen
Accidental touchscreen activation is one of the most common frustrations for Fujifilm photographers. Turn it off in two places:
- AF/MF Setting Menu > Touch Screen Mode: The combination of turning this off here and unchecking Touch Screen Mode in the Disp. Custom Setting menu will eliminate any chance of autofocus or shooting being accidentally activated by the touchscreen.
- Button/Dial Setting > Touch Screen Setting: Turn off the remaining touch functions (swipe gestures, etc.) if you don’t use them.
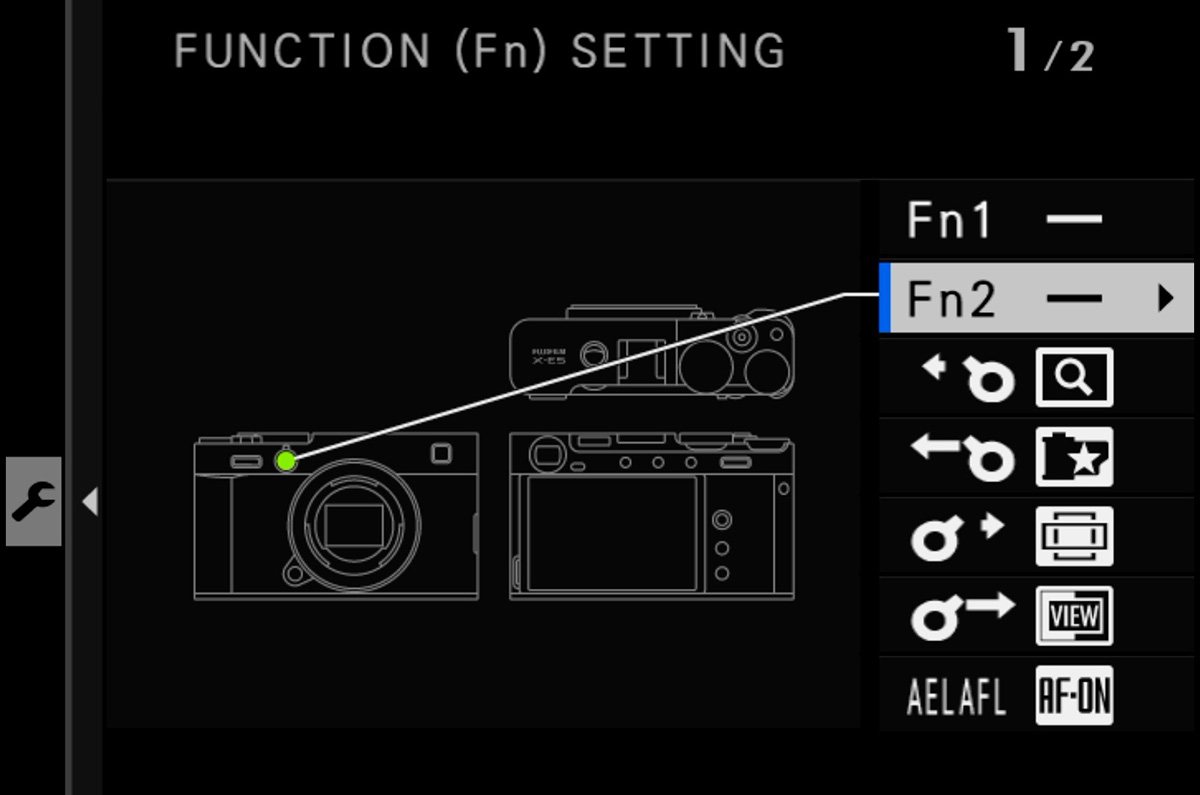
Disable Buttons You Don’t Need
In Button/Dial Setting > Function (Fn) Setting, go through any buttons & controls you don’t actively use and set them to None. The Q button in particular is notorious for being accidentally activated. If you want to keep access to the Q menu, reassign it to a more protected function button, like the top plate Fn button.
Keep what you actually use, like AF-ON. But anything you’re not deliberately pressing can become a liability.
Simplify Focusing
For a truly analog feel, manual focus is the logical choice. Try the Digital Microprism or Digital Split Image MF Assist. Both are intuitive throwbacks to film-era focusing screens.
If you’d rather keep autofocus, Single Point AF Mode gives you precise control without the unpredictability of Wide or subject tracking modes.
Consolidate Your Menus
Wading through multiple menu pages to find a single setting can kill your shooting flow. Two tools help here:
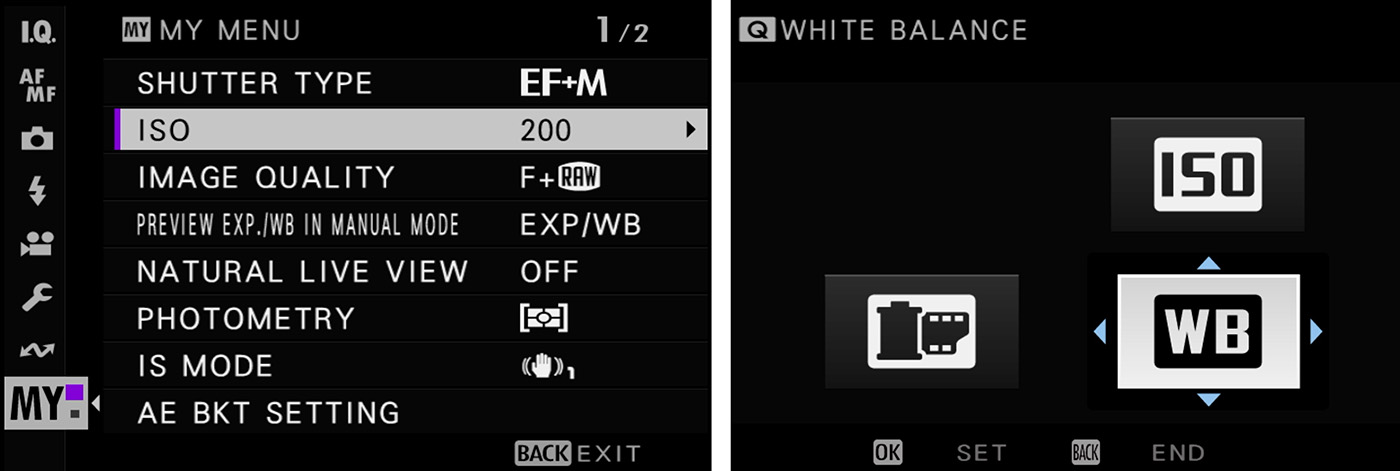
My Menu: Set up a custom menu with only the settings you regularly change. One or two pages, nothing more. This alone makes the camera feel dramatically less cluttered. Learn how to program My Menu.
The Q Menu: Reassign the Q button to a less accident-prone function button, reduce the Q menu slots from 16 down to 4 or 8, and populate it with the handful of things you actually adjust in the field. Good candidates: ISO, film simulation, and white balance. ISO in particular belongs here rather than on a command dial. It’s still quick to change without the chance of accidental changes to ISO 12800 (which happens with the command dial).
The Payoff
Once the unnecessary controls and information are out of the way, your camera becomes a much easier photographic tool. With fewer decisions competing for your attention, you can put more of your focus where it belongs, like your composition, use of light, and the moment in front of you.
Have any other ideas? Please leave them below.