Using ACROS Film Simulation Color Filters in Fujifilm X & GFX
Disclosure: This post may contain affiliate links. I earn a small commission of product sales to keep this website going.
Fujifilm X & GFX cameras started including the ACROS film simulation in their digital film simulations in 2016, offering photographers a completely new black & white digital experience. The ACROS film simulation, based on their popular black & white film stock, comes in four flavors that might confuse people. What are those color filters?
Learn more about Fujifilm film simulations in a free online course - click here.
Color filters with black & white photography
Why use color filters for black & white photography? There's no color in the final image, so why does it matter?
It actually matters a lot.
Those colors still do pass through your lens before reaching the film or sensor. The overall brightness of those colors is recorded by the film, or sensor, as different shades of gray.
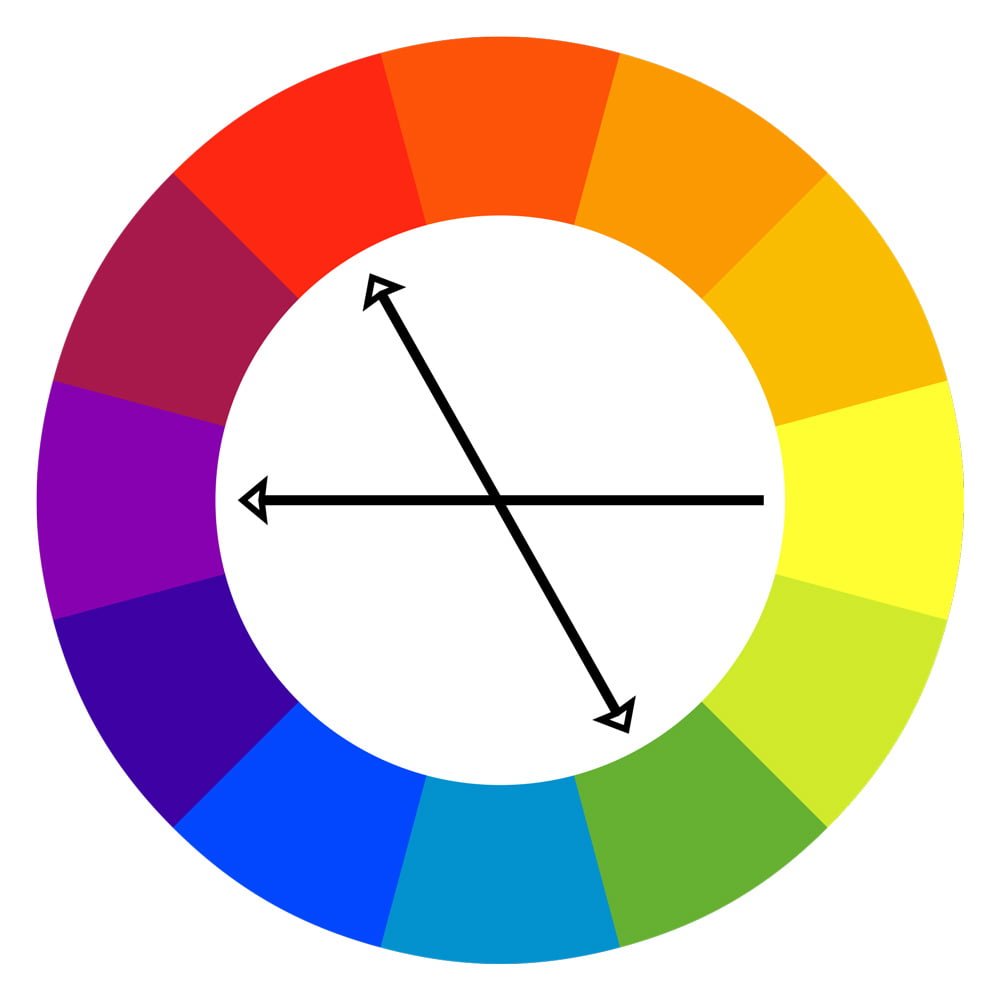
Say you're making a black & white photo of a scene with a deep green and a rich red. The colors are opposite each other on the color wheel, but they have the same "brightness." The resulting photo would be one similar gray tone, with hardly any tonal contrast at all, despite the high color contrast.

Reclaim that contrast by adding a color filter! That's what color filters for black & white photography are all about. Separating colors and adding contrast.

How color filters work
A color filter will "pass" its respective color and block opposite colors to varying degrees.
For our red-green example, the red filter passes the red color, making it appear relatively brighter. It blocks the greens, opposite of red, making those appear darker.
Not all colors are created equally, so you'll have different intensities out of different color filters. But the concept is the same and is what's important to understand about how color filters work.
Film vs Digital filters
Traditional color filters were colored pieces of glass that you'd screw on to the front of your lens, affecting how the film recorded overall luminance of each color wavelength.
These kinds of filters don't really mesh well with the microscopic color filters that are already on top of your digital sensor to separate red, green, and blue.
Instead, many digital photographers recreate these filters in post-processing using digital equivalents. They capture the RAW file and then adjust the "grayscale tone" of each color that appears in the color version of the photo.
But why waste time on the computer doing this when Fujifilm gives us three popular filter options in the camera?
ACROS film simulation filters
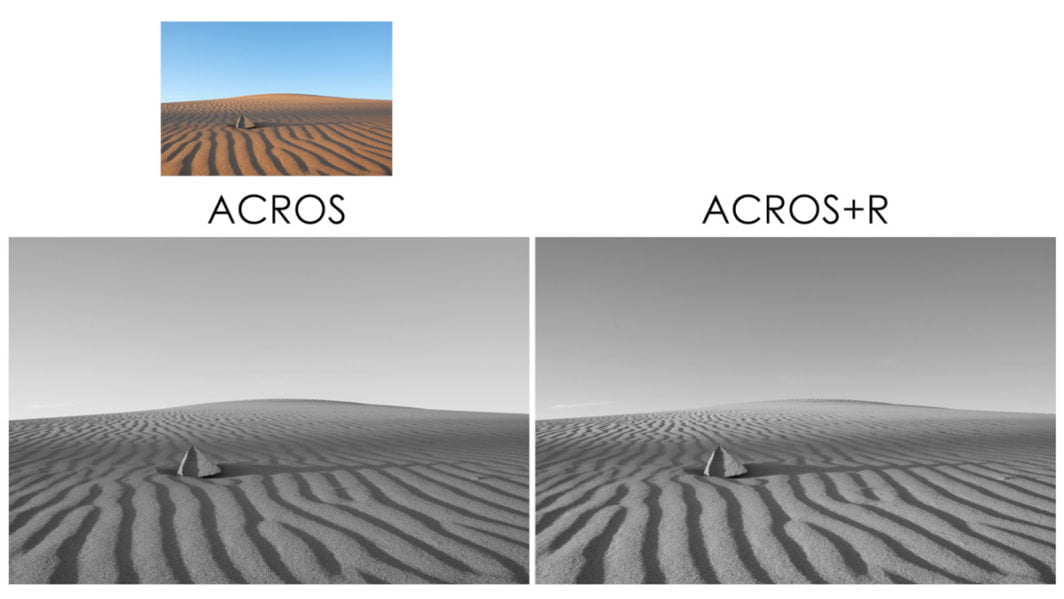
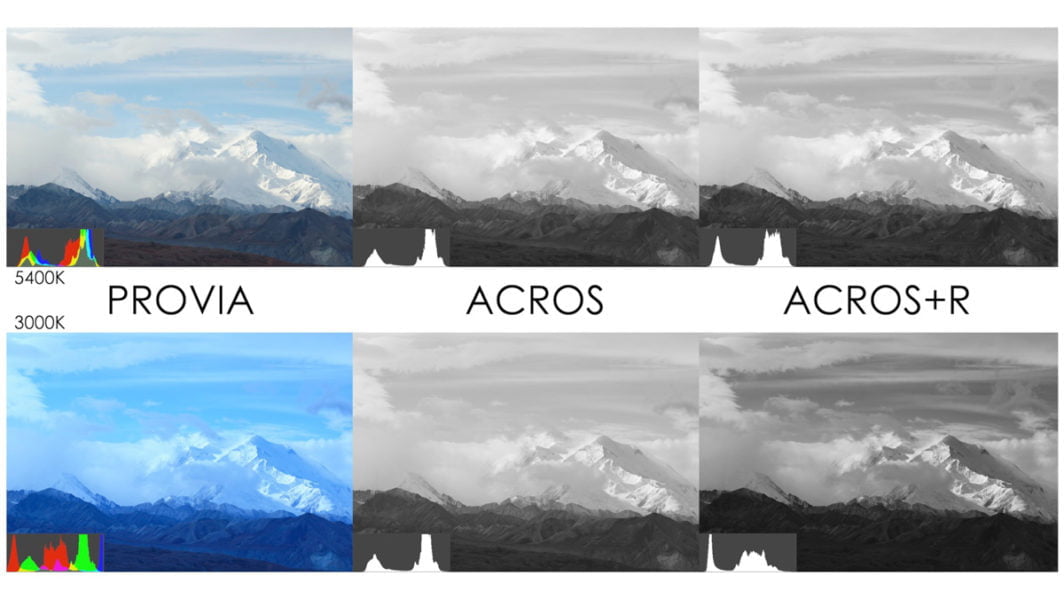
All of the images you'll see below are RAW conversions of the ACROS simulations with no other tonal processing applied.
The ACROS film simulation has four options - ACROS STD (no color filter), ACROS+Yellow, ACROS+Red, and ACROS+Green.
These filters will never be absolutely faithful renditions of what a glass color filter will do to black & white film, but they're pretty darn close and a great alternative to post-processing.
When do you use each filter? As mentioned above, use these filters to separate colors, adding contrast and depth to your black & white photos when regular ACROS won't do it.
Here's a chart of what the four different ACROS film simulation options do to different colors, taken from my free Fujifilm film simulation online class.

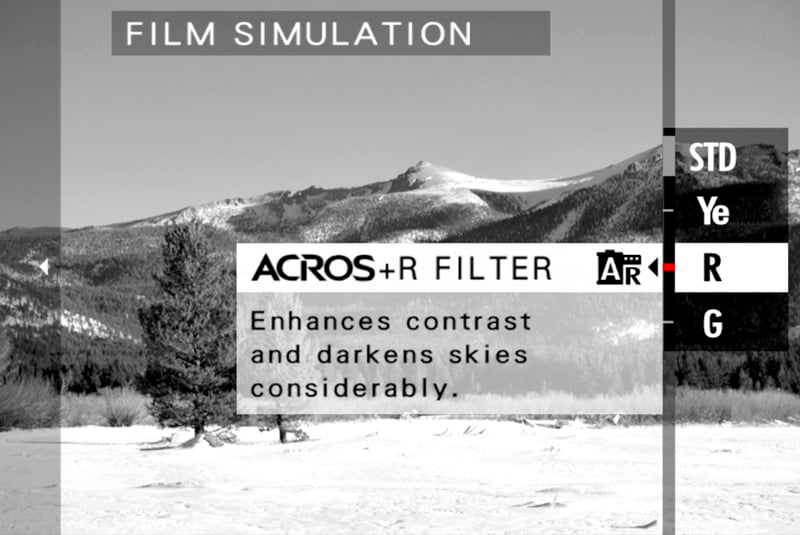
ACROS+Red Filter
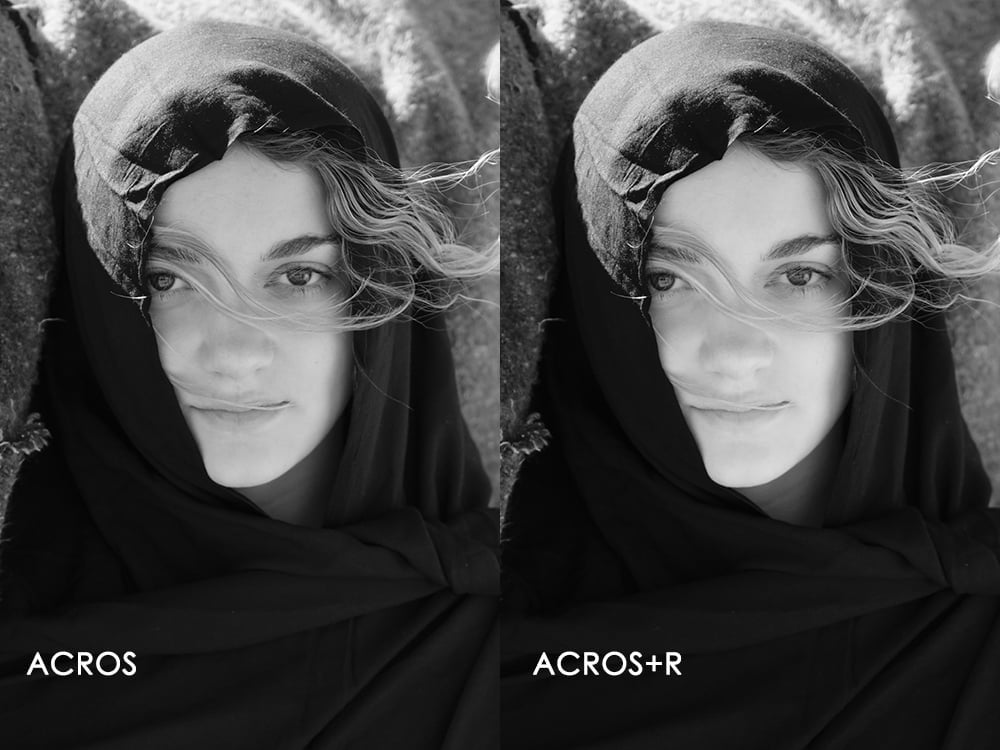
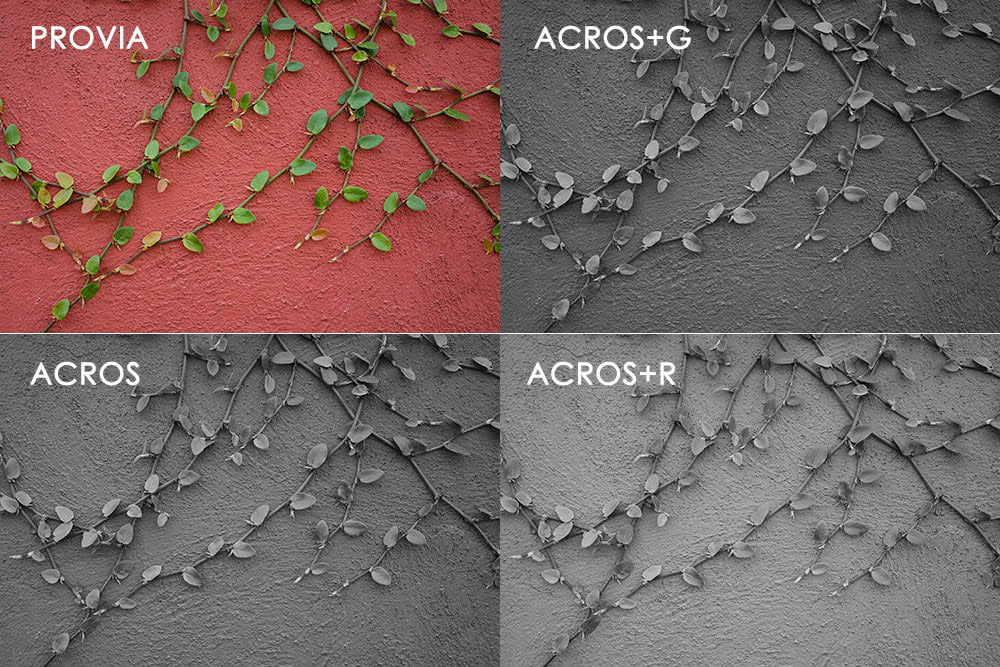
The red filter is especially popular for landscape & nature photography. This filter will separate the greens and reds found in flowers & foliage, brightening red flowers and darkening leaves. It will also darken blue skies, creating contrast with clouds.
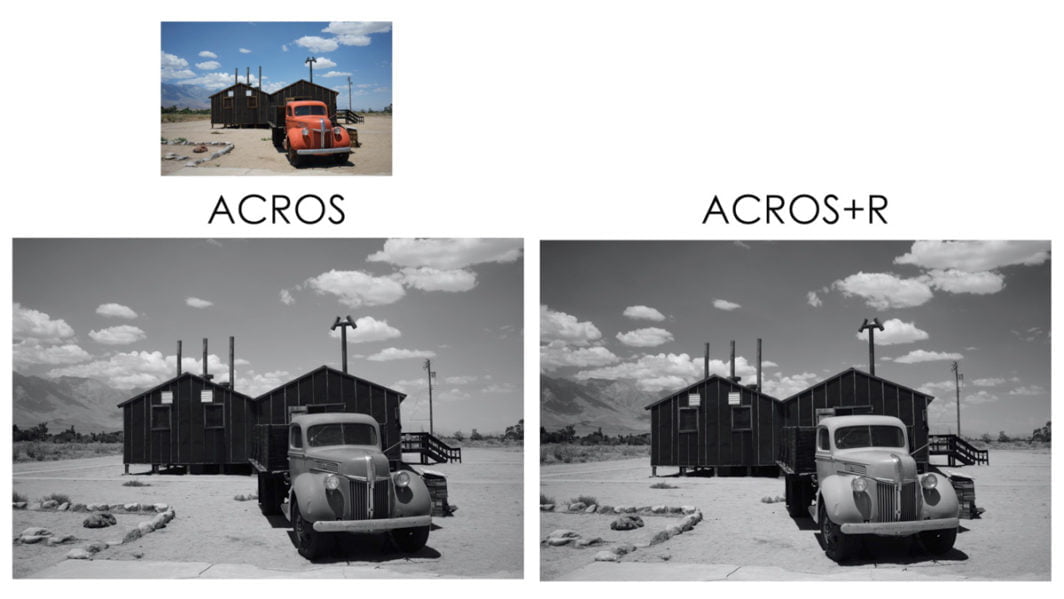
A red filter can also add contrast in urban photography, a popular genre used with the ACROS film simulation.

Just be careful with portraits - the red filter can lighten lips, especially those with red lipstick, for an unnatural look.
ACROS+Green Filter
The green filter with ACROS doesn't have as much utility as the red filter, but it can make a world of difference in certain situations.
It will do the opposite of the red filter - instead of making reds brighter than greens, this makes the greens brighter than reds. This is the same relationship as regular ACROS - just accentuated with ACROS+G.
Green filters were traditionally used to lighten foliage. But you'll barely notice a difference in this with the ACROS green filter. It may even make your foliage darker if it has a yellow color cast.
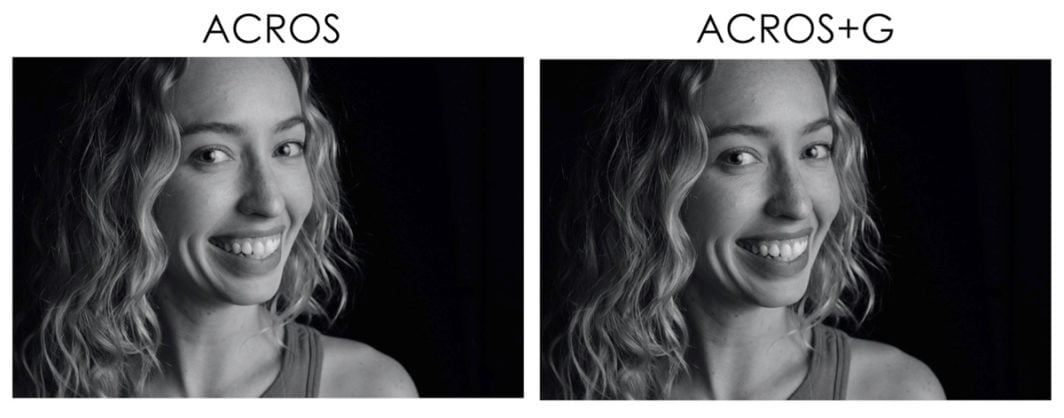
The green filter is also sometimes used in portrait photography for creating rich texture in faces and providing contrast in facial features, a little more than ACROS by itself can do. It also helps cut reflections from lighting on the skin. Be careful though because the green filter can actually accentuate blemishes in blotchy skin.
ACROS+Yellow Filter
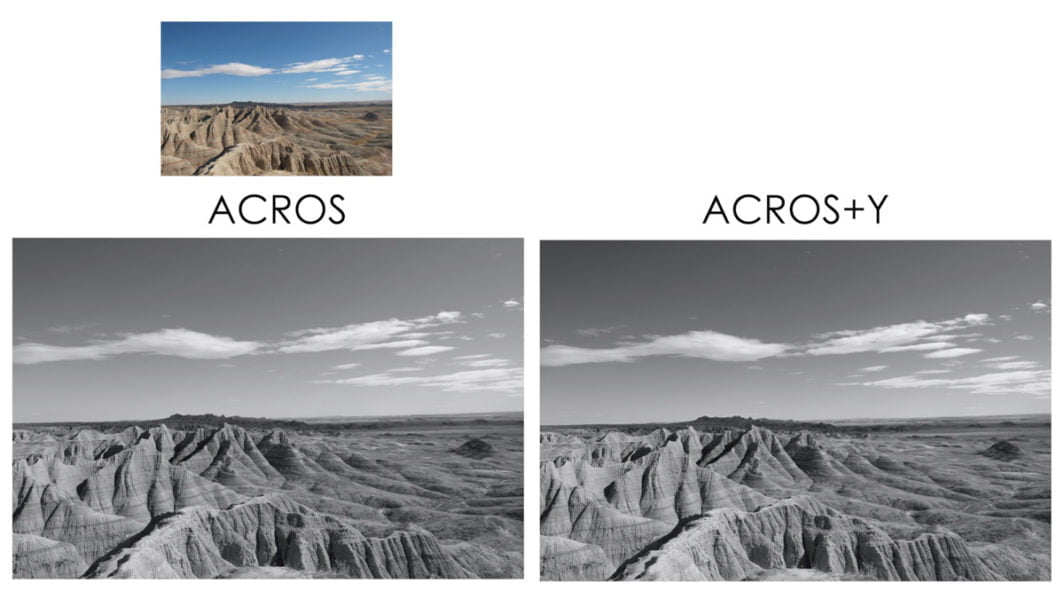
The yellow filter for the ACROS film simulation is kind of the "jack of all trades" or "I don't know which filter to use" filter.
You can see in the chart above that it will add contrast between the different colors, more than ACROS, but nowhere near the extent of the red filter, which can sometimes be too much. Think of it as a subdued red filter.
Many photographers will just use the yellow filter all the time to increase the contrast of their black & white photos, only going to red or green in exceptional situations.
What about white balance with ACROS?
Yes, your white balance will affect how the ACROS filters render your photos.
Leaving your white balance in AUTO is usually "good enough" when using ACROS, but you can really get creative by introducing manual Kelvin temperatures and white balance shifts.
How is ACROS different than Monochrome?
Monochrome is simply the PROVIA film simulation but stripped of all color. A straight black & white conversion of a color photo.
The ACROS film simulation was designed by the Fujifilm engineers to specifically emulate their black & white film. It has completely different characteristics than PROVIA in the way it handles tones & texture, especially in the shadows.
It's all about experimentation
Nothing beats going out to practice to really see what the different ACROS film simulation filters will do to your photos.
I hope that now you have an understanding of why and when to use each filter.
You can also try film simulation bracketing if you're unsure. This will create three different photos using three different filters with one press of the shutter.
For more ACROS color filter comparisons, a PDF download, film simulation quiz, and in-depth videos, check out my free Fujifilm Film Simulation Course. Yeah, it's free, and not even spammy like other free stuff! I designed this course to complement my main film simulation comparison post.
Hi John. I'm a new user to both the Fuji ecosystem, I've just bought a barely used version of the excellent Fuji X-T1, and your website / blog. Both I have to say are truly excellent. I bought the X-T1 primarily because I wanted something old school and the X-T1 ticks a lot of boxes. The X-Trans II sensor appears well liked and by buying a relatively inexpensive camera system now it keeps my options open in the future as there is a lot going on in the camera world. Anyway, I couldn't pass up the opportunity to say well done on the blog. I'll be reading everything with time. Take care, David
Thanks David, I appreciate the feedback!
The X-T1, despite its age, is still a wonderful camera to get your feet wet. I hope you do great things with it. Cheers.
Friday, September 04, 2020, 7:30 p.m. Came across your web site in a Google search I did for fuji simulations. I have been a user of Fuji X's since the X100 but only recently purchased a new X-T3 that provided me with the Acros sim. I want to thank for providing this excellent blog and I will be looking at your other blogs and doing the online course. I always like the explanations behind something as opposed to someone posting two images of two fuji sims and that's it. You done a wonderful job here John.
Thanks Don, appreciate the feedback! I guess from my education background I’ve never been satisfied with just giving answers...gotta know the WHY too!
I have been using X100F for 2 years and love classic chrome & acros simulation but never really understood the filters. I was intrigue on classic negative and found your site, more earring and found your acros filters simulation, one of the best explanation with clear examples. Thank you!
Thanks for the feedback Frank, I'm glad you found it helpful!
This is an amazing website with lot of useful information! I have the fujifilm X-T30 and am mostly interested in street photography in BnW. I love the ACROS and am using it with the green filter. What is your opinion? What do you suggest about camera settings for shooting BnW street? Many thanks!
Well that's like asking what the best camera is 🙂
I'd recommend a minimum shutter speed of 1/250 to ensure you get sharp subjects, but then again if you want to show movement you'd need to slow it down to 1/15 or so. Auto White Balance if using ACROS. Increase your shadow tone setting for dramatic shadows, and decrease your highlight tone setting to preserve highlight details. But that's only if you like that style of contrast.
I could keep going, but as you can see, there's so many different possibilities, and it all depends on your vision.
Best I can suggest is to go out and experiment with different settings and see which look you like the best. Just start basic with the ACROS color filter, and adjust your highlight & shadow tones to different combinations. Then go from there.
Excellent article, thankyou. I’m enjoying my XT3 so much and learning a little more about it, mostly from you and Dan Bailey, every day. Keep up the good work, and stay safe!
Thanks Peter, appreciate it! Keep shooting!
Great site and information! Plenty to learn, thanks for sharing!
Thanks for the feedback Brian, plenty more to come too!