Disclosure: This post may contain affiliate links. I earn a small commission of product sales to keep this website going.
What is Film Simulation Bracketing?
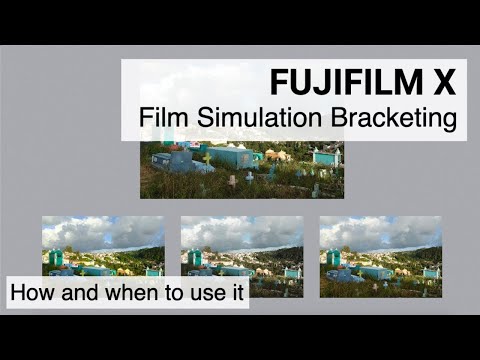
Film simulation bracketing is a way to apply three different “looks” to one photo in-camera.
One of the main reasons why so many photographers love Fujifilm is for their film simulations.
The camera applies a preset to your photo that emulates a variety of classic film stocks. You can read about Fuji’s in-camera film simulations here or learn more in a free course. It greatly reduces the need for many photographers to spend time processing their photos.
These cameras will normally apply just one simulation to each photo when you press the shutter – the simulation you select in the camera settings.
But with film simulation bracketing, you can tell the camera to apply three film simulations to one photo.
Think of it as processing one negative in three different ways in the darkroom. Except this takes a fraction of a second!
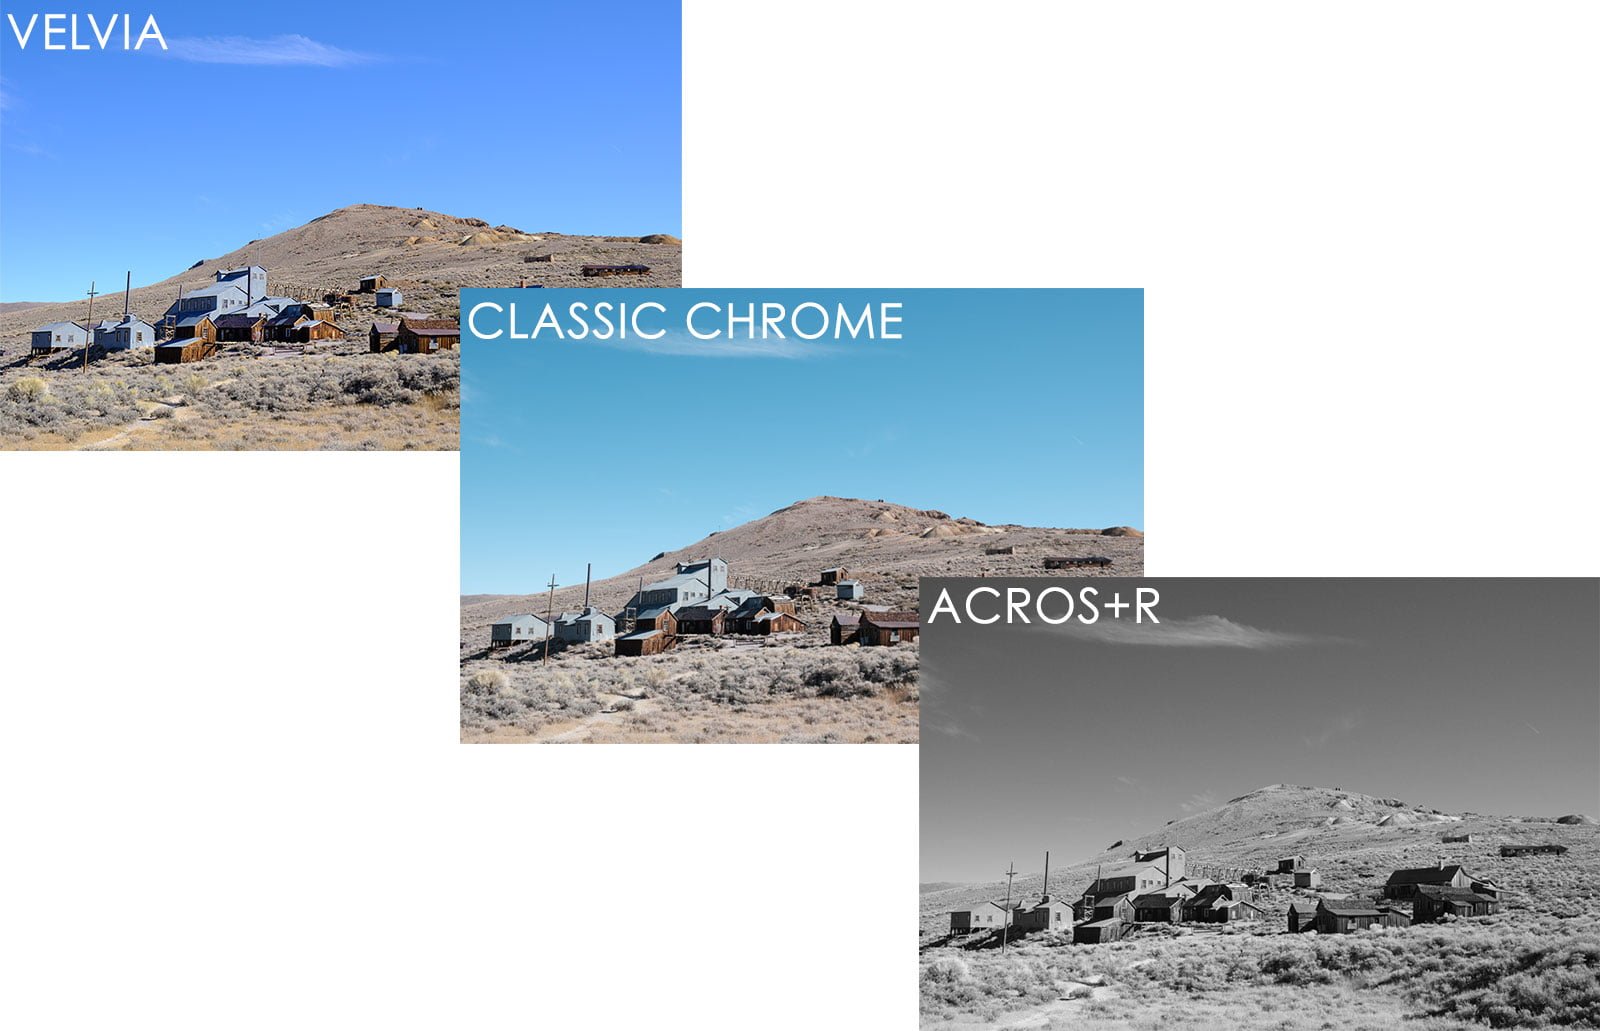
In the photo below, I get three quite different looks when pressing the shutter button once.
When would you use Film Simulation Bracketing?
This is an incredibly useful feature when you have an idea of how you want a photo to look but you’re not quite sure about the fine specifics.
You can create drastic differences or subtle ones, things you might normally do in post-processing but have the option to do in-camera.
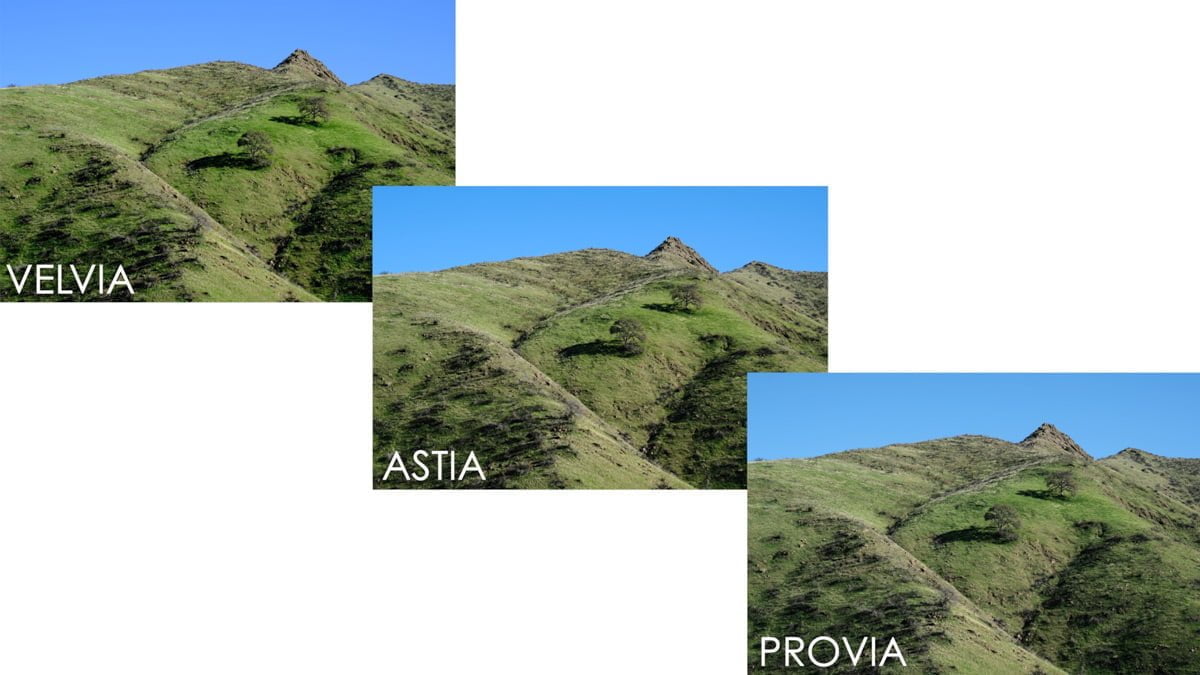
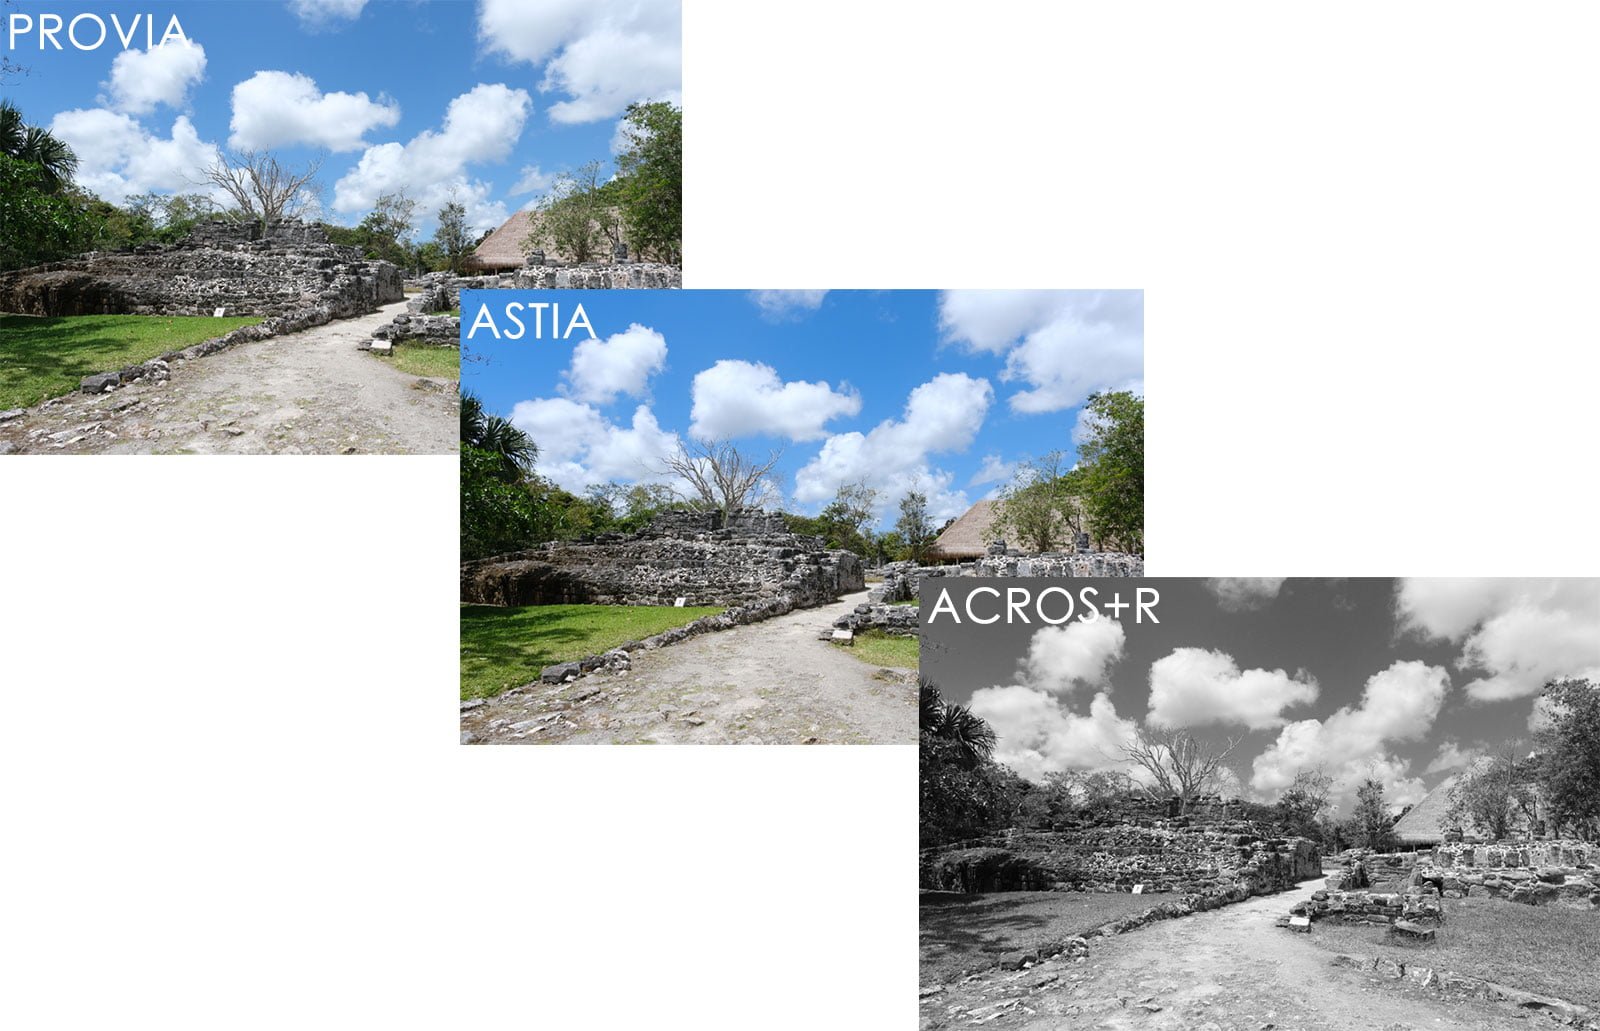
The example below has some subtle differences that might actually make all the difference to you.
Black & white
For example, the ACROS black & white film simulation is available in four flavors. Regular ACROS, and then with red, yellow, and green filters applied. These filters, simulating glass filters photographers would put on lenses, affect how different colors are rendered on black & white film.
But if you just don’t know if you want those blues to come out nearly black or light gray, film simulation bracketing will save the day.
The camera can apply three different filters to one photo instantly at capture.
Color
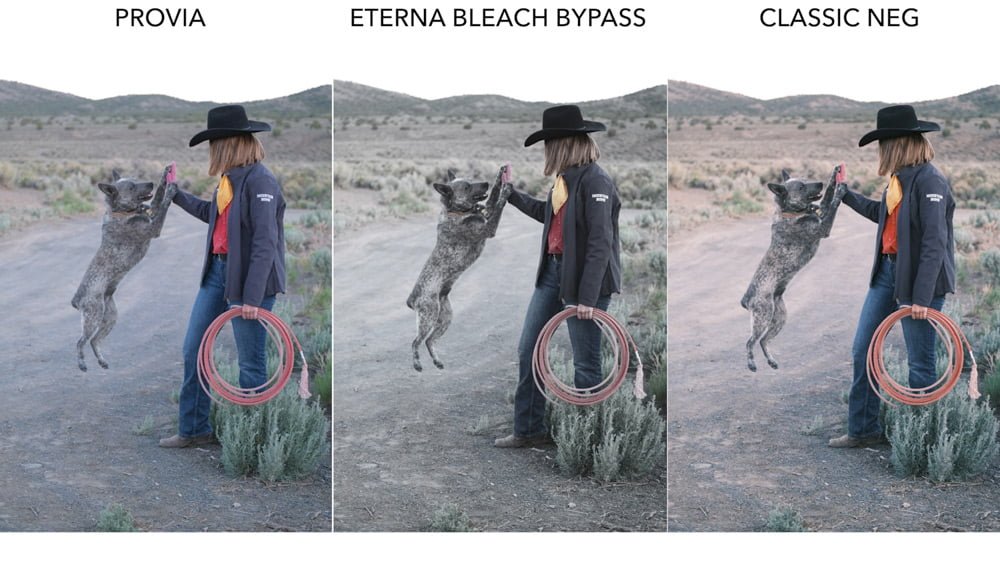
Sometimes I’m torn between Astia and Velvia when I want vivid colors. And when I want a little more subdued look, I’m often torn between Provia and Classic Chrome. For generic travel photography, I often go back and forth between Provia and Astia.
Film simulation bracketing gives me the option to see how both look without having to push any extra buttons.
If one of these choices is just way off, I can delete it in the camera. Then when I get home, my editing choices are much easier.
What Film Simulation Bracketing cannot do
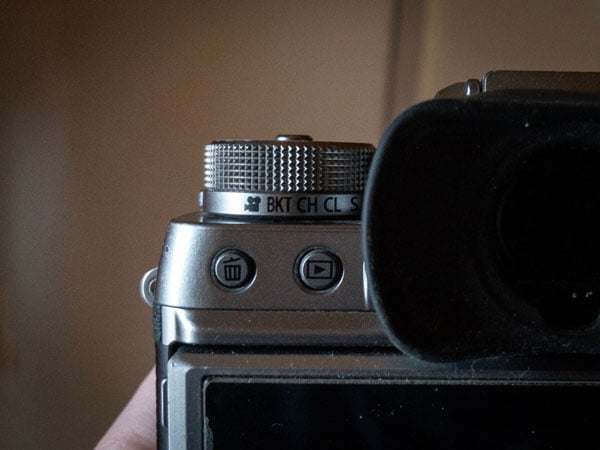
Drive Mode limitations
Film Simulation Bracketing is one of Fuji’s “Drive Modes.” The other drive modes are Continuous Burst, Auto-Exposure Bracket, Dynamic Range Bracket, and Focus Bracket, among others.
So when you’re using Film Simulation Bracketing, you can’t use any of the other drive modes. The burst modes are probably the ones that you might want to use the most with this feature, but can’t.
Film simulations, not custom settings
The bracketing applies to film simulations only, not custom settings.
And no, those aren’t the same. Film simulations are just one ingredient in the custom setting recipes that you can create.
So while you’ll create a custom setting that contains a film simulation, a contrast level, a saturation level, and so on, Film Simulation Bracketing will only adjust the film simulation part of that custom setting. The contrast, saturation, etc., will all be whatever’s currently set in your base image quality settings.
We’ll talk more about using custom settings with Film Simulation Bracketing in the next section.
Read more about creating Fujifilm custom settings here.
How to set up Film Simulation Bracketing
Before you go in and just pick three different film simulations, it helps to identify why you’re picking the three simulations.
Is it because you’re unsure if you want to use black & white or color? Or because you don’t know if you want a strong, vivid film simulation or a flat, muted simulation?
Identifying your reasons for using this feature is a great starting point!
And if you need a primer on what the different film simulations look like, I have some comparisons here.
Set up your desired film simulations
Once you’ve identified which three film simulations you want to get with your photos, you’re ready to program them into the camera. Here’s how:
- Press your camera’s MENU button
- Navigate to the SHOOTING SETTING menu (camera icon)
- Find FILM SIMULATION BKT. If it’s not there…
- Open up DRIVE SETTING (usually the first option on the Shooting Setting page)
- Open up BKT SETTING
- Open up FILM SIMULATION BKT
- Go through and select your desired settings for FILM 1, FILM 2, and FILM 3

If you intend to use Film Simulation Bracketing immediately, you’ll need to open BKT SELECT in the BKT SETTING page and select FILM SIMULATION BKT. This is where you select if your bracket mode will use this setting, auto-exposure bracketing, dynamic range bracketing, etc.
Set up your base settings
Any other settings (custom contrast, color, etc.) you have applied to your Base Image Quality settings will also be applied to each image created during the bracketing.
There are two ways to access/change the base settings:
- Press the “Q” button on the back of the camera and adjust each of those settings individually (white balance, dynamic range, highlight/shadow tones, color, sharpness, noise, etc.)
- Press the “MENU” button and go to the IMAGE QUALITY (I.Q.) menu and adjust the settings in that menu.
Note that when your drive mode is set to BKT, the FILM SIMULATION option in both of these screens will be inaccessible.
I can’t really tell you what to do or not do here since it’s all subjective. If you’re unsure, just “zero out” the Highlight tone, Shadow tone, and Color. Each film simulation is affected by these settings differently.
Making the photos
There are just a few things to do before making the photo:
- As mentioned above, make sure the BKT SETTING is set to FILM SIMULATION BKT in the DRIVE SETTING menu.
- Set the actual drive mode to BKT or FILM SIMULATION BKT (as opposed to S, CH, CL, ADV., etc).
- You only need to press the shutter button once and don’t need to hold it down since this bracketing method only makes one exposure. It’ll do the magic after that.
Final thoughts on Film Simulation Bracketing
I’ve been on a continual quest to get the best possible JPEG files at capture. Not because I’m lazy, but because it’s satisfying to both get a beautiful capture at capture and not have to spend countless hours processing RAW files. Film Simulation Bracketing is an additional tool to this end. A tool that I haven’t taken advantage of enough when I first switched to the Fujifilm system.
There have been times when I used my custom setting with Classic Chrome, only to get home and find that Provia was more suitable for the look I was going for. This is where this feature makes its money. Not to be used all the time, but in those situations where you want the comparison.
Please note that if you’re recording RAW+JPEG, film simulation bracketing will create three copies of the RAW file and three copies of the JPEG. It’ll quickly eat up card space and make your cataloging more complex. For this reason, I advocate that you use this feature judiciously if you’re recording RAW+JPEG. After all, you have the RAW file, so there’s no reason to use this for every photo. Even if you’re recording only JPEGs, this method can quickly multiply the number of photos you have to deal with.
Please also note that different camera models and firmware versions prohibit you from using this feature when recording RAW files – it’s available only when recording just the JPEG format.
Have fun with it, but don’t get too carried away!
Narendra Bansal
Tuesday 3rd of October 2023
I recently came across your wonderful article. I tried film sim bkt on my xt3. Surprisingly I cannot bkt ACROS sim! Rest of the simulations can be bracketed ok. I have no clue why it is happening. I will appreciate your advice.
John Peltier
Tuesday 3rd of October 2023
Hmm that's interesting. I don't have an X-T3, but I just tried on my X100V (which has the same sensor and processor as the X-T3) and all ACROS filters are available in the Film Simulation Bkt menu and bracket properly. Do you not see the filter options at all? Or did you choose the different filter options and they're all coming out the same? Be sure you're recording the JPG file format.
Wilson
Friday 7th of April 2023
Can the X-T5 do Film Simulation in custom presets now?
John Peltier
Friday 7th of April 2023
The X-T5 has always been able to include Film Simulations in the custom presets, just like all other models. Or am I misunderstanding the question?
Barry Studd
Thursday 29th of July 2021
Great site John, I love the fuji cameras I don't touch raw, let the camera do the work. I stupidly part exchanged my old trusty XT1 and XE2,XE1 with various lenses last year to get the X100v, which I love. But fast forward to now and am missing my intchanging lens fuji system, so I bought an XE4. Love the camera my only niggle is the shoulder strap lugs, why couldn't they stick with the eye lugs so that I can use my favourite cord wrist strap? Now trying to build up my lenses again 35mm 50mm which should suffice with the 27mm I got with the XE4. Later on will replace the XT1 with an Xpro or another XT? So wish I'd kept my glass back then, but don't regret getting the X100V
John Peltier
Friday 30th of July 2021
Thanks for the feedback Barry! Yes the X100V is an awesome camera - what I love about it is that it's so small, it's always with me! The X-E4 has its quirks for sure, but it's still a more-than-capable ILC camera for JPG photographers.
Carter C
Friday 26th of February 2021
Great info thank you!
Elliot
Thursday 14th of November 2019
Excellent article with one exception. I have the X100F and have owned other X cameras as well. But in the 100f, if you want to bracket film simulations, you have to deselect raw, i.e. raw + jpeg, in order to do the bracketing of jpeg simulations.
John Peltier
Thursday 14th of November 2019
Thanks, I had originally only mentioned the firmware differences but I've mentioned camera differences now too.