Nikon Pixel Shift Shooting: What It Is, How It Works, and When to NOT Use It
Disclosure: This post may contain affiliate links. I earn a small commission of product sales to keep this website going.
Tucked at the end of the Photo Shooting menu on most newer Nikon Z cameras is a feature that can give you higher resolution, less noise, and more color accuracy: Pixel Shift Shooting. It sounds almost too good to be true! And in a lot of ways, it is, because it only works under a very strict set of conditions. Here's what Pixel Shift does, when to use it, and when to avoid it.

What Pixel Shift Does
Pixel Shift uses your camera's in-body sensor stabilization to physically shift the sensor by half a pixel in different directions between shots, capturing a sequence of images that Nikon's NX Studio software then combines into a single merged file. The result is a high-resolution image with truly accurate color and less noise.
What is "Accurate Color"?
Most people understand the "high resolution" aspect of Pixel Shift, but the color part is less understood.
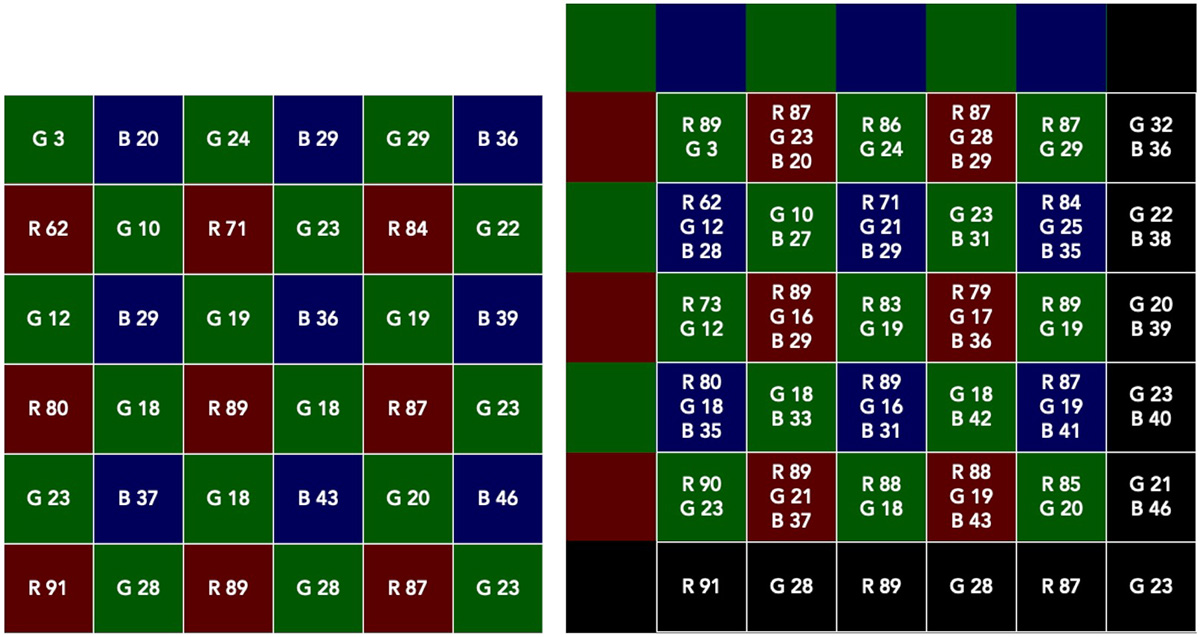
Camera sensors only record luminosity (brightness), not color. Each pixel sits under a red, green, or blue color filter and records only a luminosity value for that color. During RAW demosaicing, the other two color values for each pixel are interpolated. They're estimated based on the surrounding pixels. A pixel under a red filter has a known red value, but its green and blue values are guesses derived from nearby green and blue pixels, averaged together.
Modern demosaicing algorithms do this well, but it's still an estimate. Pixel Shift eliminates the guessing. As the sensor shifts between shots, every photo site eventually records a real, measured luminosity value for red, green, and blue, not an interpolated one. None of the color data in the final image is guessed.
The Four Pixel Shift Modes
We'll get to the menu options soon, but you'll find four different "modes" when using Pixel Shift Shooting.
- 4-shot: Same resolution as a single exposure (a 24MP camera stays 24MP), but with full color sampling at every pixel and reduced noise from averaging across the four frames.
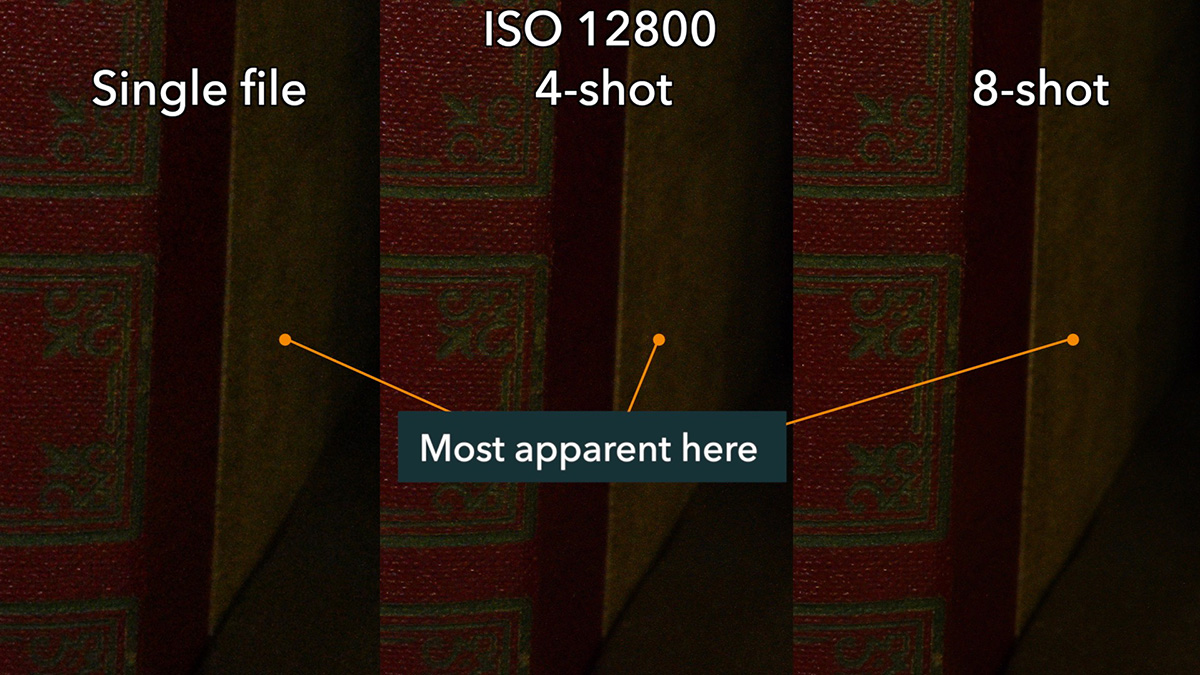
- 8-shot: Same resolution as 4-shot, with additional averaging for even lower noise.
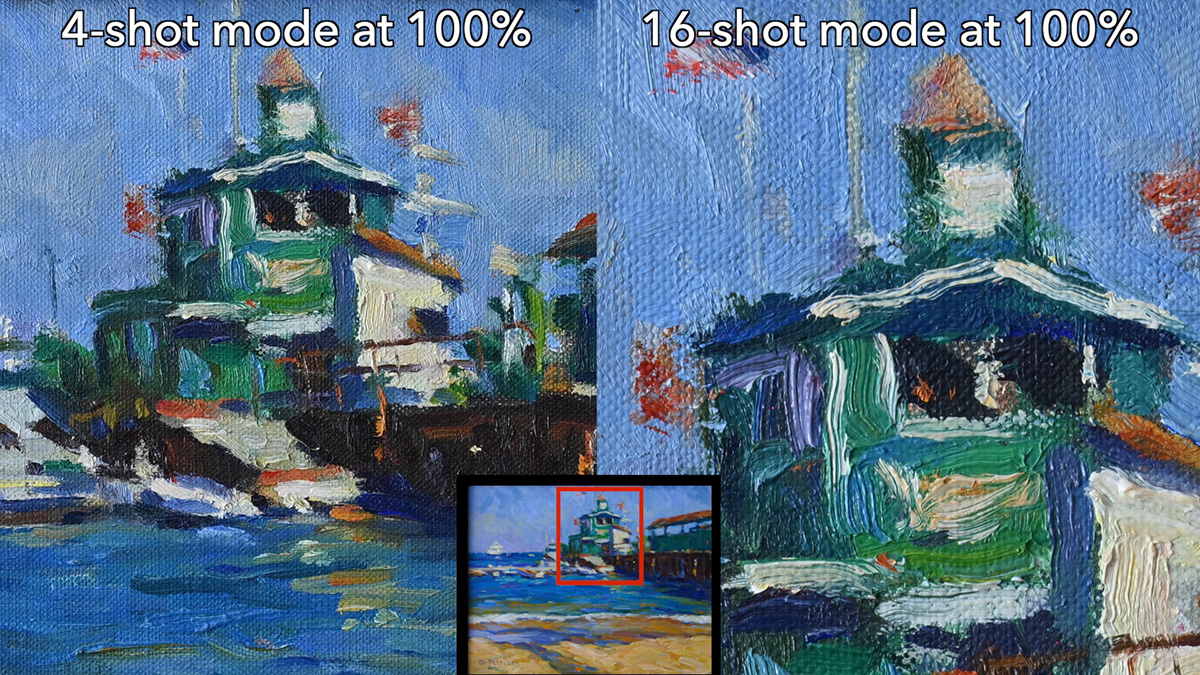
- 16-shot: Roughly 4x the resolution of a single exposure. A 24MP camera produces a 96MP image; the 45MP Z8 produces 180MP. Includes full color sampling and reduced noise.
- 32-shot: Same resolution as 16-shot, with additional averaging for further noise reduction.
Where Pixel Shift Can Help You
Photographers who find themselves in these situations may benefit from Pixel Shift Shooting:
- High-end commercial photography where color accuracy is important
- Large-format printing where maximum resolution yields better prints
- Macro and landscape photography
- Archival work, like photographing paintings or documents where resolution, accurate color, and low noise are critical for preservation and reproduction
The Dealbreaker: Nothing Can Move
This restriction rules out Pixel Shift for most photographers: nothing in the scene can move during the sequence.
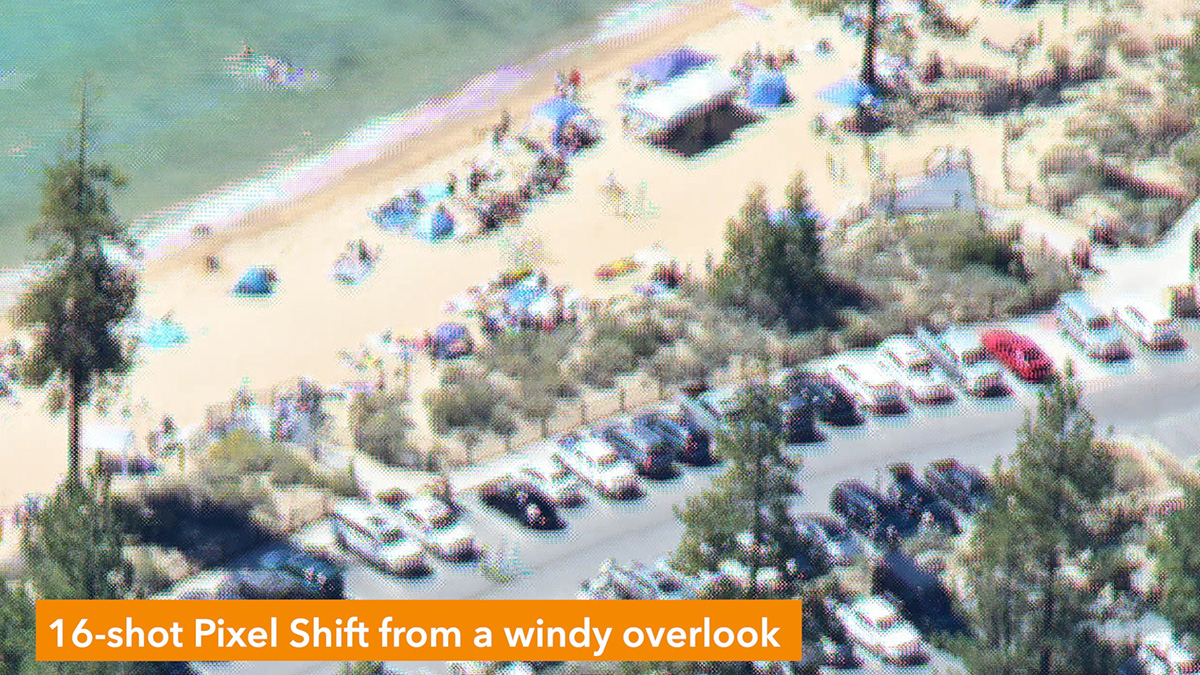
Static subjects, like landscapes, buildings, and architecture, are all fair game so long as you're using a tripod. But any movement at all, changing light, or handheld shooting will introduce visible artifacts in the final result. Even landscapes require absolute stillness; a slight breeze can produce artifacts, and water is a common problem area. Unless that water is completely still, you'll likely see artifacts along shorelines or anywhere waves are present.

The 4 and 8-Shot Modes Can Deceive You
This is worth a mention because it's important to be aware of. The movement problem described above is obvious in the high-resolution 16 and 32-shot modes. But the standard-resolution 4 and 8-shot modes can produce a merged image that looks clean even when there was movement in the frame during capture.
This is misleading. In those cases, the software is just aligning and masking, falling back on interpolated RGB data rather than the real, per-pixel color values Pixel Shift is designed to capture. You won't get any feedback during or after the merge indicating whether the final image has true color. You might think you're getting a "real color" 4 or 8-shot merge when in reality it's just a single photo.
Other Limitations of Pixel Shift Shooting
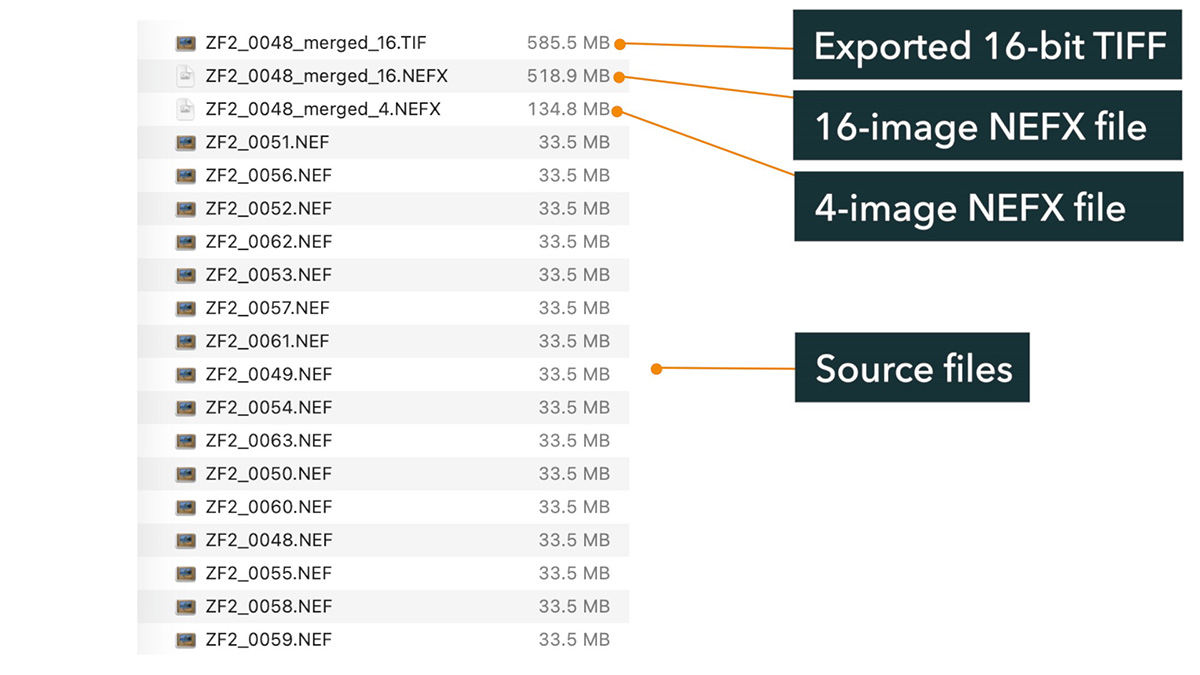
- Nikon cameras don't combine the images in-camera (unlike some other brands). You must merge the sequence in NX Studio, which produces a proprietary NEFX file. Some post-processing software now supports NEFX files, so check your software. But you must do the initial merge in NX Studio.
- Storage requirements grow exponentially. A 16-shot sequence on a 24MP Z-series camera can produce a merged TIFF file around 600MB. And that's before accounting for the 16 individual RAW files used to create it. Storage demands are even higher on the 45MP Z8. Plan your card and drive space accordingly.
- Electronic shutter only, regardless of your shutter type setting, with the additional limitations that come with electronic shutter use.
- Image quality is locked to RAW.
- Continuous shooting is disabled.
- Bulb and Time exposure modes aren't supported.
Setting Up Pixel Shift
As mentioned, this is found in the Photo Shooting Menu in supported cameras (and can be added to the i menu or My Menu for quicker access):
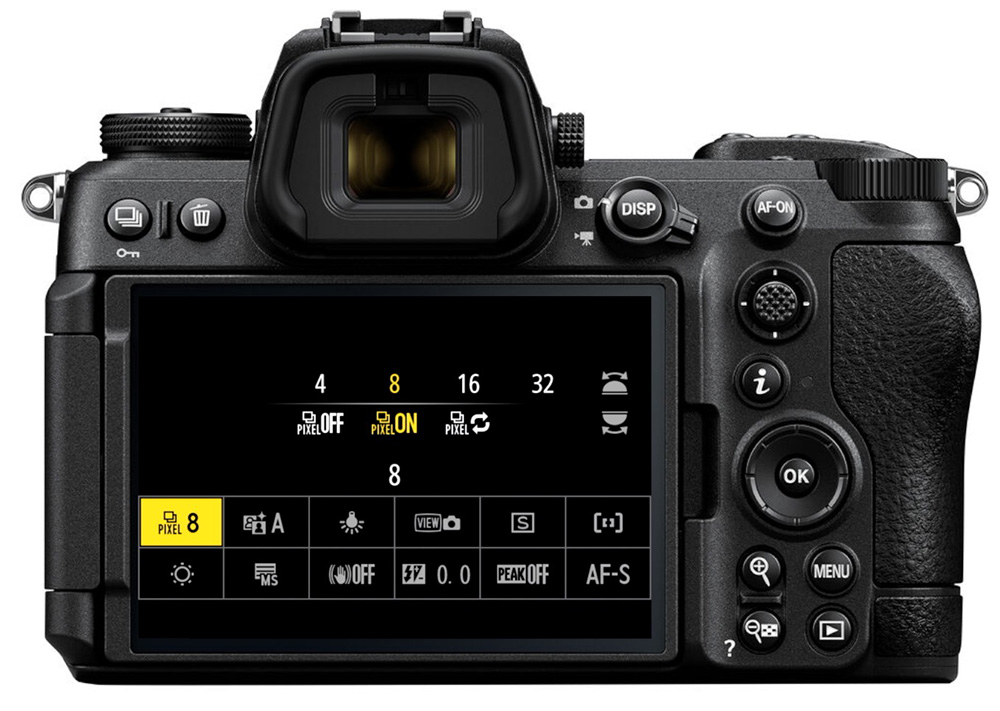
On/Off options:
- On (Series): Continues creating pixel shift sequences repeatedly until manually turned off
- On (Single photo): Creates one sequence, then automatically turns off
- Off: Standard shooting mode
Number of Shots: Choose 4, 8, 16, or 32. The 16 and 32-shot options produce maximum resolution and color; 4 and 8-shot options produce real color at standard resolution. Within each pair, the higher number (8 or 32) adds extra noise averaging.
Delay: Sets the time between a full shutter press and when the sequence begins, allowing camera vibrations to dampen out. This is similar to a timer delay setting for long exposures. A longer delay (5 seconds, for example) is a safe choice, especially without a remote trigger.
Interval Until Next Shot: Leave at the shortest setting (00) unless you're using flash or a strobe that needs time to recycle between frames (most cameras can't use this with a flash due to the electronic shutter limitations).
AE Bracketing (some cameras): Pixel Shift can be combined with auto exposure bracketing, though this multiplies your total shot count and storage requirements accordingly.
Starting Storage Folder (some cameras): Lets each pixel shift sequence save to a new folder with reset file numbering. This can help with organization.
Shooting Tips
Once Pixel Shift is active, you'll see the pixel shift icon on the display. A few things to be aware of:
- Use a sturdy, stable setup with zero movement or vibration during the sequence
- Shield the camera from wind if there's any breeze at all
- Use a wireless trigger (like the SnapBridge app) rather than pressing the shutter button to eliminate any vibration from your hand
- You can end a sequence early by pressing OK if needed
There's not much to review on the camera after capture. Everything else happens once you bring the files to your computer and merge them in NX Studio.
Pixel Shift Quick Reference
| Mode | Resolution | Best For |
|---|---|---|
| 4-shot | Standard (1x) | True color, reduced noise, no resolution increase |
| 8-shot | Standard (1x) | True color, further noise reduction |
| 16-shot | ~4x standard | Maximum resolution + true color + reduced noise |
| 32-shot | ~4x standard | Same as 16-shot, with further noise reduction |
Use Pixel Shift for: static subjects on a tripod, like still landscapes, architecture, macro, archival work.
Avoid Pixel Shift for: anything with movement, like people, animals, water, windblown scenes, handheld shooting
This is the first half of creating a pixel shift sequence. The next step is merging your pixel shift sequence into a final file using Nikon's NX Studio software, covered in the Advanced Nikon Shooting Modes course. Use code BLOG20 for 20% off the full course.