What ISO Really Does (It's Not What You're Taught)
Disclosure: This post may contain affiliate links. I earn a small commission of product sales to keep this website going.
Raising your ISO does not make your camera's sensor more sensitive to light. That statement might contradict what you've been told, even by camera manufacturers. But it's important to have a better grasp on what ISO is really doing if you want to understand your more advanced camera settings.

The Explanation Most of Us Learned
New photographers typically learn the exposure triangle as aperture, shutter speed, and ISO. This is a direct digital stand-in for the old film exposure triangle of aperture, shutter speed, and film sensitivity. Camera manufacturers even have this on their websites: Fujifilm's camera glossary describes ISO as "how sensitive your sensor is to light."
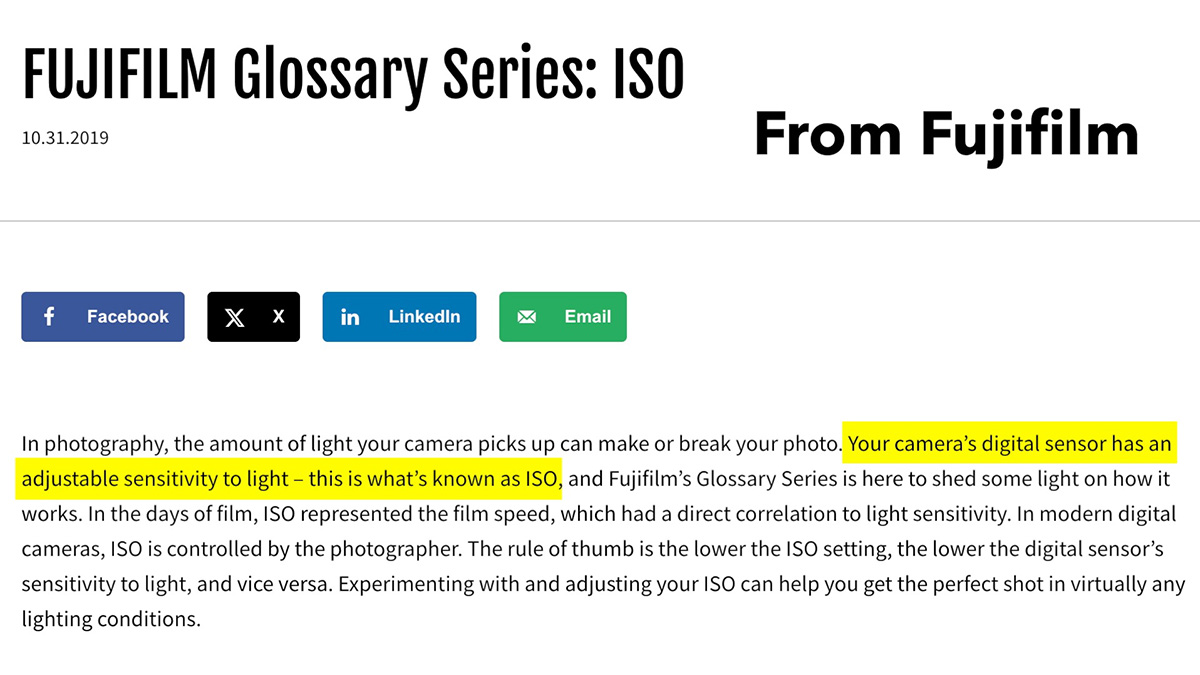
That explanation works fine for the basics. For most photographers, most of the time, it's all you need to understand how ISO fits into aperture and shutter speed decisions. But once you start looking at more advanced settings like Dynamic Range or Active D-Lighting, that explanation starts to contradict how those features work. A more accurate mental model is that ISO is how much the sensor's captured signal gets amplified afterward, like a volume knob, not a sensitivity dial.
The Sensor as Two Sides: Input and Output
The clearest way to understand this is to view your camera sensor as having two distinct sides: an input side and an output side.
The Input Side: Collecting Light
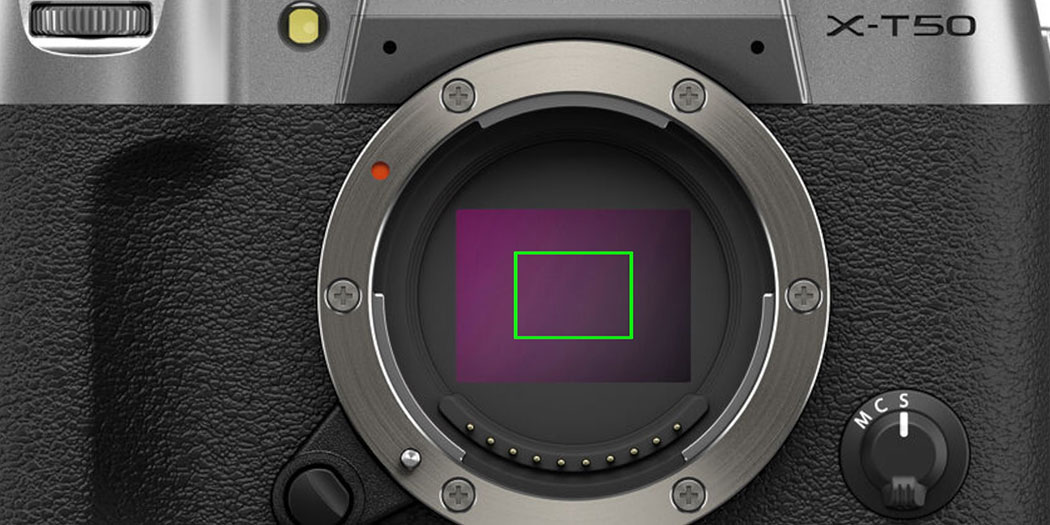
The input side faces the light and contains millions of photo sites. Think of them as tiny buckets collecting water. How much water fills each bucket depends on only three things:
- Water pressure: your ambient light. How much light is available in the scene to begin with, whether that's from a bright midday sun, a full moon, a flash, or other artificial lighting.
- How much you open the faucet: your aperture. Wide open lets in as much light as possible; closed down lets in just a trickle.
- How long you leave the faucet open: your shutter speed. Longer exposure times fill the buckets more.
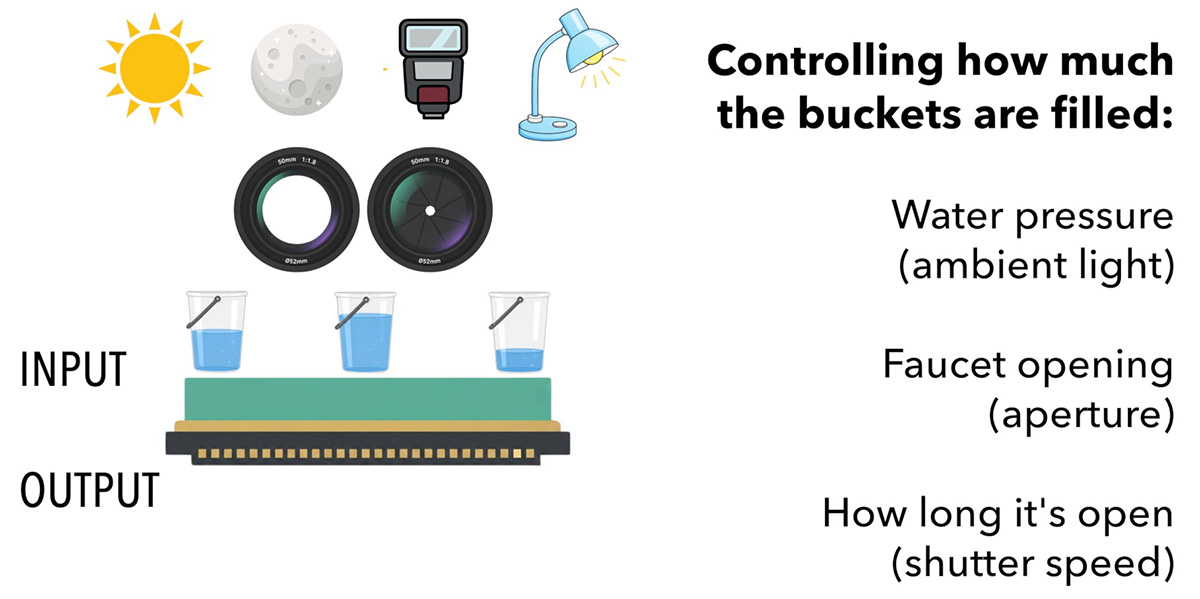
That's it. Those three things are the only variables controlling how much light reaches the sensor. You cannot create more water than what's coming through the pipe. You can't manufacture light that isn't already there.
The Output Side: Amplifying the Signal
Once the shutter closes, each bucket has collected whatever it collected. The amount of water in each bucket then generates an electrical signal proportional to how full it is. A nearly empty bucket produces a weak signal, and a nearly full one produces a strong signal.
This is where ISO comes in. ISO amplifies that electrical signal after the light has already been captured. It's turning up the volume knob on a signal that's already been recorded, rather than changing how much light was gathered in the first place. If you set a low ISO, the signal will be a similar strength to how it was recorded. If you crank it up, everything gets brighter.
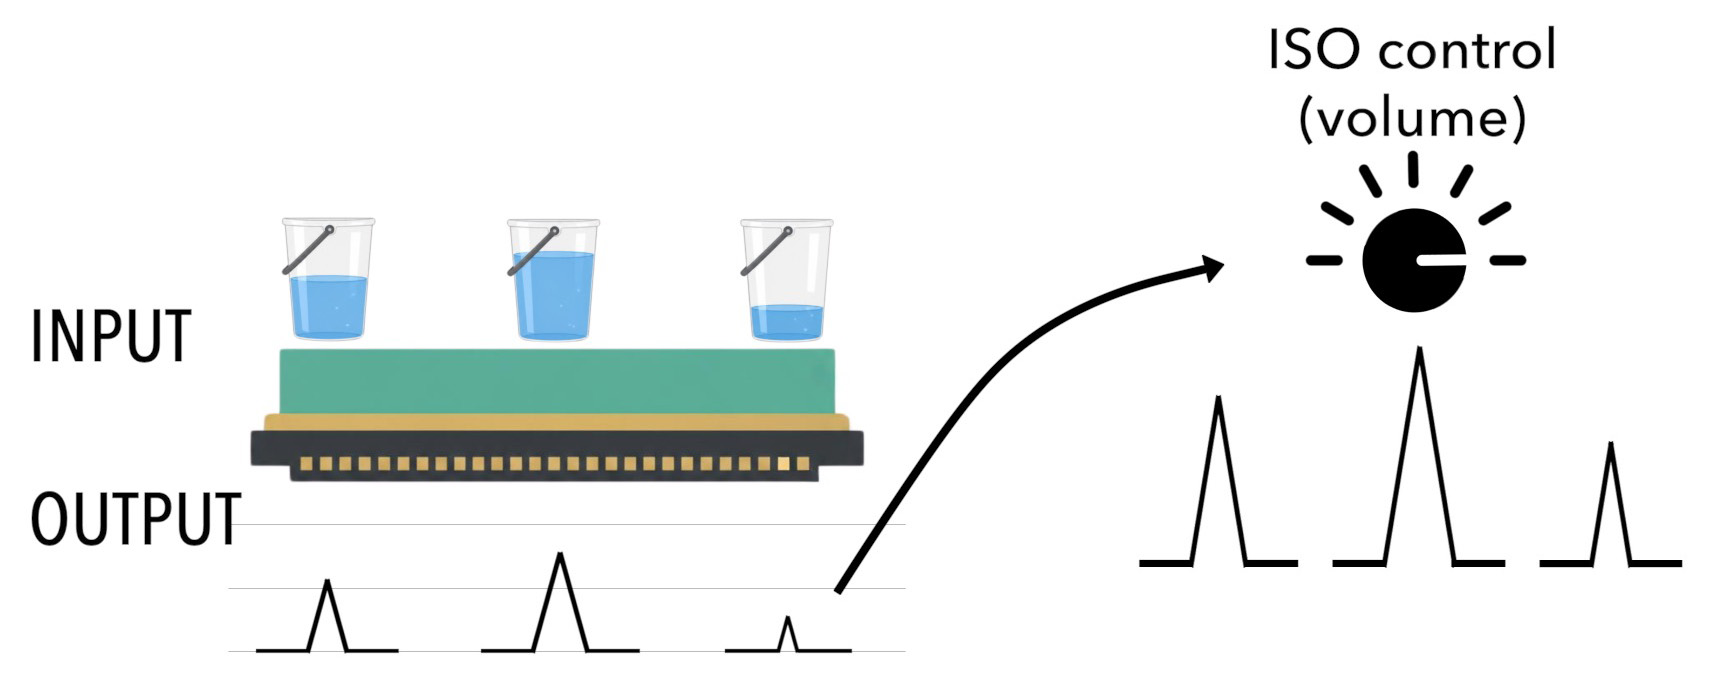
In reality, there are multiple stages to this amplification process happening at the hardware level, but for the vast majority of photographers, that's irrelevant. What matters is understanding that amplification happens on the output side, after capture, not on the input side when the light is gathered.
Related: Fear of High ISO is Handicapping You
What Happens When a Bucket Overflows?
This is the part that explains highlight protection.
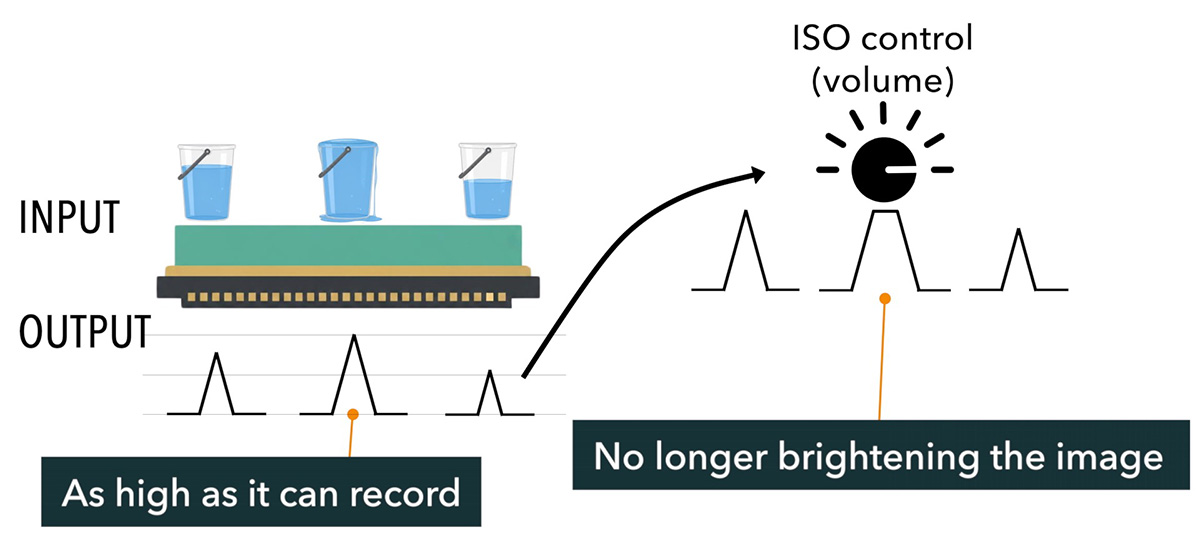
If too much light hits a photo site, that bucket overflows. Just like overfilling a bucket of water, the excess spills over and is lost. There's no way to recover it or even know by how much it overflowed. The overflowed bucket still generates a signal, but that signal effectively just says "full." It has no information about how much it was overfilled.
Amplifying that "full" signal with ISO doesn't help. A completely full bucket becomes pure white, and you can't make that any brighter (or remove light). That's a clipped highlight. Detail, like color and texture, is lost at the input stage, before ISO ever comes into the equation. No amount of ISO adjustment can bring that lost detail back, because the information was never captured in the first place.
Why This Matters for Dynamic Range and Active D-Lighting
Since highlight clipping happens at the input stage, protecting highlight detail requires reducing the amount of light hitting the sensor during capture. In a high-contrast scene with deep shadows and bright highlights, the only way to prevent overfilling those buckets is to reduce how much light comes in during the exposure, either by closing the aperture or using a faster shutter speed.
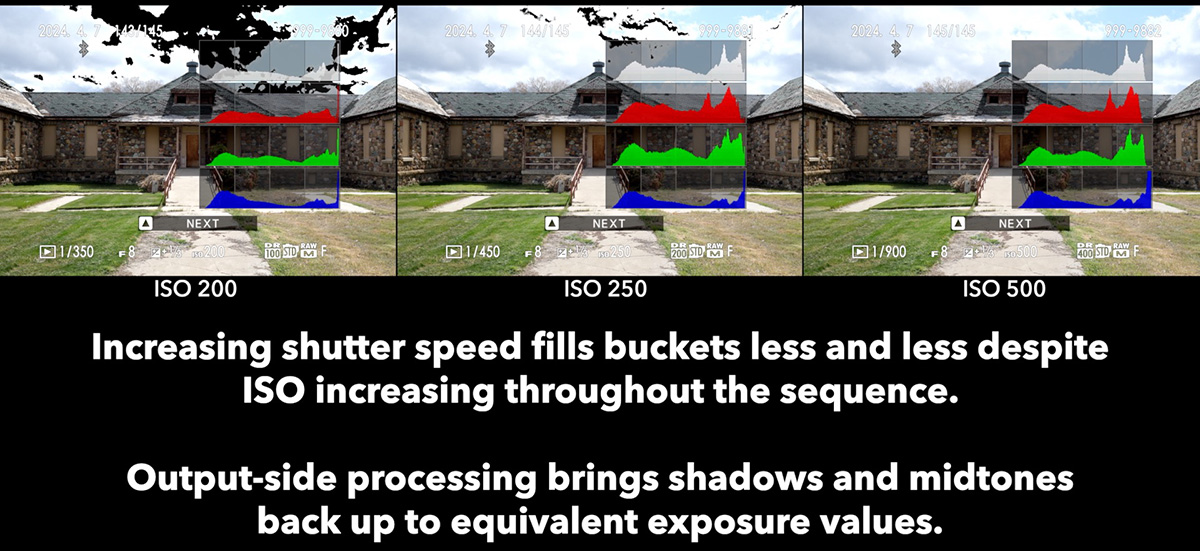
This is what Fujifilm's Dynamic Range settings and Nikon's Active D-Lighting (and equivalent features from other manufacturers) are doing. They force underexposure at the input stage by adjusting the aperture or shutter speed to reduce the amount of light collected. Then, on the output side, ISO amplification and a tone curve recover the shadows and midtones, boosting the weaker signals without overamplifying the already strong ones.
This also explains the earlier question of why Fujifilm cameras require a minimum ISO threshold to use Dynamic Range while Nikon's Active D-Lighting doesn't. Raising ISO on a Fujifilm camera to use a Dynamic Range setting is effectively the camera saying, "We're going to amplify this signal afterward, so you need to reduce how much light comes in now." The ISO requirement isn't about sensor sensitivity at all, it's the trigger for that underexposure.
This is a sequence of Fujifilm Dynamic Range Off, one stop of correction, and two stops of correction - the black areas in the sky indicate highlight clipping:
This Is Still a Simplified Model
There's a useful analogy here from teaching aviation weather to pilots. When introducing global wind patterns, you start with the "single cell model," a simplified concept that helps a student grasp the basic idea of how wind circulates around the planet, even though it's not the complete picture. From there, students move to the more detailed "three cell model," covering the different circulation zones from the equator to the poles.
What's been covered here is the equivalent of that three-cell model for ISO. It's accurate and useful, but still a step short of the full technical picture. Beyond this, there's additional complexity in how individual camera brands and sensor designs handle analog versus digital gain, dual-gain sensors, and other behind-the-scenes processing. That's available to explore if you're interested, but it's not necessary for understanding how ISO relates to Dynamic Range, Active D-Lighting, and your day-to-day exposure decisions.
If you want to go deeper into how aperture, shutter speed, and ISO relate to one another, including an interactive simulator where you can experiment with the relationships yourself, check out the free Exposure Triangle for Beginners course.