Nikon Active D-Lighting vs HDR Mode: When to Use Each One
Disclosure: This post may contain affiliate links. I earn a small commission of product sales to keep this website going.
Nikon Z cameras include two built-in tools for handling high-contrast scenes: Active D-Lighting (ADL) and High Dynamic Range (HDR) mode. They might seem interchangeable at first glance, but they work very differently. Choosing HDR when ADL would be the better mode can ruin your shot. Here's a quick explainer on what each one does, and when to choose ADL or HDR.

Who These Settings Are For
Both ADL and HDR are primarily tools for JPEG shooters, photographers who want a finished, shareable photo straight out of the camera without spending time processing RAW files. If you shoot RAW and process in Lightroom or Capture One, you can recover a significant amount of highlight and shadow detail yourself, and these settings may not add much to your workflow. But if you want the camera to handle contrast for you, these are two great tools to be familiar with.
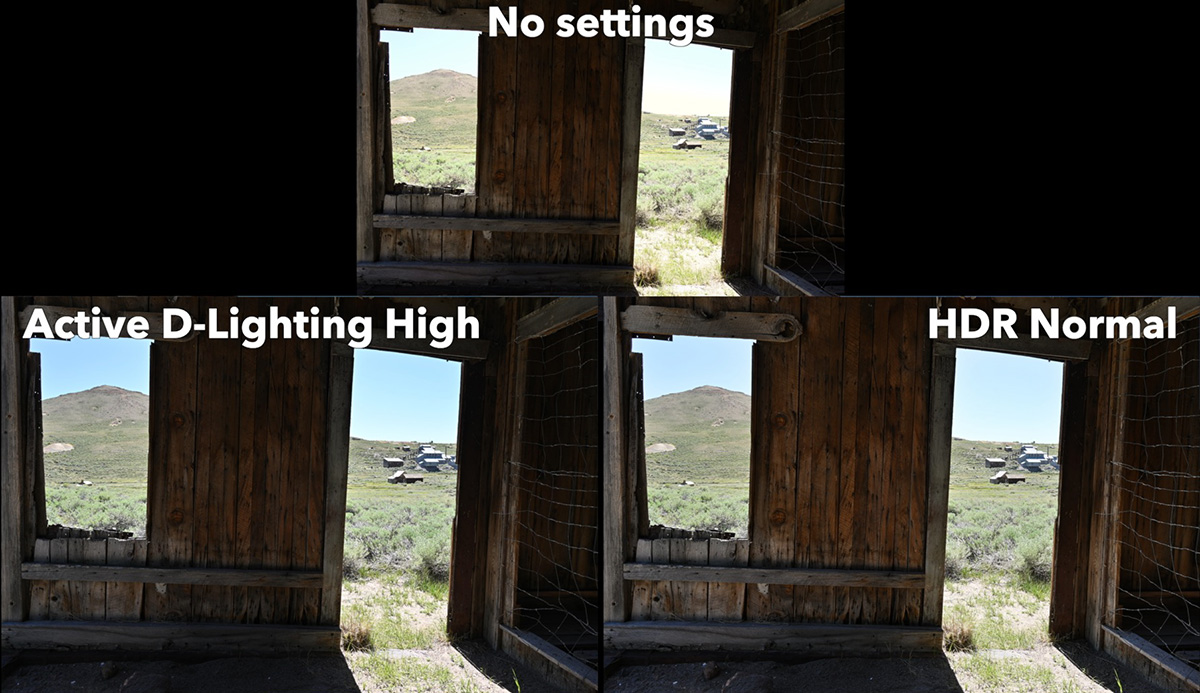
Active D-Lighting: One Frame, Subtle Adjustments
ADL works on a single exposure. Press the shutter, one frame is captured, and the camera adjusts the tone curve to recover highlight and shadow detail. It then saves this in your JPEG with those adjustments baked in. If you're also recording RAW, the ADL processing is applied to the in-camera preview of the RAW file but not the RAW data itself.
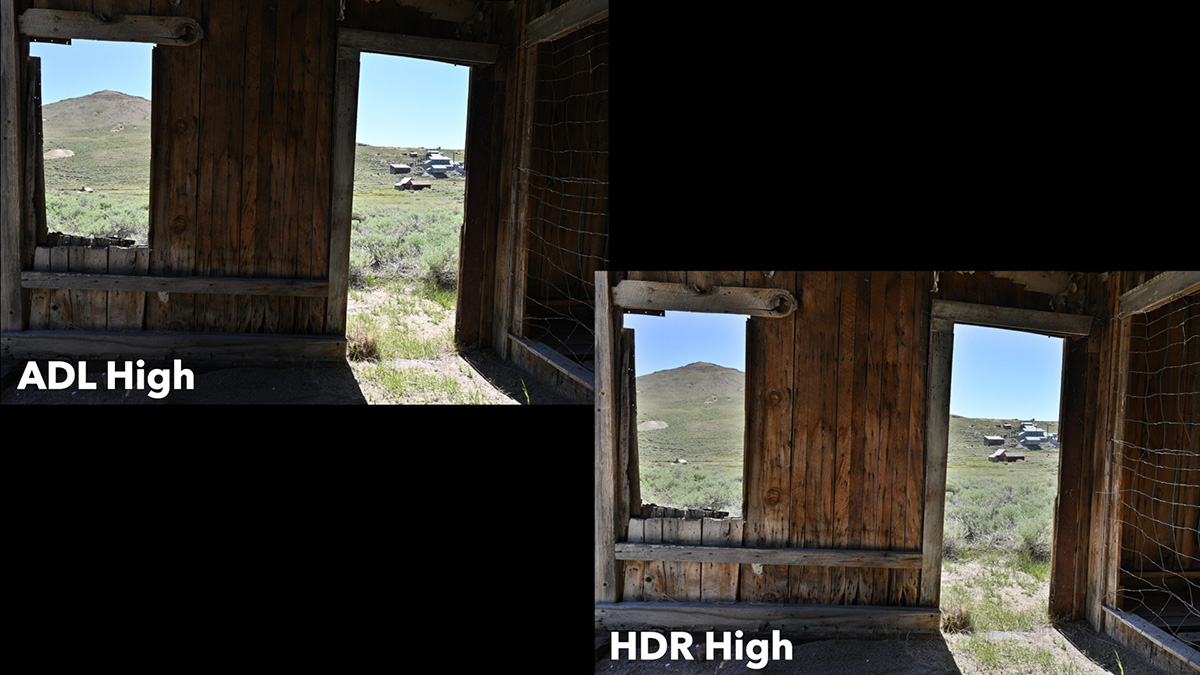
Beyond Off and Auto, ADL offers several manual strength settings. The effect is very subtle and natural-looking, especially at lower settings. It's just enough to pull back blown highlights and lift shadow detail without the image looking processed. At higher settings, the recovery becomes more aggressive, though it generally still looks realistic.
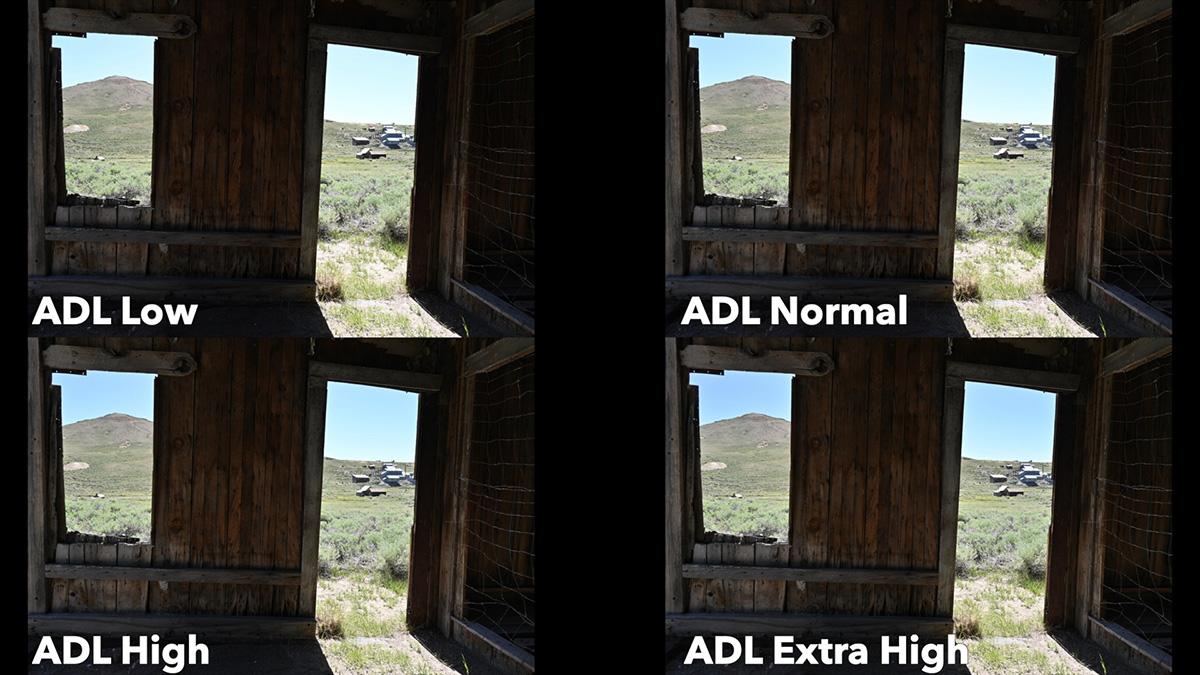
ADL is well-suited for:
- Everyday shooting where you want to reduce contrast slightly
- Any scene with movement, like people, animals, water, wind-blown grass or leaves
ADL is one of the few settings you can reasonably leave on all the time at a Low or Auto setting and mostly forget about. In Auto, the camera will apply subtle adjustments whenever it determines the scene warrants it. You can also use ADL Bracketing to capture the same scene at multiple strength settings and pick the best result afterward.
HDR Mode: Two Frames, More Aggressive Recovery
HDR mode takes two exposures in rapid succession at different exposure values and merges them in-camera. This is the same process as merging auto-exposure bracket frames in editing software, but done automatically right after you press the shutter. The result is a single JPEG with a tonal range wider than any single frame could capture.
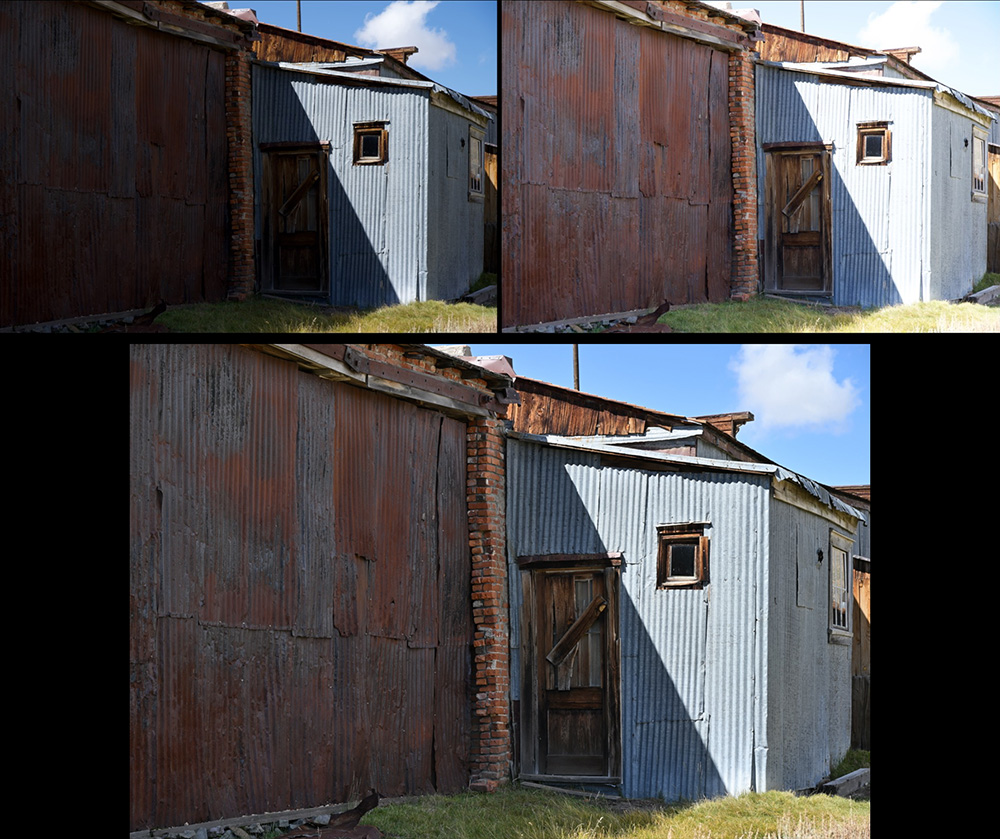
You can optionally save the individual RAW files that make up the final HDR JPEG, which gives you flexibility to re-merge them later if needed.
Like ADL, HDR offers multiple strength settings plus an Auto option. At low strengths, the result can look nearly identical to a standard image. At maximum strength, highlight and shadow detail is recovered significantly more. However, at these higher settings, you may start to see halos where bright and dark areas meet, caused by the blending process feathering between the two frames.
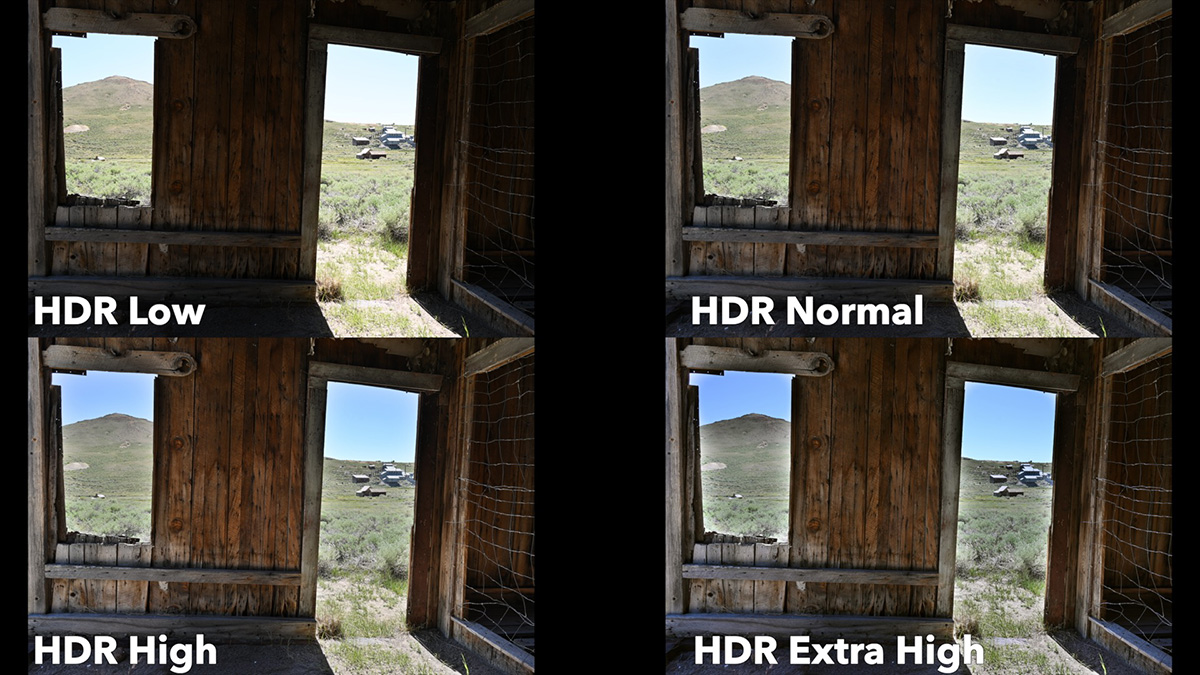
HDR mode is well-suited for:
- High-contrast static scenes like architecture, interiors with bright windows, landscapes
- Situations where you want more aggressive tonal recovery than ADL provides
- Scenes where nothing in the frame is moving
The Critical Difference: Moving Subjects
This is where the choice between the two becomes easy to understand.
Because HDR mode captures two separate frames, anything that moves between those two exposures will ghost. This means that the camera can't align the moving objects when blending. If there's a dog running through a forest, moving water, grass blowing in the wind, or you're even handholding the camera without stabilization, all of these will produce visible ghosting in the final image, sometimes severely enough to make the photo unusable.
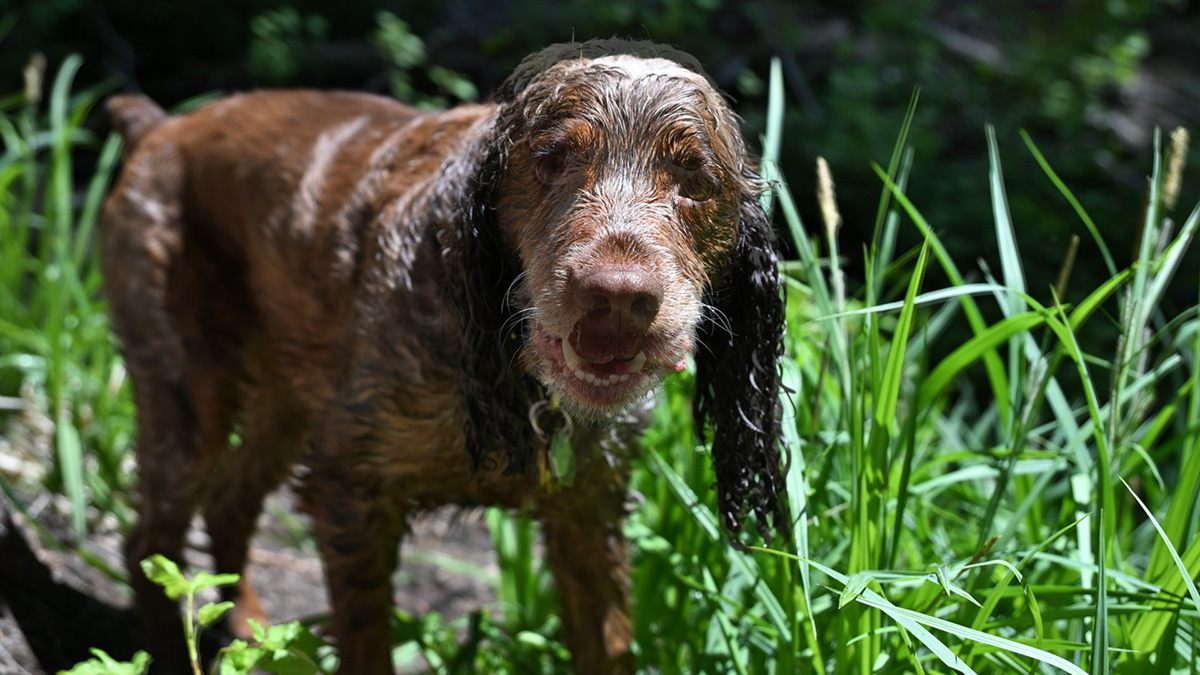
ADL doesn't have this problem because it works on a single frame.
If anything in the frame is moving, use ADL.
If the scene is completely static and you want more aggressive recovery, use HDR.
ADL vs HDR Summary
| Active D-Lighting | HDR Mode | |
|---|---|---|
| Number of exposures | 1 | 2 |
| Adjustment style | Subtle tone curve adjustment | More aggressive exposure blending |
| Works with moving subjects | Yes | No (ghosting will be present) |
| Can leave on all the time | Yes | No (scene-specific choice) |
| Output | JPEG (+ RAW preview) | Single merged JPEG (+ optional RAW files) |
| Best for | Everyday shooting, anything moving | Static high-contrast scenes |
The Simple Decision Rule
- Want subtle adjustments, or is anything moving in the frame? Use ADL
- Have a completely static scene and want maximum tonal recovery? Use HDR
- Not sure, or want to experiment? ADL Bracketing lets you capture multiple strengths in one go and pick the best result
If you want to go deeper into ADL bracketing, HDR, and the full range of advanced shooting modes on Nikon cameras, including AE bracketing, white balance bracketing, time-lapse, focus shift, and pixel shift, check out the Advanced Nikon Shooting Modes course.