What are Stops of exposure? The key to the Exposure Triangle
Disclosure: This post may contain affiliate links. I earn a small commission of product sales to keep this website going.
Adjusting exposure
You may (or may not) be familiar with the "Exposure Triangle." Adjusting a combination of aperture, shutter speed, and ISO to change the overall brightness of your photo, the depth of field, and the "motion effect." If this is all gibberish, I'd encourage you to go through my free Exposure Triangle for Beginners course.
Balancing exposure
One of the basic concepts of this whole thing is that if you open up your aperture to get a shallower depth of field, you'll need to compensate for the extra light flooding into the lens. Either increase your shutter speed or decrease your ISO.
You do this yourself in manual exposure mode, and even though the camera does it for you in the other exposure modes, you still need to anticipate what the camera will do to compensate.
If you change any of those three variables to get a different effect, you'll need to compensate by adjusting one or both of the other variables.
But by how much? If you decrease the aperture, the photo will get darker. How much do you need to slow down the shutter speed and/or raise the ISO to bring the "brightness" back?
You can't "subtract two apertures from an ISO and add a shutter speed," so we need a way to measure these changes and do some simple math. Those measurements are called stops. And once you know what stops are, you'll find you can better control your exposures.
Defining a "stop"
Stops are how we quantify changes in ISO, shutter speed, and aperture.
Simply stated, one stop is a doubling or halving of brightness.
Increasing your ISO one stop will make your photo twice as bright.
If you increase your shutter speed by two stops, your photo will be four times as dark as when you started (one-half as bright for the first stop and one-half of that for the second stop).
Increasing your aperture by three stops will make your photo eight times as bright as when you started (double it for the first stop, double that for the second stop, and double it again for the third stop).
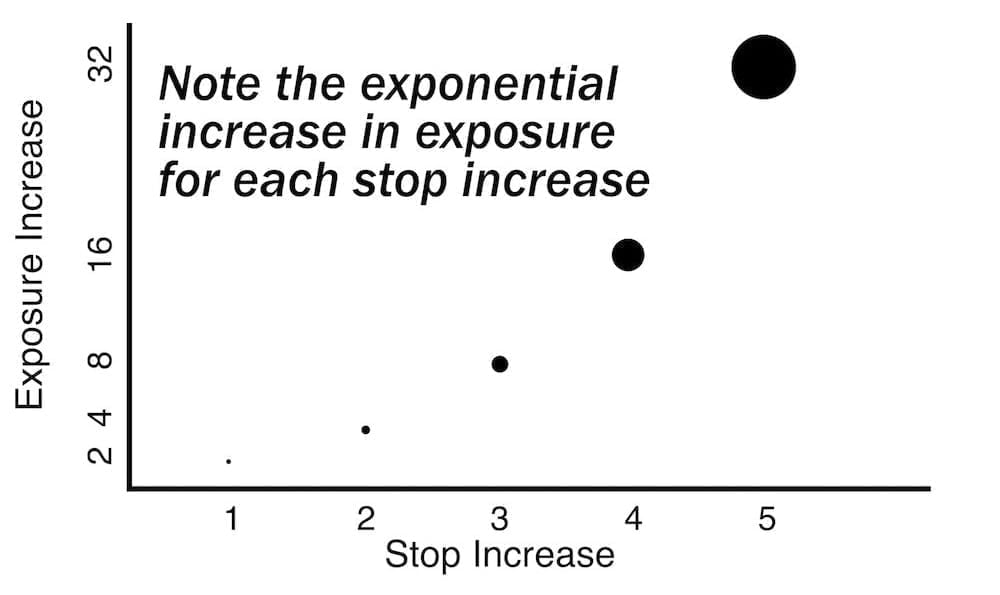
Notice how those changes are exponential and not linear. If your scene has an initial brightness value of 2 (just an arbitrary number I chose to make math easy), and you increase it by one stop, it will have a brightness value of 4. Increase it a second stop, and it will have a brightness value of 8. Increase it a third stop, and it will have a brightness value of 16. And so on.
You're probably also wondering, what are stops in terms of ISO, shutter speed, and aperture?
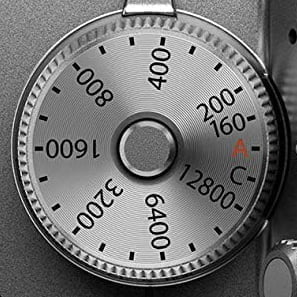
Stops of ISO
Stops in terms of ISO are easy. Take a look at the scale below; each number represents a stop, from low ISOs on the left to high ISOs on the right.
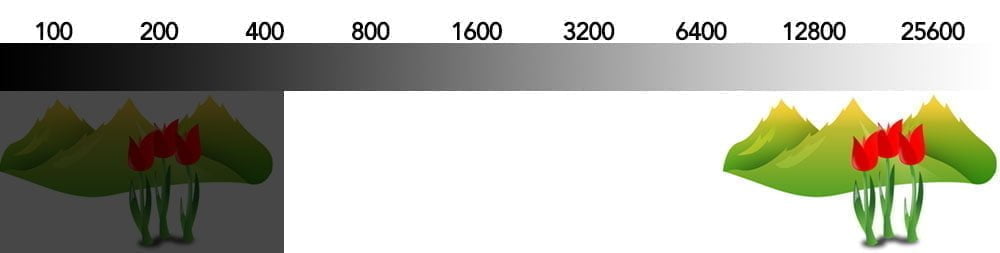
Notice how the ISO values are just being doubled or halved? Just like what stops are! When you double your ISO, you're doubling the brightness. When you halve your ISO value twice, you're halving your brightness twice.
The ISO range in your camera will vary; what's more important to know is how changing your ISO will change your photo's final brightness.
And, contrary to popular belief, you can photograph above ISO 200. Don't be afraid of high ISO!
Stops of shutter speed
Here's the scale for shutter speed, from fast shutter speeds (left) to slow shutter speeds (right). Each number - fractions of a second - represents one stop.
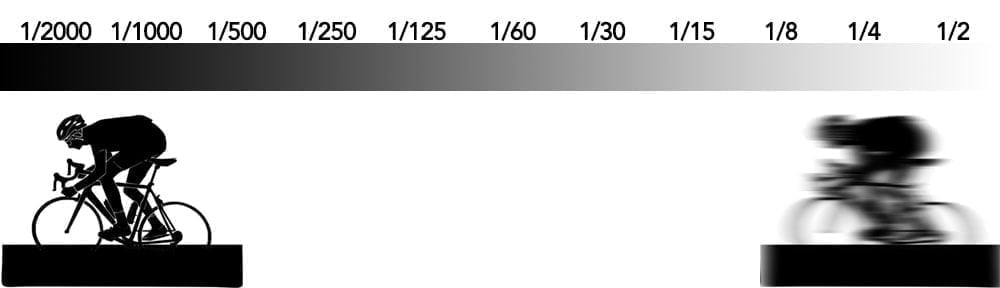
Notice the similarity to the ISO scale? The numbers (time, in this case) are doubled or halved. There are some minor variations to make the numbers even (like from 1/60 to 1/125, or from 1/15 to ⅛), but they're more or less pretty easy to figure.
The actual shutter speed range is much larger than this; this is just for illustration only.
Stops of aperture
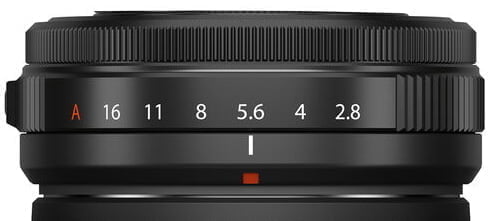
Calculating stops of ISO and shutter speed is pretty straightforward. The "stops scale" for the aperture is a bit more complex, as you see below. Each number represents a full stop, from small apertures on the left to large apertures on the right.
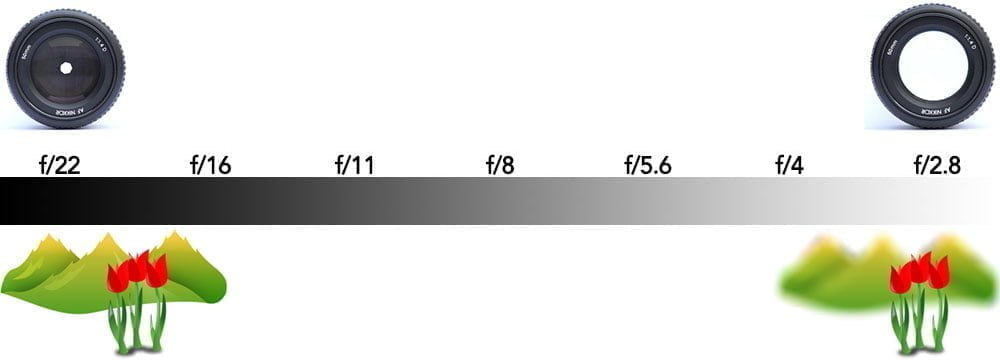
These numbers look a little different because they're actually ratios, but you can commit them to memory in no time.
The range of aperture available to you will vary depending on your lens. Fujifilm photographers have a variety of ways to change aperture; those are covered in this article.
Third stops
Maybe you don't want to double or halve your exposure. You want to be able to refine it a little better.
Thankfully, cameras also allow us to change our exposure variables in what are called third stops.
Examples of third stops are (whole stops in bold):
- ISO: 100, 125, 160, 200, 250, 320, 400, 500, 640, 800...
- Shutter speed: 1/1000, 1/800, 1/640, 1/500, 1/400, 1/320, 1/250, 1/200, 1/160, 1/125...
- Aperture: f/11, f/10, f/9, f/8, f/7.1, f/6.3, f/5.6, f/5, f/4.5, f/4...
Applying stops to the Exposure Triangle
Does the math - at least the stop scale - make sense now?
I hope so! Because this is where the breakthrough really comes in when applying it to the Exposure Triangle.
When changing one exposure variable - like the aperture from f/8 to f/4 - all you do is count how many stops that is (it's two).
Then adjust your other two variables to add up to the same amount of stops! If your aperture adjustment makes your photo two stops brighter, then adjust your shutter speed/ISO two stops darker.
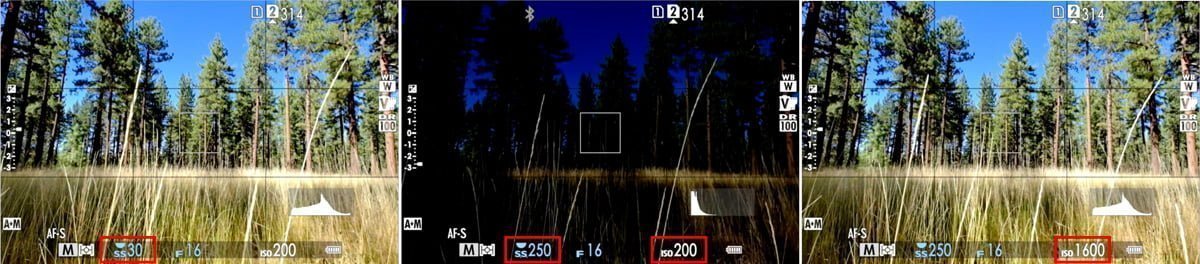
Let's go back to the first example in this article. Photographing a picture of tall grass blowing in the wind. The initial variables were:
- Shutter speed 1/30 second
- Aperture f/16
- ISO 200
That shutter speed is just too slow for moving grass. I need to increase it to make the grass sharp. So I increase it to 1/250 second. How many stops is that? It's three. Three stops darker. 1/30 > 1/60 > 1/125 > 1/250.
This change makes the photo three stops darker, so I need to do something to make it three stops brighter. The easiest thing to do is to increase the ISO by three stops, from 200 to 1600. 200 > 400 > 800 > 1600.
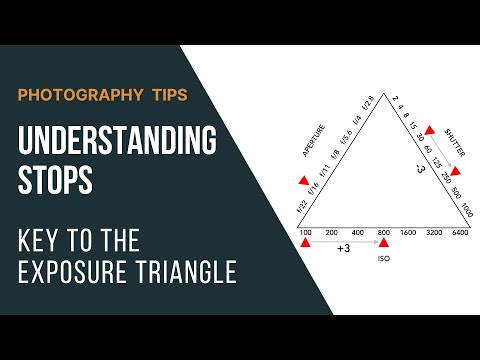
The triangle below demonstrates this (with a slightly different ISO value):
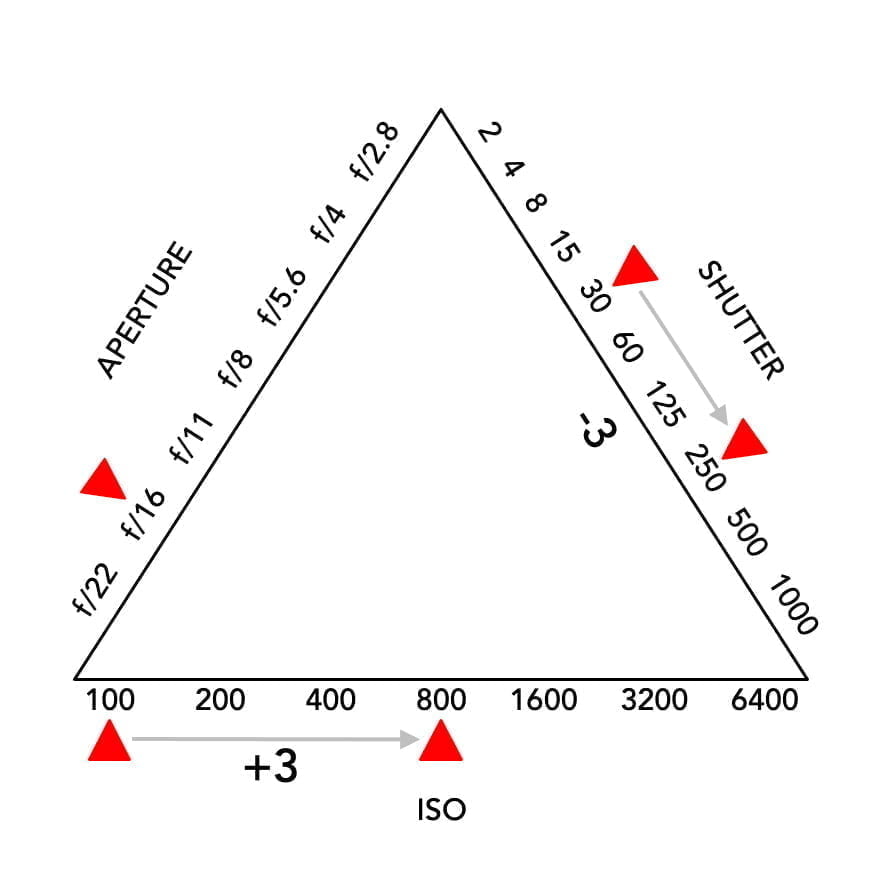
You could also increase the ISO one stop and increase the aperture two stops, increase the ISO two stops and aperture one stop, or only increase the aperture three stops. No matter what you do, make sure you're making your photo three stops brighter to account for making it three stops darker.
You could do it in manual exposure mode (which is a great way to learn exposure). Or it could be the camera doing it in the other exposure modes - but what will the camera do? It's important to know if the camera will give you a faster or slower shutter speed or wider or smaller aperture, as those automatic adjustments will affect your exposure too. "Why is my shutter speed so slow in aperture priority mode?" Well, that's because you made your aperture smaller, and the camera compensated by slowing the shutter speed by the appropriate amount of stops.
I hope this is a lightbulb moment!
So much more goes into exposure, but this is one of the biggest things that can help people understand exposure. You also need to consider:
- ISO isn't technically a part of exposure. Exposure is aperture and shutter speed.
- How will you prioritize either aperture or shutter speed to get the exposure you want?
- How will you use exposure compensation?
These topics and more are covered in the free Exposure Triangle for Beginners course, which has several videos and quizzes to help you better understand exposure!