Tips for Sharper Photos in Fujifilm Cameras
Disclosure: This post may contain affiliate links. I earn a small commission of product sales to keep this website going.
This article, some tips for getting sharper photos in Fujifilm cameras, is a request from one of our readers, Hugh, who had problems getting consistently sharp images.
It was also the topic of our December Fujifilm Photographer Webinar. While the webinar goes into greater detail during the hour-long discussion, I at least wanted to summarize the highlights in this article.
Understand Depth of Field
One of the most significant "lightbulb moments" when you're trying to figure out how to get sharper photos is to have an advanced understanding of depth of field.
When you first learn photography - and well beyond that - you learn that small apertures give you deep depth of field and large apertures give you a shallow depth of field. So, if you want both your foreground and background to be sharp, just go to f/16 or f/22, and everything will be sharp.
But that's not entirely true. Depth of field isn't just aperture - it's also focal length and focus distance.
I've consolidated all this information into this article about depth of field.
Autofocus tools
AF Distance Indicator
I write about the MF Distance Indicator in an article about "Zone Focus," which you can read here.
The same scale - which shows you your depth of field - is also available in autofocus (AF) mode.
- Go to Screen Setting > Disp. Custom Setting > and enable AF Distance Indicator.
- Then go to AF/MF Setting > Depth of Field Scale > and select Film Format Basis.
Once this is enabled, you can use it as a "quick check" to ensure your focus distance and depth of field cover your subject. This does require some practice and making a habit of it, but it's a way to monitor your autofocus system for sharper photos.
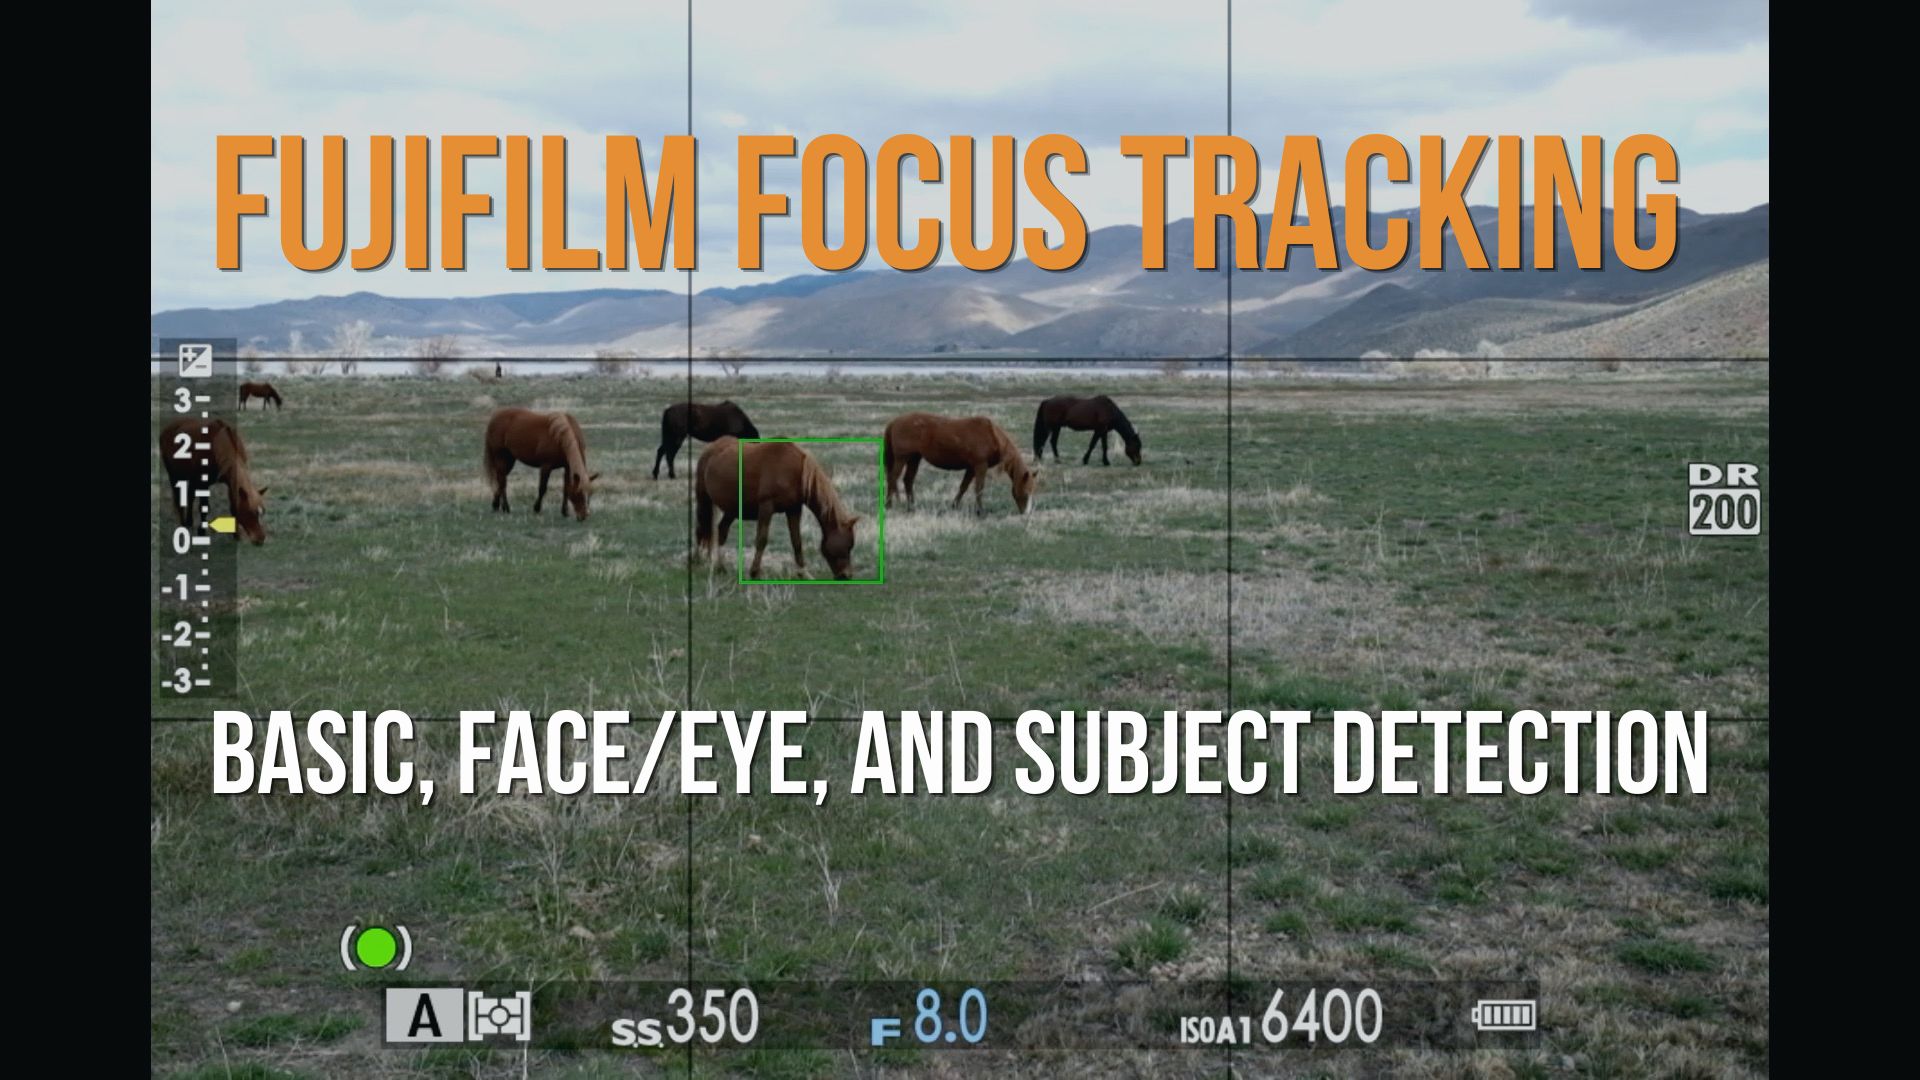
Face and Eye Detection
This nifty little piece of artificial intelligence works great. Except for when it doesn't. It can result in many blurry photos when it's not behaving.
I would recommend only using it when photographing people. Turn it off all other times; it can detect a face that's not there right as you press the shutter button and throw off your focus.
When you do use it, make sure the face and eyes are clear, in bright light, and that hair, hats, and glasses are out of the way if you want those sharp photos.
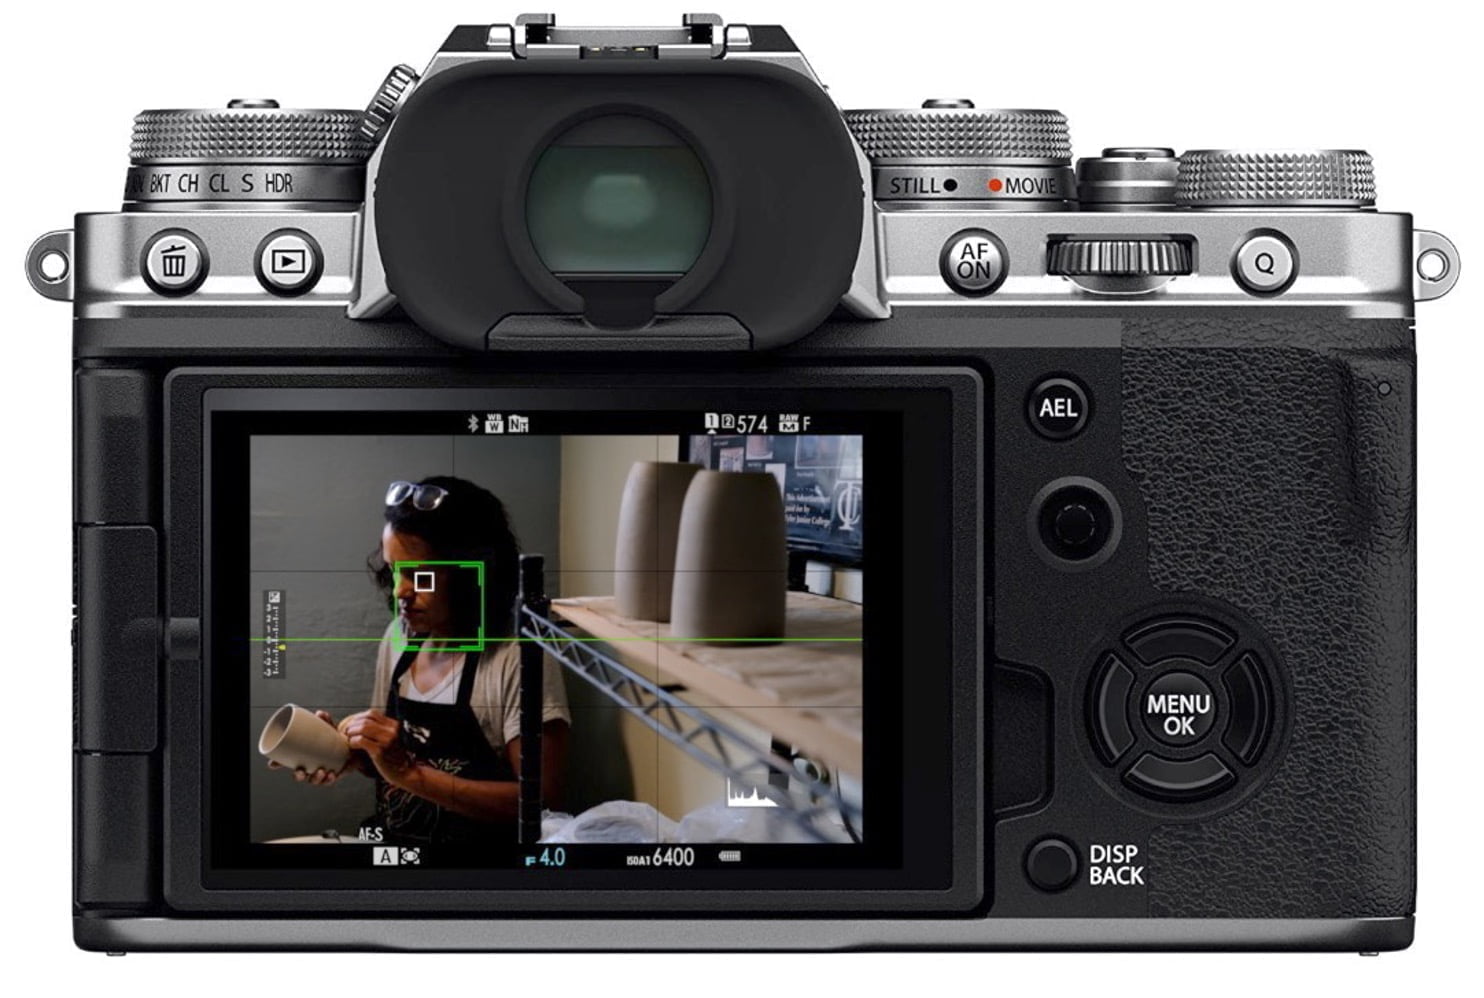
Image Stabilization
One of the biggest causes of blurry photos is motion. Image stabilization can account for some of this, but only when correctly understood.
The critical thing to remember about image stabilization is that it only accounts for the camera's motion - not the subject's motion. Do not rely on this to get sharper photos when your subjects move quickly. For that, you'll need a proper shutter speed, which we'll discuss next.
Enabling image stabilization when handholding the camera at slow shutter speeds can really help you get sharper photos. The photo below was captured at a 60mm focal length, handheld, at a half-second! That's pretty darn sharp for a half-second exposure handheld. Thanks to image stabilization.
The newest Fujifilm cameras offer up to seven stops of image stabilization.

What about when you're on a tripod?
The movement of the gyros inside your camera and lens can create a "perceived" movement and cause the image stabilization system to move when the camera is solid - creating motion blur.
Image stabilization should be turned off when on a tripod.
Selecting shutter speeds
Many photographers fear raising the ISO because of "noise," thus requiring a slow shutter speed, often resulting in blurry photos. Don't be afraid of high ISOs. Use fast enough shutter speeds. Get sharper photos that you can keep.
Here are some general rules of thumb; they'll vary based on the situation but are a good place to start.
- People: 1/250 sec.
- Sports: 1/1000 sec.
- Wildlife: 1/500 sec.
You can program these shutter speeds into Auto ISO programs, letting the camera do what it needs with the ISO and maintain this minimum shutter speed to freeze your subjects. Note that most older Fujifilm cameras are limited to 1/500th sec. as the fastest Auto ISO shutter speed. Newer cameras allow you to go up to the mechanical limits.
You can read this article for more on Auto ISO.
In low light
We have two big low-light problems resulting in blurry photos: slower shutter speeds are often required, even at high ISOs, and the autofocus system can struggle to find contrast. So how do we deal with this?
For one, go as high with the ISO as needed to freeze motion and get a sharper photo. Regular people looking at your photos will not notice noise, but they will see blur due to a low ISO & slow shutter speed.
The image below was captured at ISO 12800, f/2.8, 1/60 sec. Are you distracted by noise? I don't even see any. I just see a bunch of people having fun around a campfire. If I listened to the Internet forums and stayed below ISO 1600, my shutter speed would be ⅛ sec, and there'd be a lot of blur.

Dealing with the focus, try to find the area of strongest contrast and focus on that, like a point of light. Go into manual focus, put the little spot over the area of strongest contrast, hit that back AF ON or AF-L button, recompose, and capture the photo. You only need to focus once, and this is the most accurate way of doing so.
Or you can use the zone focus technique at night if you can estimate your subject's distance accurately. Fujifilm has many great manual focus tools to help you focus in low light.
You can view the full webinar here, in our Webinars section. Please let me know what other tips, questions, or comments you have!
Hi John, you mention shutter guidance of e.g. 1/1000th for some scenes, and programming it into auto-ISO. I love auto-ISO but all of my Fujifilm cameras top out at 1/500th for the minimum shutter speed in auto-ISO settings. I actually find this really limiting; is there something I’m missing about how to use these settings? I’d love to be able to use auto-ISO and faster minimum shutter speed.
Thanks for pointing that out, I'll make a note of that. Only the newest generation of cameras (X-T5, X-H2) allow you to go up to the mechanical limits of the shutter. Older cameras are limited to 1/500. I have no clue why.
@John Peltier,
Hi, I have an X-S10 and can set Auto ISO anywhere between 160-12800. The lowest mechanical shutter speed on this camera is 80 though, and the highest mechanical one is 4000. So I it seems to be a mix and maybe each camera is different?
Barnabas, the X-S10 mechanical shutter low limit is actually 60 minutes (in Bulb mode). When programming Auto ISO though, you should see a range of 1/4 to 1/500 sec for your available shutter speeds. Are you seeing something different? I've changed various settings in my X-S10 and am always seeing 1/4 to 1/500 for the available shutter speeds in Auto ISO.