Disclosure: This post may contain affiliate links. I earn a small commission of product sales to keep this website going.
Want to immediately improve your travel photography? Here are some easy travel photography tips for beginners. They don’t require too much of an investment in time or skill, but they will mean the difference between snapshots and photographs!
Enjoy the tips!
Do your research
The most important travel photography tip for beginners is to get good at pre-trip research. It makes all the difference and will set you up for success with everything else on the list.
How will you interact with people?
Are there any cultural barriers to photographing people? Some countries can have both extremes of the spectrum. You’ll find the locals in large cities in India love having their photo taken, while the Muslim populations are more apprehensive about it. Other Muslim countries are very strict about taking photos due to religious reasons. And even certain non-religious populations don’t like having their photos taken for other cultural reasons.
Learn some of the local language! You don’t have to spend months becoming proficient in conversation. Even just learning a few words like hello, how are you?, please, thank you, may I take a photo? can go a long way in earning trust, making friends, and getting someone to smile. You can use an app like Google Translate for simple translation or a program like Pimsleur or Rosetta Stone to learn the most basic conversation.


What will you photograph?
Are there any stories to tell? What do they eat? What are they known for? Arts, music, food? If so, what specifically is it about their art, music or food that makes them unique?
Knowing what you’re going into will really improve your understanding of what there is to photograph and where the stories are.
Don’t just leave it to the guidebooks either. Read encyclopedias (or e-encyclopedias?) to learn about their history and culture. Guidebooks tend to leave out a lot of the specifics.
Here are some links you can explore to learn more than the guidebooks offer:
- CIA World Factbook
- Baker Country Guides (a Harvard business collection)
- BBC Country Guides
- Culture Crossing Guide (cultural customs, dress, taboos, etc)
That oughta get you started!

When will you photograph?
What will photography be like in the winter? Or the summer? When is the best month to go, considering things like temperature, rain, tourist crowds, festivals, and accessibility due to ice and snow?
And what time of day is best to photograph? Morning and evening typically offer the best sun angles, but what about midday? Or will it even be too hot to be outside? When are sunrise and sunset? Tools like The Photographer’s Ephemeris and PhotoPills can help you with a lot of these decisions.

Know your gear
One of the best travel photography tips for beginners is to be intimately acquainted with your gear.
The last thing you want to do is buy a new camera the week before going on a big trip. You won’t know how to use it! You’ll be fumbling around trying to change settings when time matters most.
Believe me from experience. You’ll come back with better photos using an older camera that you’re intimately familiar with, rather the newest, top-of-the-line camera that you haven’t had much time with.
In fact, recently I’ve been an advocate of mastering the old camera instead of upgrading to the new.
Be able to change settings like focus mode, exposure mode, aperture, shutter speed, and exposure compensation while blindfolded (not really but you know what I mean).
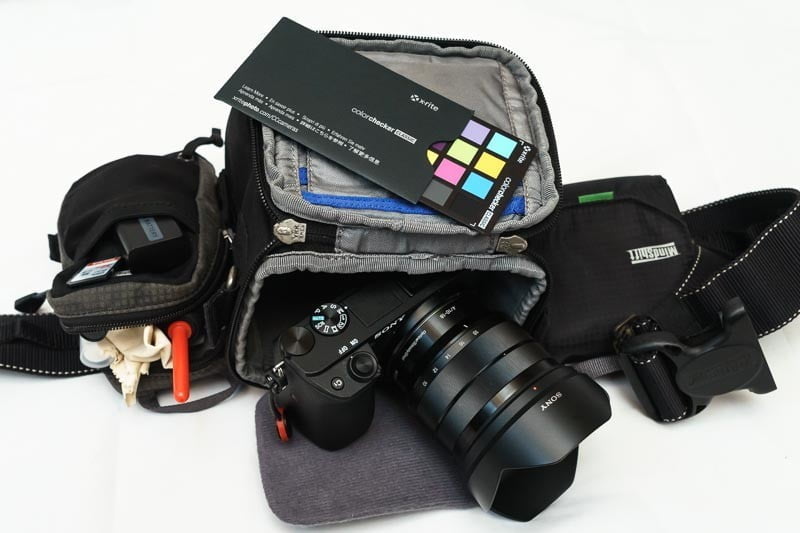
Pack light
I’ve been on a few trips with other photographers where they show up with giant bags of gear. Which is cool, they have a lot of different tools for a lot of different jobs.
But going back to the previous travel photography tip – knowing your gear – if you really know your gear, you’ll be able to maximize its capabilities and reduce the need for extra gear.
So you may be wondering why this is important. There’s nothing wrong with having a lot of camera gear (as long as you can afford it). But traveling with all of it has a lot of disadvantages. Some disadvantages that quickly come to mind, with regards to travel photography:
- Extra weight and bulk will slow you down.
- You’ll have to pay for extra luggage if you can even carry extra luggage at all.
- Camera bling makes you a target.
- You might miss some important photos if you’re trying to figure out which camera/lens to use and/or trying to swap out lenses.
- Less gear makes you more nimble, especially in crowded places and extreme terrain.
- A small messenger-like bag will help you blend in much more than a giant camera backpack.
All of these things will ensure that you can focus on the photograph and not be distracted by other things. Less really is more.
Are you worried about what to bring and what to cut? Check out my Five Lightweight Photography Tips post for guidance on whether or not to take the tripod, and which lens(es) you should take.
Don’t try to do it all
It’s tempting to try to see everything that you can while traveling in some amazing far off land. After all, you’re already there, right?
But if you want to actually photograph instead of taking snapshots, you’re going to need to stick around in one spot. Many photographers just “skim the surface,” coming back with the same photos that everyone else comes back with.
Why is this? Because they don’t take the time to really get to know a place.
It’s like when people drive through national parks and stop only at the pullouts. They may be getting some incredible photos, but they’re the same photos that everyone else comes back with because everyone is in a rush to see everything. So they take the same photos from the same 1% of the park that everyone else sees. But the guys (and gals) who actually spend a week on lesser-known trails deep in the park are the ones who come back with the best stories and photos.
Do the same when you travel. Again, less is more, which seems to be the theme for many of these travel photography tips for beginners.

Guides & fixers are the key
I was always one of those people who never wanted to hire a guide. I wanted privacy, I wanted to do my own thing, and I didn’t want to spend the money.
But after a few international trips where fixers were obligatory and provided for me, I can’t imagine going on a photo trip without a local guide! A fixer is a specialized type of guide who will cater to your specific photographic goals. Most fixers are guides, but not all guides are fixers.
A few great reasons why a guide, or a fixer, are so awesome to have:
- Great advice on food and lodging
- Security and assistance with cultural norms
- In-depth local knowledge you won’t get from guidebooks
- Introductions to interesting locals you wouldn’t otherwise meet
- Access to places (and people) you otherwise wouldn’t have
- They’ll help you get around, even driving for you
Getting a fixer or photography guide is more important in some places than others. In countries where the language and culture are very similar to your own, you may be fine just “asking around” as you go. But in countries where the language and culture are completely different, and especially if you want to photograph people, a guide will be the best investment you could make.
You can usually find a guide in travel forums or with a simple Google search. Just make sure that they’re not your normal guide. They should understand what you want as a photographer, i.e. when and where the best lighting is, and a willingness to introduce you to the right photographic subjects. Especially if you’re after a specific story (that’s where they’re a fixer more than a guide).

Find a story to tell
The postcard photos are fine, but is that all you really want to come back with? How will that make you stand out from everyone else? Take those postcard photos when you get there just so you have them, but then move on to your story.
This last tip is why we’re embracing the previous five travel photography tips for beginners. This is our goal. To tell a story.
What story are you going to tell? Is it going to be about how an iconic, country-specific dish is prepared differently in various parts of the country? Is it about how the last traditional blanket weavers are surviving in the modern era? Or about how beach communities are fighting plastic pollution?
Be as specific as you can. By limiting the scope of your story, you’ll actually find more to say about it (same concept as don’t try to do it all). Brainstorm with ideas you’re interested in and try to narrow it down to something very specific. If you need help brainstorming, this post on giving yourself assignments might help.
The art of photographic storytelling is an entire course on its own, but as long as you keep this in mind during your travels you’ll come back with more memorable photos.


What are these photography tips for beginners all about?
We’re trying to distinguish ourselves from other photographers through visual storytelling. And all of these photography tips get us to that goal.
- Do your research to find your story
- Know your gear so you can more effectively use your camera
- Pack light to be more nimble through your story
- Don’t try to do it all; you’ll be able to concentrate on your story more
- A guide or fixer will be your access to what you need to tell the story
Let’s see those stories! Be sure to subscribe for more awesome travel photography tips.
Andrew Pointon
Wednesday 4th of December 2024
Very helpful John but do you not think that it is also important to research the likely weather conditions in advance of your trip as if not promising then the photos will be disappointing?
John Peltier
Wednesday 4th of December 2024
Yes of course checking the weather is important, but that's not unique to travel photography, rather, travel in general. I hope everyone is doing that to know what kind of clothing to bring, etc. I also hope that one would not cancel a trip they've been planning for months if they notice, three days prior to leaving, that the weather will be "bad." You must know how to adapt and create compelling photos regardless of the weather.
Wilns
Friday 25th of August 2023
Hello! Great ideas for aspiring travel photographers. Indeed, they do not require too much time or skill. Thank you.