Disclosure: This post may contain affiliate links. I earn a small commission of product sales to keep this website going.
Does the investment to get into flash photography intimidate you? Do you see professional photographers with large strobe kits and think, “I don’t have the money for that, and I’m not schlepping all of that gear with me!”
Don’t fret – you can build a travel flash photography kit for $200 or less. While I love shooting in natural light, a travel flash kit can really expand what you can do with your photography while on the road. Here’s how to get started without breaking the bank.
This can be a part of your “essential camera bag accessories” without adding too much bulk or cost to the kit.
1. Cheap travel flash
I don’t mean “cheap” as in, “it’ll only last a couple months” – I mean “less expensive”.
You don’t need to purchase a $300 flash because it has the same name on it as your camera.
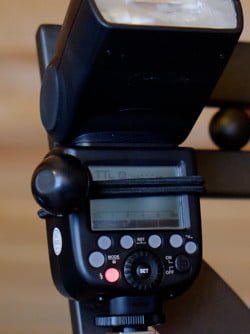
Check out Godox – they make what I think is the best flash for travel photography. Why? They’re super-affordable, solidly built, produce the same light, and have a built-in radio receiver.
I have a number of TT600s and one TT685 – all that saved money let me buy another lens.
Godox makes flash units for all major camera manufacturers, so pay attention when you’re purchasing. The only big difference between them is the shoe mount.
I’ve dropped these flashes, gotten them wet, and crushed them, and they keep on working just fine. If something ever happened to one of my flash units – either they were stolen or I broke them – I’d much rather have it happen to a $65 flash unit instead of a $300 flash. Even with insurance.
How many flashes should you get for a compact travel strobe kit?
One is completely adequate.
I used to travel with two or three but I never used more than one. Unless you’re doing studio setups and have all the time in the world to set them up, you really just need one. And more flashes mean more stands, more batteries, and more modifiers.
Create some shadows or get some fill. That’s all you need.
Manual or TTL?
This topic deserves its own entire website so I don’t want to start the debate here.
I really love using manual flash. However, for my travel flash kit, I carry my TTL TT685. There are times where if the scene is very dynamic I’d much rather hand it off to the TTL system because I don’t have time to futz around with manual settings.
The Godox TTL flash units are approximately $45 more than the manual-only flashes.
TTL functionality is nice to have, especially when Godox makes it so affordable.
Godox TT600 Manual Flash: ~$65 at Amazon
Godox TT685 TTL Flash: ~$110 at Amazon
Running total: $110 with TTL flash
But wait, don’t forget the…
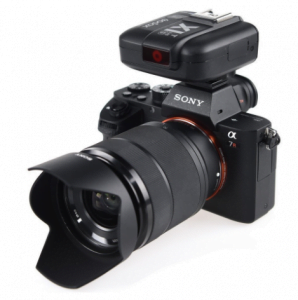
Godox X1T-S flash commander on Sony a7
2. Flash remote
So I mentioned the reason I love the Godox flashes is because they have built-in radio receivers.
The Godox X1T transmitter gives you the freedom and creative capability to get your flash off the camera to create some more interesting shadows. You can hide the flash a few hundred feet from the camera, all possible with the 2.4GHz radio transmitter.
The X1T is slightly larger than other remote systems like the Pocket Wizards but it’s considerably cheaper.
Godox X1T Transmitter: ~$46 at Amazon
You can also find X1T combos with the TT600 Manual Flash for ~$110 and with the TT685 TTL Flash for ~$155.
Running total: $155 with TTL flash
Travel flash modifiers
You’ll still want some ability to alter your light, but you don’t need to carry large diffusion screens, umbrellas, or softboxes to do so.
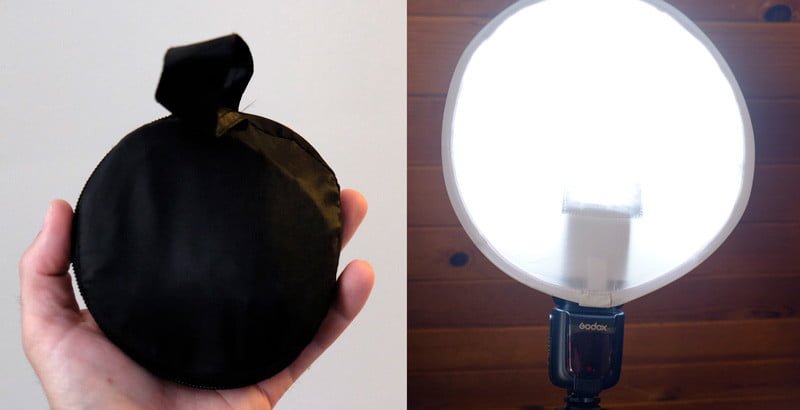
3. Diffusers
A diffuser takes your small, harsh, point light source and turns it into a larger light, thus softening it. With that said, a larger diffusion panel is better, but you have to temper that with portability.
There are four travel flash diffuser systems that I use. An in-depth comparison of all these systems will be coming soon, but in the meantime, I just want to mention the one ultra-portable, affordable diffuser that’ll get the job done. If I’m only carrying one of my four diffusers, this is it.
And that’s the Meking 12″ combination diffuser/gray card. This little diffuser folds up small and packs into a zippered case you can put in your pocket, but the wireframe quickly pops open to a 12″ cylinder that you attach to your flash head. The strobe doesn’t get too far from the screen and the light isn’t quite evenly diffused, but it does the job for close-up environmental portraits in a pinch. The other side doubles as a gray card. At approximately $12, why not? It’s a great place to start.
Running total: $167 with TTL flash
4. Color modifier
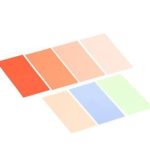
Strobist gels
You can have a lot of fun modifying the color of your light. At other times it’s a necessity when combining flash with tungsten or fluorescent lights, like in a street market or in a hotel.
In these cases, you’ll want some “gels”, or colored pieces of plastic film that cover the flash head.
Something as cheap as the Photogels Strobist kit works fine. This ~$6.95 kit contains a number of gels to warm up your scene or correct for tungsten or fluorescent light; they can be quickly & easily taped to your flash head.
I personally use the Rogue Color Correction Kit because it’s part of a strobe modification system I use by Rogue Photographic Designs. The basic kit runs ~$30 and contains more colors, an attachment band, and storage folder.
Running total: $174 with TTL flash
 Travel flash mounting
Flash stands? Forget it. You can do a lot with these two things I always have with me.
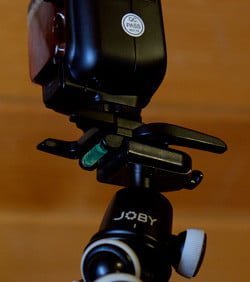
5. Cheap plastic stand
Yes, the little plastic stand that comes with your flash unit. It’s free and will let the flash sit on a level surface without any extra investment. They come with a 1/4″ threaded mount on the bottom, so you can put them on a tripod for added height. You’ll get even more versatility if you carry something like the Joby GorillaPod.
 6. Ball bungees
These little ball bungees take up no space, are cheap, and will let you attach the flash to railings, poles, etc. You can chain a few of them together for wider objects like trees. At 25 pieces for under $8 you’ll end up finding many more uses for them.
Running total: $182 with TTL flash
7. Batteries
I always use Panasonic Eneloop rechargeable batteries in my flash units when I’m stateside. These little batteries pack a lot of power and last a long time. Initial acquisition costs are significantly more expensive than standard grocery store batteries, but you don’t have to buy them again. A charger and four batteries runs $18.
I’ll just carry charged batteries on short trips; on longer trips I’ll carry the charger and travel adapter with me. But if they run flat, you can find AAs almost anywhere.
Running total: $200 with TTL flash, or $155 with manual flash
Starting your travel flash photography kit
There are so many more accessories available for a small travel flash photography kit, but this will get you started without spending a lot of money.
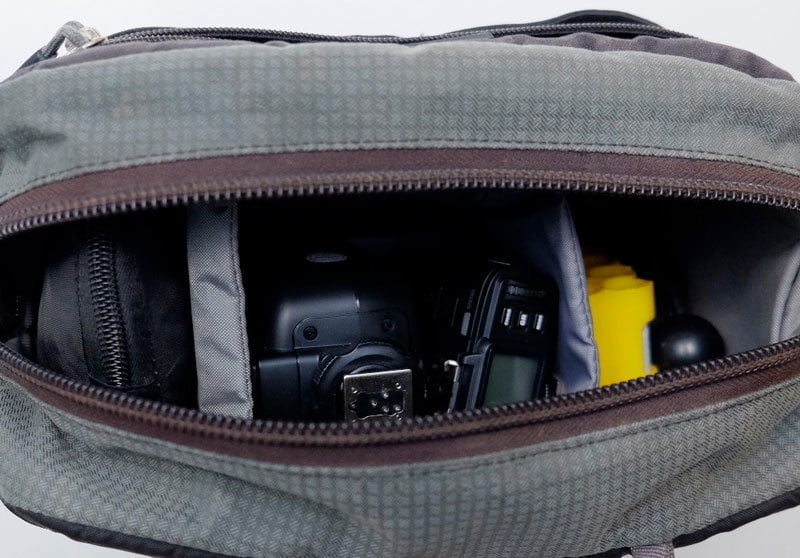
Just enough to get a cheap flash off of the camera and modify the colors and shadows – that’s all you need at first. This small little package is cheap and fits nicely in my Hubba Hubba Hiney, keeping it all together.
Check back soon, I’ll be further exploring portable diffuser systems, mounting options, and other portable light modifiers.
Eugenio Martinez
Thursday 23rd of December 2021
Hello, Wondering if you would recommend any newer/different gear now that it's almost 2022 :) I find yout content very insightful, keep it up!
Thank you.
jsvfoto
Monday 3rd of September 2018
Hi John,
Appreciate you sharing your findings. Could you tell me if the manual OCF approach syncs at 1/250 on Sony a7xxx cameras?
John Peltier
Monday 3rd of September 2018
Great question. I always stuck with 1/200 or less with manual OCF; I usually had problems at 1/250. Sometimes 1/200 gave me problems too but not all the time. That was with the a7 & a7II.
Vaibhav Chauhan
Monday 13th of August 2018
Thanks. Very informative for a beginner.
John Peltier
Monday 13th of August 2018
Thanks for the feedback, I'm glad you found it helpful.