The Case for Setting White Balance In-Camera
Disclosure: This post may contain affiliate links. I earn a small commission of product sales to keep this website going.
Using Kelvin White Balance In-Camera for Better Colors
One of my biggest headaches when transitioning to digital photography back in the early days of digital was getting the correct white balance.
Shooting on AUTO white balance played a major role in my frustration. Cameras are stupid. Auto doesn't always make our lives better or easier. It got it right sometimes and then other times I couldn't even recognize the photo.
And worse yet, the precise fine-tuning that became available instantaneously on our computers meant that I became obsessed with chasing color correction.
And in my recent mindset of not doing any post-processing unless it's for clients, it became even more important to me to get the perfect white balance in camera.
I resurrected experimenting with white balance cards, ExpoDiscs, and BaLens lens caps (which have their own post here). Then I came to the conclusion that the easiest way to get correct white balance in-camera is by setting Kelvin temperatures manually.
I've started thinking in analog again and it's made a huge difference...
Decades ago I'd purchase daylight-balanced film designed for color temperatures of around 5500 Kelvin. Outdoor photos shot underneath sunlight looked fine. They were consistent. If I were shooting under thick clouds or in the shade, I'd add a warming filter to compensate.
Simple steps. Consistency every time. It wasn't rocket science, and it shouldn't be now.
Kelvin what?
There are a million pages on the Internet dedicated to defining white balance and Kelvin temperatures. So I'll paraphrase.
Just think of fire as your light source. Hot fire emits blue light and cool fire emits amber light, right?
The camera needs to know the temperature of the light hitting your scene so that it can correct for it. Unless you correct for this, your pictures will have that distracting blue or amber color cast.
So if our light source is a "cool" 2500K (amber), we add blue to balance it to neutral white.
Our brain does this automatically and instantaneously so that white things look white. The camera does this...not as well.
Why is white balance important?
White balance affects all of the colors in your photo. Color is a major component of a photographic image, so getting it right is important.
Color can convey an emotion or it can sell products. With that said you can see why it's a decision that might be better off left up to you, not the camera.
The problems with AUTO white balance
Your camera has complex algorithms to examine the scene and guess what the correct white balance correction should be. But it doesn't know what the lighting source is. Some things can throw it off.
Scenes with strong colors
Whenever there's a scene with a lot of either cool or warm color themes, the camera can unnecessarily add warmth or coolness to counteract what it perceives to be a cold or warm light source.
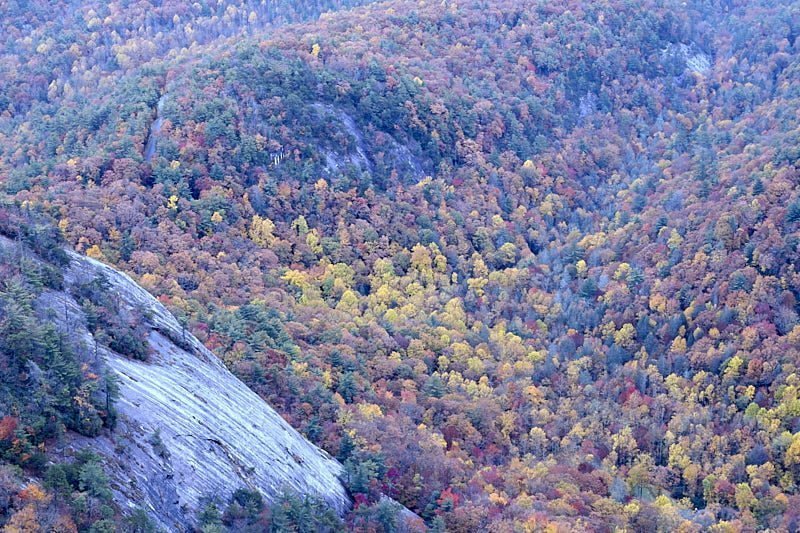
This fall photo has a lot of yellow colors. It was taken with AUTO WB. I'm sure most of you would argue that this is too blue, a product of the camera thinking all those orange leaves was a cool light source.

The same can happen to tint as well as temperature. Taking photos under tree canopies is one example. All that green tricks the camera into thinking there's an unnatural green cast, so it will add a load of magenta. The resulting photo could have a strong purple cast.
Mixed lighting
The camera doesn't know what to do in scenes that have a mix of tungsten light, daylight, fluorescent light, candles, etc. In truth, most photographers don't either.
But that's your decision, not the camera's. Manually adjusting the Kelvin white balance gives you complete control over how it's balanced, and it only takes a second.
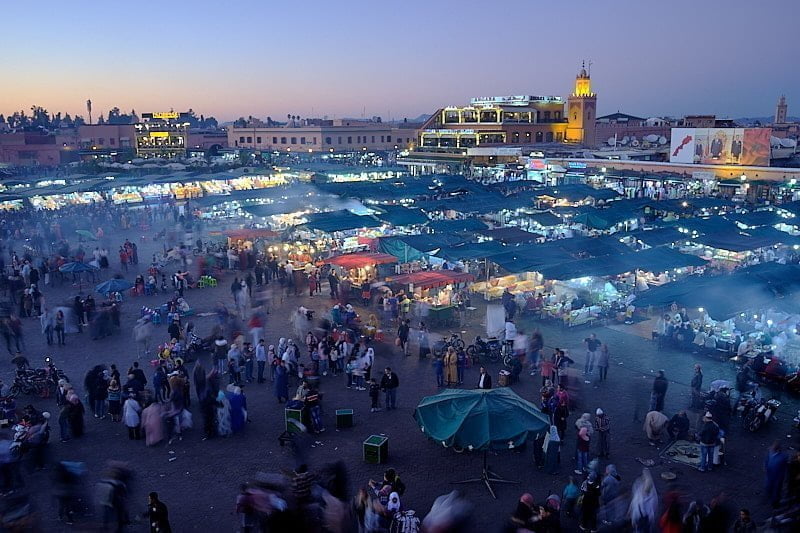
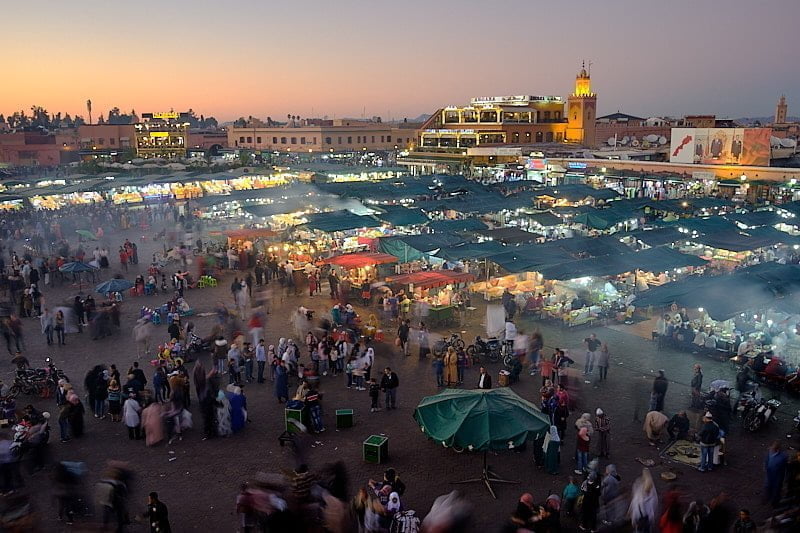
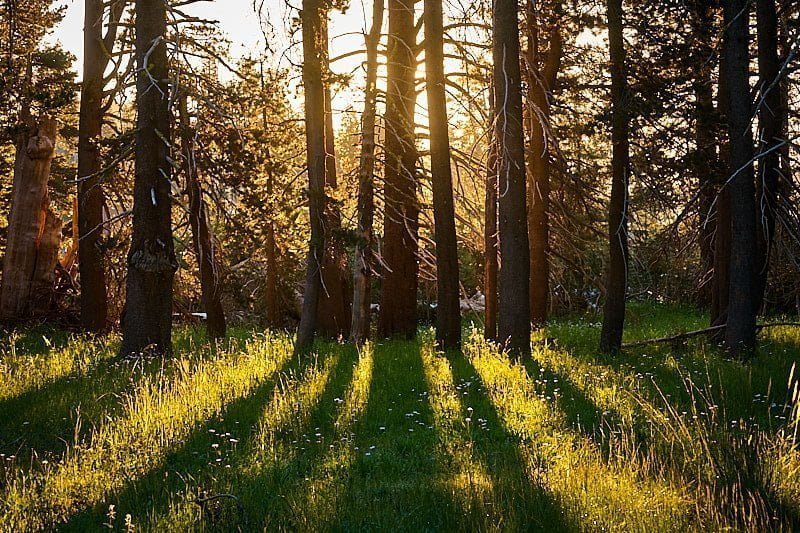
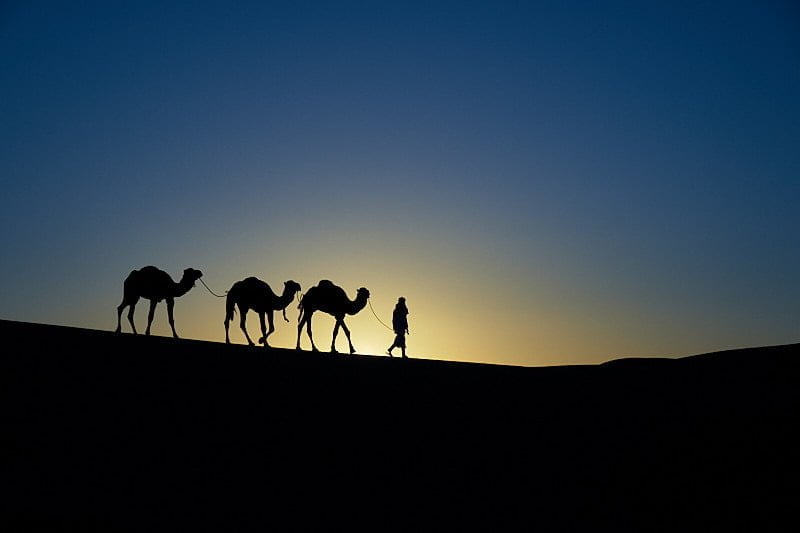
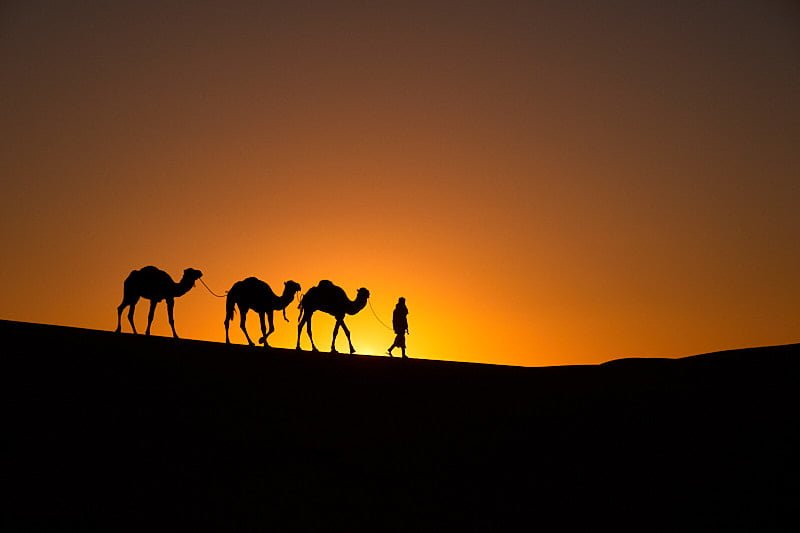
This scene has a lot of mixed lighting...dusk, shadows, and mixed artificial lighting. The camera can try to balance it, but probably not to your taste.
Inconsistency
Cameras will often set different white balance values between shots taken in the same lighting, just minutes apart. This requires attention (time) in post-processing, and if you're shooting in JPEG, photos that look different from one to the other.
Wouldn't you rather have them all look the same, even if you later realize it's just slightly off?
Now, thankfully, Fujifilm cameras come with an Auto White Balance Lock feature to "lock-in" an auto color correction. This helps with consistency if the original correction is good.
Another reason for using Kelvin white balance
I've kinda alluded to this a couple of times already.
Unless you're doing commercial work where accurate colors are essential, or editorial work where it's almost as important, the color temperature should be a photographer's creative decision.
Are you literally chilled to the bone in that snowy mountain scene? Maybe drop the temperature to 4000K to add blue tones, helping the viewer feel the coldness.
Or maybe the sun just started to peak over the horizon, filling you with warmth. Although the "correct" color temperature may be 3500K, bumping it up to 6000K will make the viewer feel that sun's warmth as well.
Cold can also be used to convey depression and despair, while warmth conveys hope and optimism.
Setting Kelvin white balance in your camera
Customize a white balance button
Most cameras have programmable buttons. White balance - even if you don't want to mess with Kelvin temperatures - is still something that's important enough it should be accessible without going into menus.
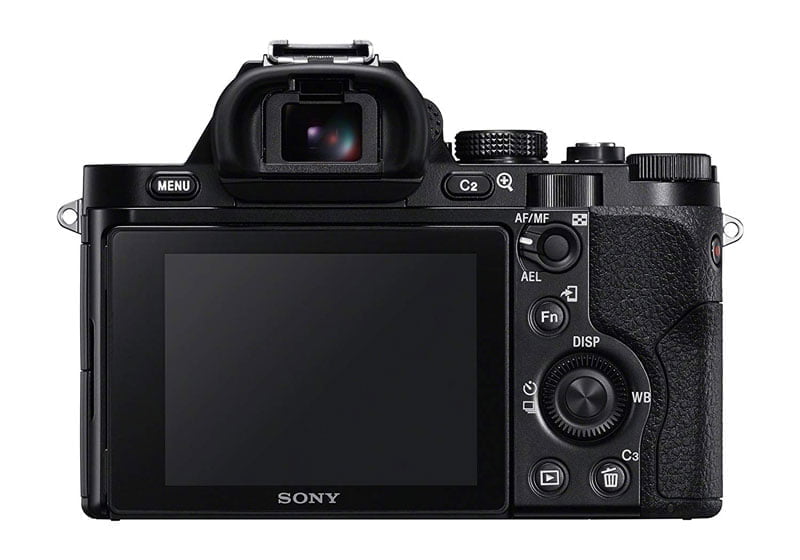
The first Sony A7 had a dedicated White Balance button. Subsequent models replaced this with a button labeled ISO, but I reprogrammed it to WB because that's what I was used to. After switching to Fujifilm, I programmed this same right pad button to access white balance.
Using Kelvin white balance is easy!
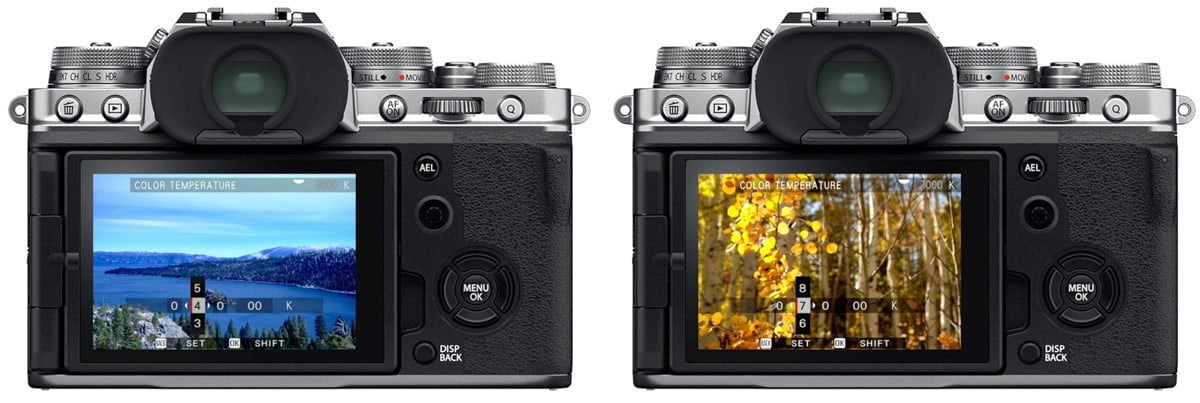
All I have to do is hit the right button and I'm taken to my last white balance setting (usually Kelvin). I scroll through to the estimated temperature based on the light source, look through the viewfinder, and fine-tune it. You can usually adjust the magenta/green tint here as well, which may be necessary with some lighting sources like fluorescent tubes.
This is one of the many advantages of mirrorless cameras - you can see the changes in the viewfinder. DSLRs can still preview these changes using Live View mode.
It doesn't take long at all - two or three seconds - and you're set for the rest of the time as long as your lighting doesn't change.
Think analog. Have a starting point for lighting situations you're commonly in. Add a "warming filter" by bumping it up 8000K if you need to.
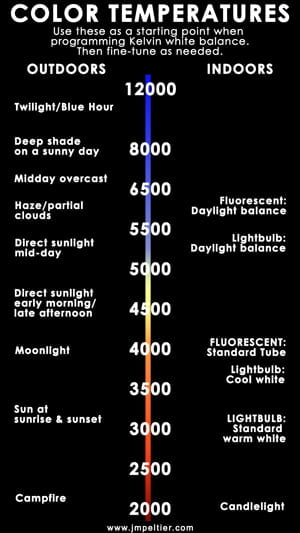
A Kelvin White Balance Cheat Sheet
I sized this White Balance Cheat Sheet to fit on most smartphone screens, so save it and keep it with you.
You'll probably have a different daylight setting for where you live. It all depends on your latitude, altitude, time of day, and air quality. Go experiment with it and become familiar with what works for where you live.
Don't forget that these aren't hard-and-fast rules, either. Sunrise and sunset, for example, gives the temperature of the sun. You may find you want to increase the temperature to 6000K or so for mood.
Wait, don't all cameras have preset white balances for different situations like sunlight, shade, and tungsten?
Yes, they do. These values are set by the manufacturer. Most cameras allow you to refine yellow, blue, magenta, and green shifts since the manufacturer preset probably won't match real life. But you're stuck in whatever Kelvin temperature is preset by them. I've just found it more efficient to get in the habit of rolling to the correct Kelvin temperature every time I power on the camera or enter different lighting.
Give Kelvin white balance a shot and see how you like it. You may find that you personally prefer AUTO, or that your job requires a white balance card.
Setting a Kelvin temperature is just one way to get the perfect white balance in-camera.
I don't think it's given as much of a chance as it deserves, and you may find that you become a big fan of it. I have.
When you get a hang of it, your RAW photos will require little color correction in post (which we all spend too much time on) and your JPEGs will look great. It's a huge timesaver.


If shooting RAW, change in post as not always the time to do so. If .jpg I can understand
Yes and that’s the point of the exercise, not everyone shoots in RAW. And I’d rather be proactive during shooting if I have the time to do so, so I don’t have to worry about it later.
So the cool (2000K) source light is yellow and the warm (9000K) source light is blue. But we think of it as the opposite when recorded in camera or processed in post? That is, a cool image is bluer, and yellower is warmer. That's strangely interesting. Undoubtedly a logic to it, but I'd need a couple more cups of coffee to even get close. Thanks for the detailed review of WB.
Yeah, it can be kind of confusing. The cool light source is yellow but in photographic terms, we usually think of cool as "blue".
I've found it easier to think of it as, "what color am I adding to make it balance out to white" and that's sorta made sense of it for me. So if I have a cool (yellow) light source, I'll be adding blue to counteract it.
That's probably more confusing but it works for me!
John, when you say " adding bleu", do you mean the RGB value (the B in this case) is changed by the in-camera software?
It's a little more complex than just "adding B" to every pixel by the same amount. The processor will add a little bit of B here, more B over there, decrease R (to add cyan), and so on. The camera is trying to render what the reflected colors would look like (what each RGB value will be) if the light source's temperature was, say, 3000K instead of 6000K.
Excellent! I’ve been thinking about your post for a while now and finally got the spirit to go ahead-:) This has to be the first time I have read and understood what Kelvin’s are. I just wanted to say keep up the good work!
Late to the party, I have the XT4 how do in know what my current K temp is in auto for example, so I can decide I want to bump it up. Is there a quick way as K defaults to whatever was used last rather than what it is. Auto I don’t seem to find.
Hi Mike, there's no way of knowing in the camera and unfortunately going to manual K won't start where AUTO was; I guess they figured that people who use manual K don't care what the AUTO value was. If you want a consistent cooling or warming while staying in AUTO, you can try using the White Balance Shift feature. Otherwise you're just gonna have to experiment with the K values.
...while building 7 shooting 'recipes' in XT-3, and finding only 3 WB pre-sets, I looked at color temperature, and found a way to possibly fine-tune the look of my photos...in the digital world, I had mostly forgotten or ignored how important temperature was, and relied on the camera brain...thank you for this article, this info., and the color guide...always more to learn...always rewarding to find great resources !
Never rely on the camera brain 🙂
Very helpful John. I really enjoyed reading this. Thanks for creating the excellent diagram.
You're welcome Doug!
@John Peltier,
Thank you for this very interesting understanding of WB.
I am a fine artist trying to document his work and have switched to LED lights,
which are missing from your guide. Where would you rank them?
And, would you have any advice for anyone in my situation, documenting 2-dimensional artwork?
I'm using a Fuji X-T100,
Luis
LED lights are usually somewhere around 5500K, but you'll have to check with the specific lights you're using. The manufacturer should tell you. I'd recommend using the same exact lights if lighting with multiple lights just to avoid inconsistencies in the color. Light your art from the sides to avoid glare.