Disclosure: This post may contain affiliate links. I earn a small commission of product sales to keep this website going.
One of the biggest breakthroughs for new photographers is understanding Exposure Compensation. It really is one of those “ah-ha” moments that can immediately give you better photos!
How your camera “sees”
Cameras are smart, but not that smart. They don’t know what you’re capturing a photo of.
Are you capturing a photo of a bright snowy landscape? Or are you capturing a photo of a nighttime city street scene?
The camera just doesn’t know – and this is important to realize when thinking about how the camera will set the exposure.
Because the camera doesn’t know what the scene should look like in terms of brightness, it’s just going to expose the scene to make it a middle-gray brightness.
Your bright snowy scene will look dull and gray, and your nighttime city street scene will be way too bright and probably blurry due to the slow shutter speed required to make it that bright.
This is where you need to consider Exposure Compensation – a critical step in your photography that you should think about for every photo except when using Manual exposure mode.
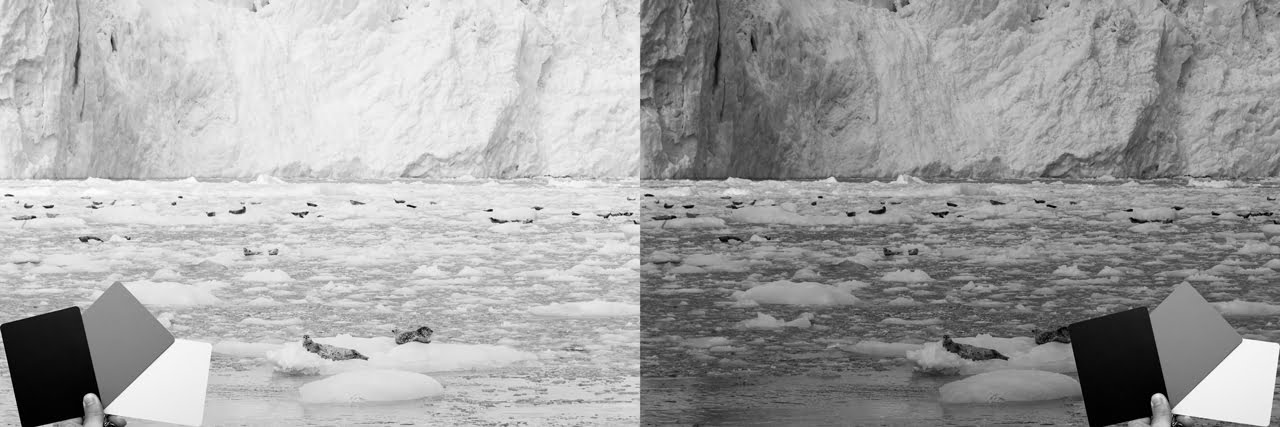
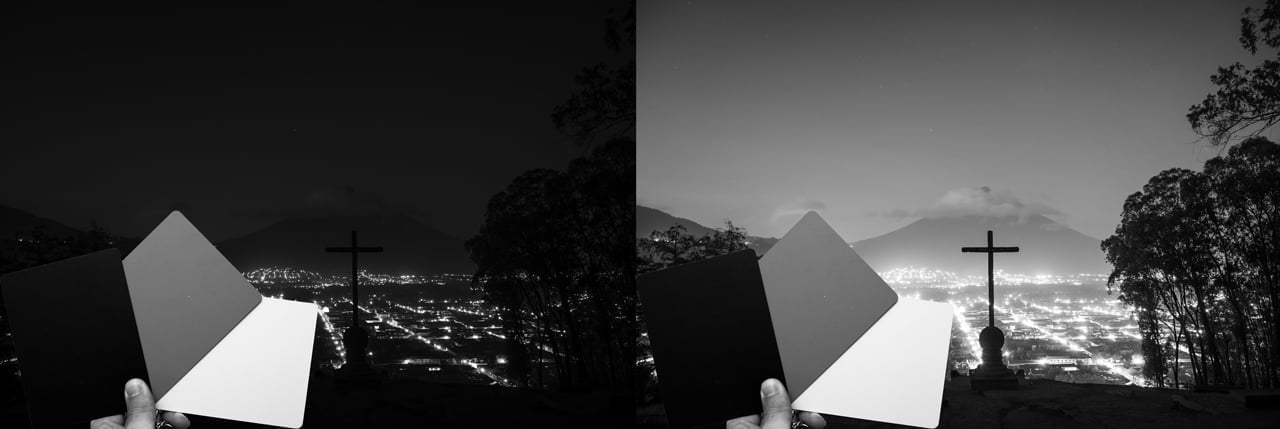
What is Exposure Compensation?
Exposure compensation is a feature available on almost all cameras. It allows us to fine-tune the brightness of our photos to make them darker or lighter, depending on our subject and our vision for the photo.
It’s essentially you telling the camera, “hey dummy, this scene is brighter than mid-gray, so make it brighter by this amount.” Or, “hey dummy, this scene is darker than mid-gray, so make it darker by this amount.”
Exposure Compensation is not used in Manual exposure mode because, in Manual exposure mode, you’re in complete control and doing that yourself by changing the aperture, shutter speed, and/or ISO.
When would you use exposure compensation?
An exposure compensation experiment
Do a simple experiment in either Program (P), Aperture Priority (A/Av), or Shutter Priority (S/Tv) mode.
Get a white piece of paper and take a picture of it – make it fill the entire camera frame. No flash.
Do the same with something that’s almost entirely black, like the back of a large picture frame. Again, take a picture of it, no flash, and make it fill the entire camera frame.
Now go to your Playback mode and compare the two images. They’re close to the same tone, or shade, right?
Here’s what happens when I do that experiment. I’m photographing a white board next to a black board. See how they have relatively accurate “brightness” when next to each other.
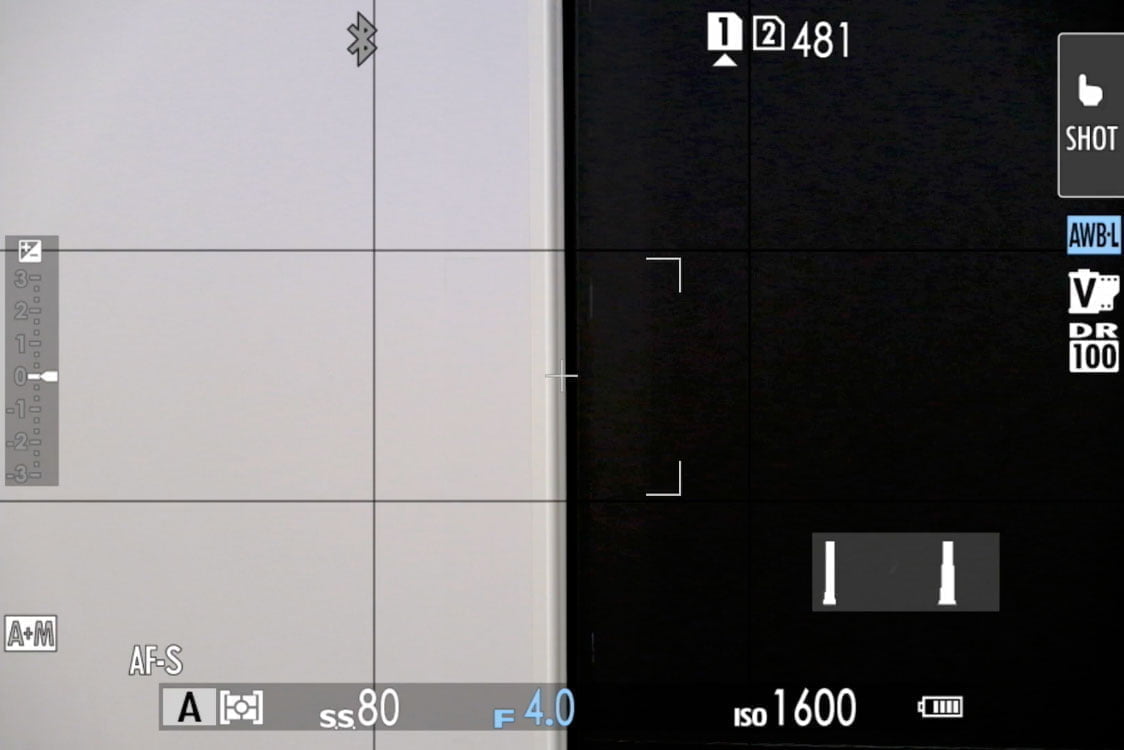
I move the camera over to the white side and capture the photo – it’s now a darker tone (left). Then I move the camera over to the black side and capture the photo – it’s now a brighter tone, almost the same as how the full white side looked (right).

A bright white object and a dark black object will be almost the same shade. That’s not how they look in reality!
The camera’s auto exposure will always want to expose your metered area to “middle gray” – it’s the camera’s recommended brightness for your picture. Because, again, it doesn’t know any better. It’s just going to assume an “average” of middle-gray.
When to use exposure compensation
This is why you use exposure compensation. You need to compensate for the exposure by telling your camera how bright or dark your scene is. Remember, the camera isn’t smart enough to know what you’re photographing.
When taking a picture of that bright white piece of paper, or snow, or clouds, we need to tell the camera that our scene is really brighter than gray.
Taking a picture of that black picture frame, or asphalt, or a night scene, we need to tell the camera that our scene is really darker than gray.
This should be something that should cross your mind before every shutter press. How bright (or dark) is this scene in relation to middle-gray? Maybe your scene does average out to a middle-gray tone, and you don’t need to use exposure compensation.
But, more than likely, your scene averages out to be brighter or darker than middle gray, and you do need to set exposure compensation.
Setting exposure compensation
Somewhere on your camera is an exposure compensation dial or button, usually marked with the +/- icon. Refer to your manual. It may be referred to as EV Compensation as well.

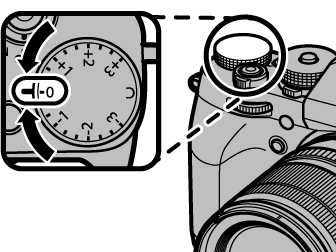
Exposure Compensation is typically unavailable in AUTO modes; it will only work in the following modes:
- Program Auto (P): The camera selects the shutter speed and aperture, but you can control the brightness with Exposure Compensation (EC).
- Aperture Priority (A/Av): You select the aperture, and the camera selects the shutter speed; you control brightness with EC.
- Shutter Priority (S/Tv): You select the shutter speed, and the camera chooses the aperture; you control brightness with EC.
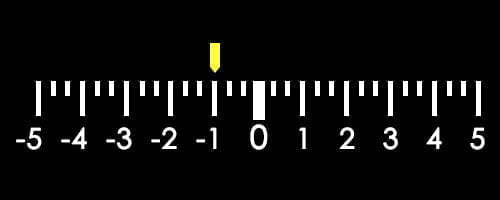
In addition to the dial/button, there’s a metering scale on your LCD or viewfinder. The scales are usually divided into minor tick marks and major tick marks, or numbers. Each large tick mark or number is one “stop” of light, while the smaller marks can be set to 1/3 or 1/2 increments.
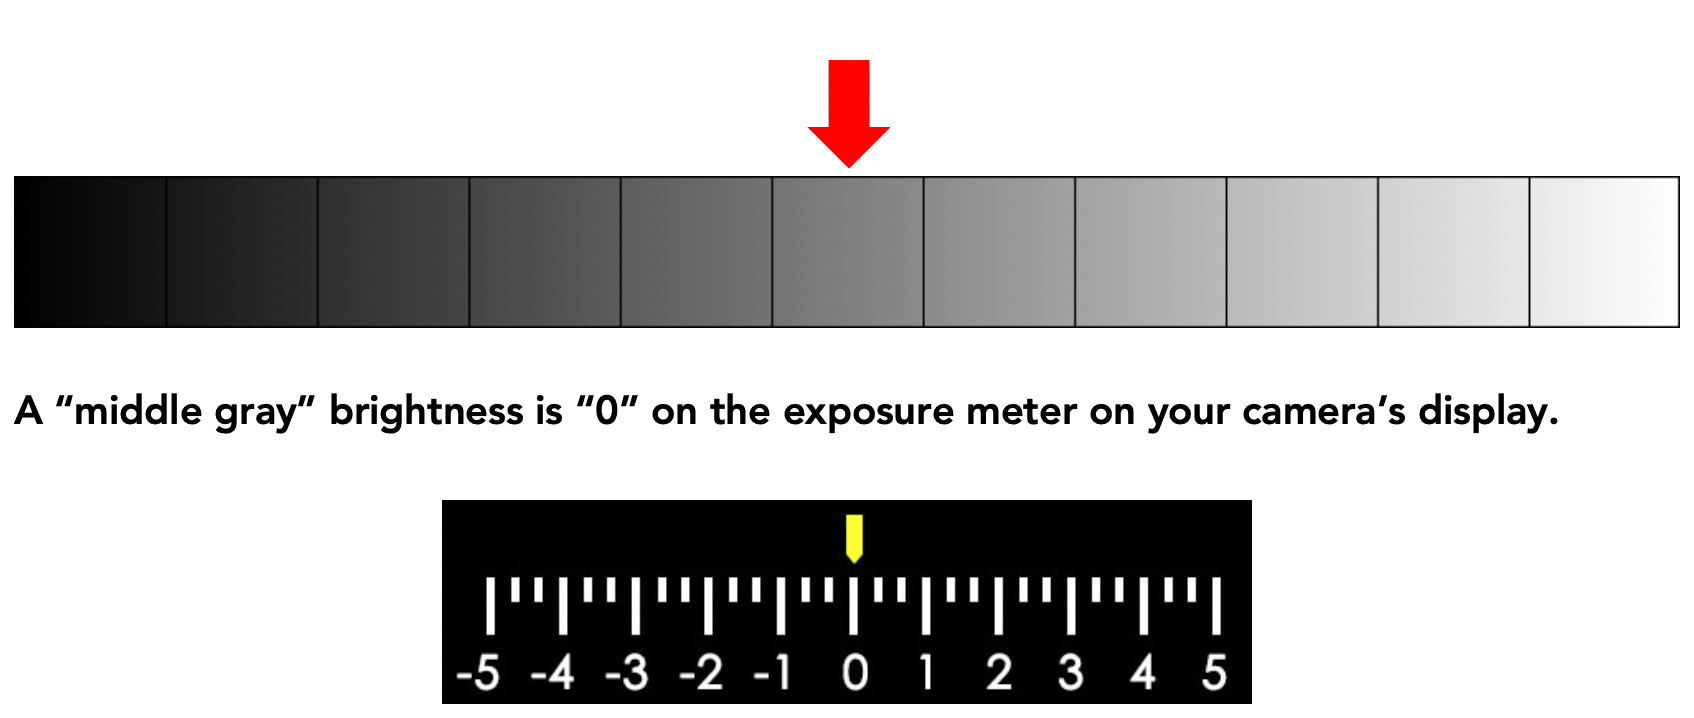
You can go through my free Exposure Triangle for Beginners course to learn more about stops and these different exposure modes.
The positive and negative sides can be set to your preference, and different manufacturers have different defaults. However, moving toward the “+” makes the image brighter, while moving the cursor toward the “-” makes it darker.
Exposure compensation Rules of Thumb
There are some generalizations to start, depending on your subject. Again, these are generalizations – they could be different depending on the lighting and reflectance of your subject. But they’re an excellent place to start, and you can adjust your exposure compensation from there.
- A blue sky at midday is generally the same reflectance as mid-gray, so set it to zero. Same with photos at dusk or dawn.
- Clouds and bright snow in daylight, +2.
- Asphalt, -2.
- Green vegetation or forests, -2/3 or -1.
- Human faces: +2/3 for average Caucasian skin tone, -1 to -2 for African skin tones.
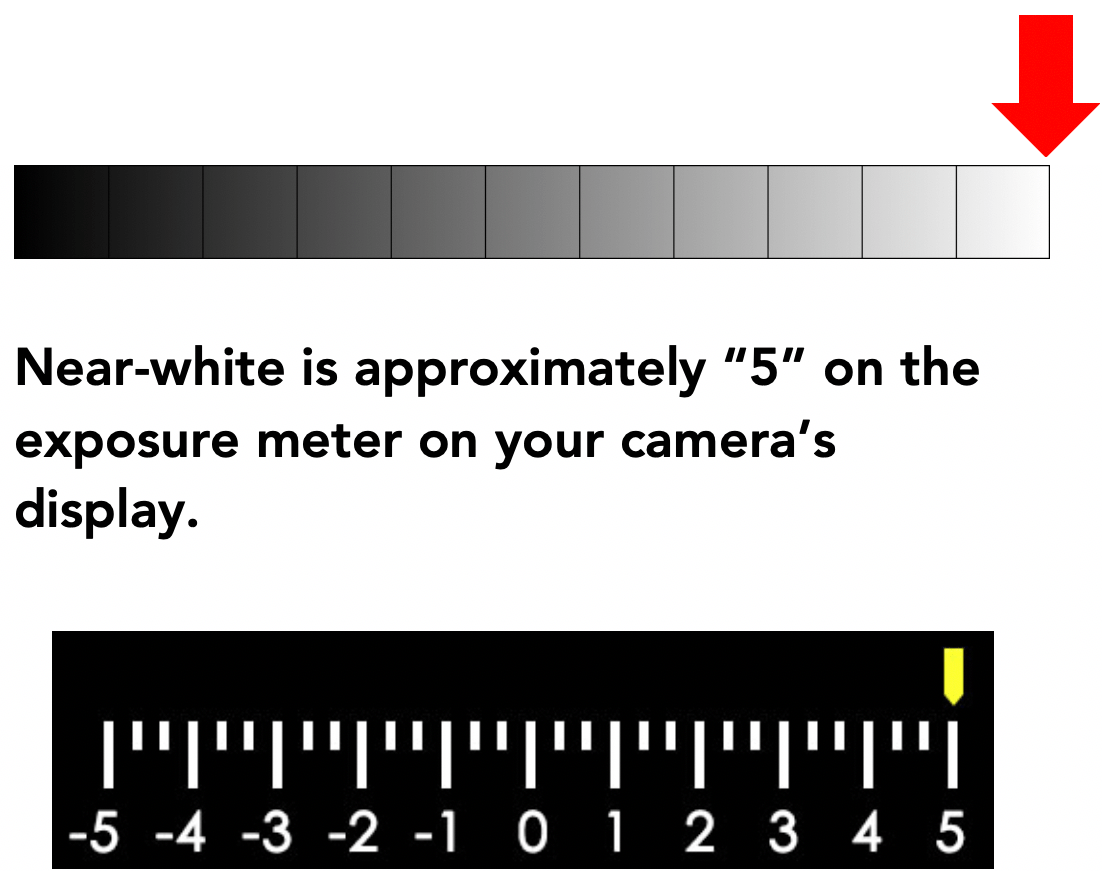
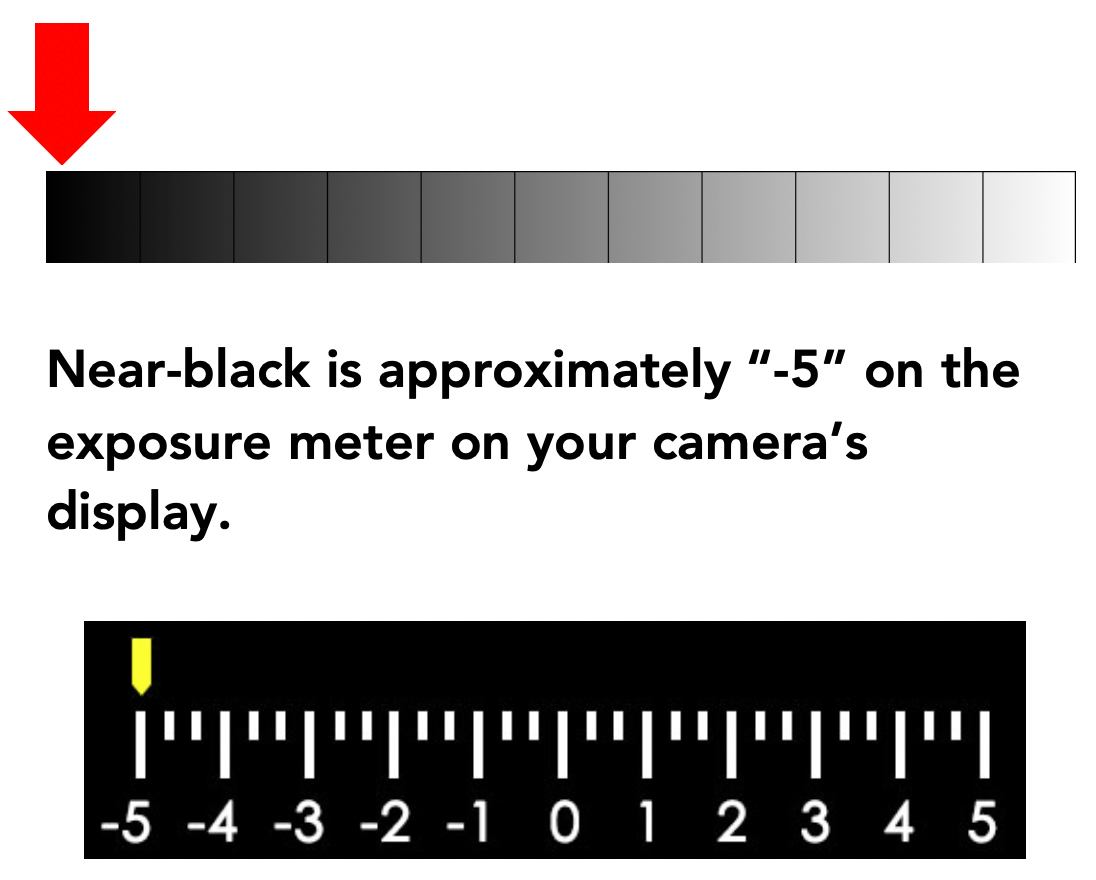
Let’s go back to our earlier exposure compensation experiment. Now watch what happens when I set +1.7 when photographing the white side and -2.3 when photographing the black side – it finally looks accurate!

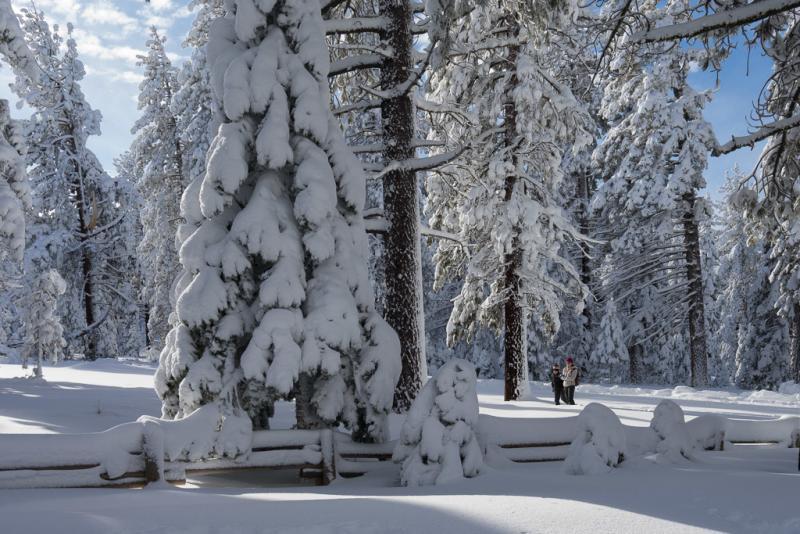
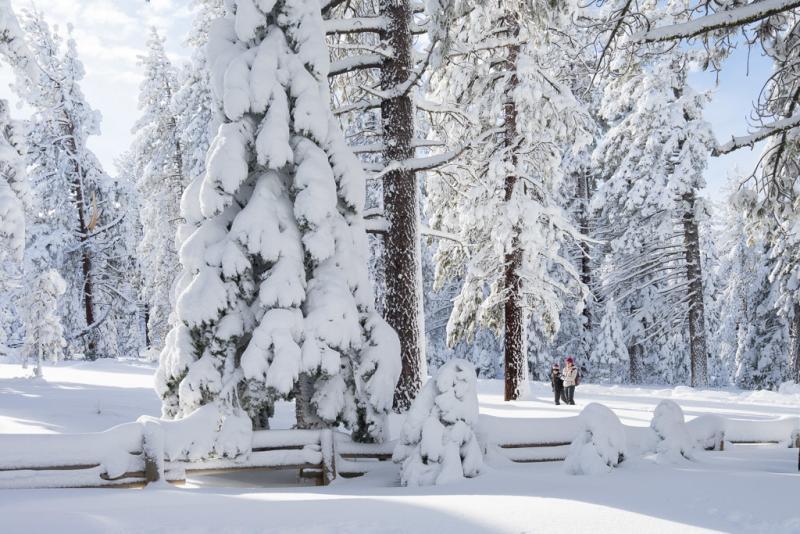
Look at the example below. The top image is what happens when the camera thinks for you. The snow appears gray instead of white. The bottom image is when you set the exposure compensation to +1.3, making the snow look like real snow!
There is no one correct method of how to use exposure compensation. It all depends on your vision for the photograph.
Go ahead and intentionally underexpose for silhouetting or overexpose when a “washed-out” look may be appropriate.
It may help you to read my post about the Zone System for digital photography to understand exposure compensation further.
And if you’re using a mirrorless camera, you have the real-time histogram in your display as another tool to help you with exposure compensation.
You can, again, reference my free Exposure Triangle for Beginners course for a primer on the exposure triangle and exposure modes.
Once you know which exposure mode to use and when, and throw in Exposure Compensation, you’ll see immediate improvements in your photography!
Do you have any questions or anything to add? Let me know below!

adam
Sunday 8th of March 2015
Great post. I didn't really understand exposure compensation before. I will find your tips handy next time I'm out picture hunting with my DSLR. Thanks for the info!
John Peltier
Sunday 8th of March 2015
Thanks Adam, keep checking back for more content. Happy hunting!
Lisa vance
Sunday 8th of March 2015
You are my hero,. Lighting is the bane of my life. I make Amazon reviews and half the time they turn out orange,,,, i bought new lights,i fixed a new background,still not right,now i know why. I have been doing the exposure on auto!!! Thank you so much for the info. Lisa
John Peltier
Sunday 8th of March 2015
Hi Lisa, glad I could help. If you're having problems with the colors not turning out right, you can also check out my post "Three Ways to Correct White Balance". Thanks!
Adam
Sunday 8th of March 2015
I am a real noob when it comes to taking pictures, but this is a tip that I can really take into account. I never even knew about exposure compensation. Thanks for this.
John Peltier
Sunday 8th of March 2015
Thanks Adam. Surprisingly, a lot of people have no idea about this camera feature. But I think it's one of the most important to understand!
Fred Smith
Sunday 8th of March 2015
I LOVE the simple, yet clear explanation of exposure compensation. I was professional for many years and will definitely bookmark and refer people who come my way asking to know more about photography!
John Peltier
Sunday 8th of March 2015
Thanks for the endorsement Fred! Glad I'm on the right track. I'll keep adding content regularly!