Disclosure: This post may contain affiliate links. I earn a small commission of product sales to keep this website going.
I love backpacking and I’m a camera gearhead. Unfortunately, these two don’t mix well. Here are some lightweight photography tips I’ve learned through thousands of miles of sore shoulders and worn-out feet. The most important thing to remember:
LESS IS MORE!
That is definitely true for the rest of my backpacking gear.
1) Ditch the tripod
Ditch the what?!
I know this won’t work for every situation, but a tripod is probably the single heaviest piece of equipment that photographers carry. This is one of the best lightweight photography tips that you can learn to embrace. If you teach yourself to shoot sharp pictures without a tripod you won’t always have to carry one. And you’ll probably find you shoot more photos when you aren’t constrained by a tripod.
You have to ask yourself: Will I use the tripod enough to justify the weight?
Ways to stabilize handheld photos without a tripod:
- Bump up the ISO. You don’t always have to shoot at ISO 50! Many new cameras will still shoot fine up to ISO 3200.
- Image stabilization. This will let you set a longer shutter speed by a few stops. Some cameras and/or lenses offer this technology.
- Shoot in Burst. If my shutter speed is near the inverse focal length of my lens (i.e. slower than 1/20 sec at 20mm), I shoot multiple shots in burst mode. One of them will come out sharp, especially with image stabilization.
- Posture. I’ll take a deep breath, rest my elbow against my chest, and click away.
When you do need stabilization in the middle of nowhere:
- Use your pack for stabilization.
- Your trekking pole is a monopod! Flip your trekking pole upside down. Some tips fit perfectly in the 1/4″ mounting hole on the bottom of the camera.
- Always use a cable release or the camera timer 2-second delay. If your camera has a mirror lock-up function, that will reduce vibration even more.
When you do need the tripod…
Yes, there will be times when you want a tripod.
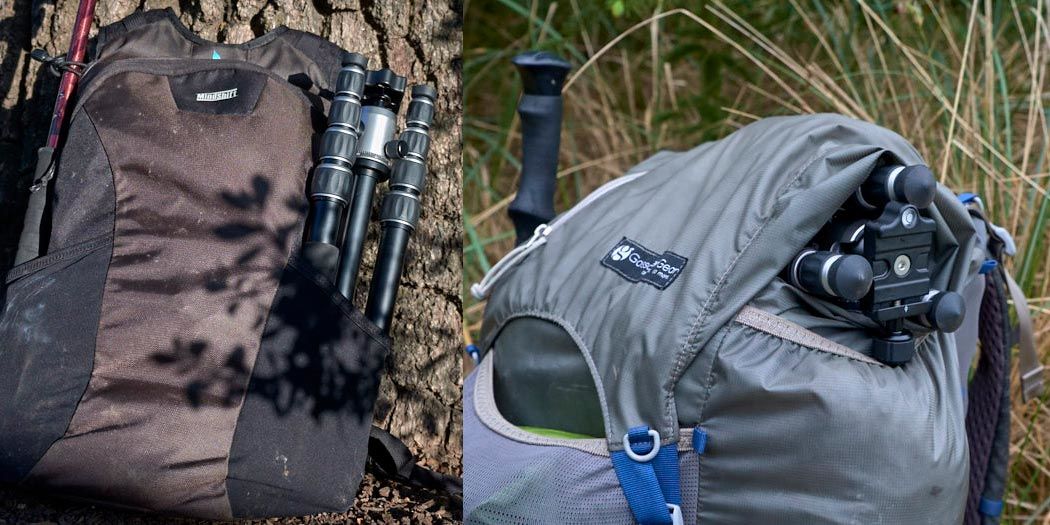
My choice is the MeFOTO Backpacker, a portable and lightweight tripod perfect for backpacking. You can read about even more lightweight backpacking tripods in my Five Best Lightweight Tripods for Backpacking and Travel.
Weight Savings: one to three pounds.
2) Evaluate which lenses you really use
You really want a wide-angle lens for the landscapes, a telephoto zoom in case you run across a bear or see a bald eagle, and a prime lens for a portrait or two.
How much do all these lenses weigh?!
Ask yourself: What do I really need? What will I use the most based on my subject matter?
Plan ahead and really think about which lens you’ll be using the most. Be practical about it.
If you’re going to carry a telephoto lens for that chance wildlife encounter but you’re mostly shooting landscapes, will you be ready to swap lenses before you miss your opportunity? Because if not, you’re carrying another couple pounds for nothing.
Review historical lens data
Go through EXIF data from all of your backpacking & hiking trips.
What’s the most common focal length range that you use? I wish I had known about this lightweight photography tip a lot sooner.
I found that I rarely used the 70-200mm lens that I had been carrying on these trips. That’s two pounds I schlepped around for hundreds of miles to only capture a dozen shots. Two pounds is a lot for someone trying to keep their total pack weight under 30 pounds!
If you don’t have a history of EXIF data or just aren’t sure, carry your camera on day hikes with a few lenses and see which one you end up enjoying & using the most. That’s your winner!
If all you shoot is landscapes, then something in the range of 16-35mm (full-frame sensors) is a good range. Do you want to shoot a little tighter? Then 24-70mm is good, and you can always stitch together multiple shots for those sweeping landscapes you’d only be able to get with a wider angle.
If you want maximum versatility you can get a variable aperture zoom with a focal range that covers the standard ranges. Fujifilm makes the best I’ve ever used with their 18-135mm f/3.5-5.6 zoom (equivalent to 27-206mm).
Weight Savings: one to three pounds.
3) Get creative with lighting
Most photographers throw in a shoe-mounted flash or two into their kit without giving it a second thought. With this comes ETTL cords, gels, light modifiers, stands, triggers, and so on.
Going back to rules 1 & 2, will you really use it?
If you’re with a large group and plan on doing portraits and/or action shots, then you’ll probably want one high-powered speedlight and a way to get the flash off-camera. And probably some gels and a portable diffuser as well. I like the Rogue system for its versatility. The small stand included with the speedlight and some bungee cords may be necessary to keep the flash where you want it. You can see what I put in a light, beginner’s flash kit here. Total weight: less than two pounds.
For those times when there’s a small chance you’ll need to manipulate light, I always carry a Cowboy Studio Portable Reflector in my pack. It has a handle, white balance assistance, and two reflecting materials (silver and gold). This 24″ reflector folds down to 10″ and weighs less than eight ounces.
Weight Savings depend on what you used to take with you, but I cut down between one to three pounds.
4) Keep the camera at the ready
It’s true: if you keep your camera in your backpack, you’re less likely to take pictures.
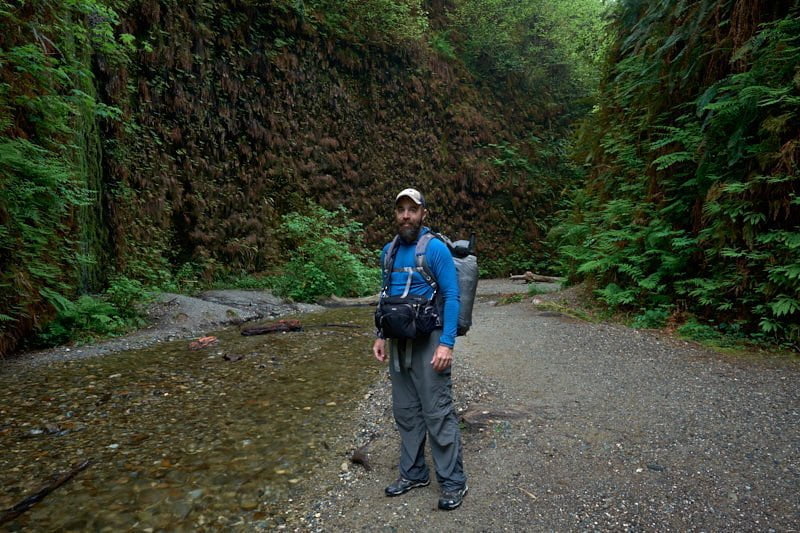
Who knows what you’ll miss! The best camera bag for backpacking is one you can wear in front of you. You’ll also want easy access to extra batteries and lens cleaner. This lightweight backpacking tip will ensure you always get the photo.
Hip belts aren’t just for nerds
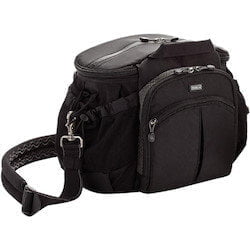
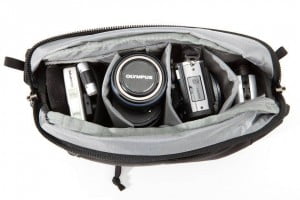
I’ve become a fan of hip belts. No, not a fanny pack, a hip belt (I know they’re kind of the same). My primary hip bag right now is Think Tank’s Speed Demon. I can hold one mirrorless camera, a lens, speedlight, batteries, cleaning supplies, and more (see my Camera Bag Essentials post to see what my minimum gear is).
Put this on first, then your backpack. It’s comfortable and everything you need is right in front of you. It also has a built-in rain cover for protection from the elements – an essential item. This pack also has a well-padded shoulder strap for conventional carry.
If you want to go even more minimalist, there’s Think Tank’s Hubba Hubba Hiney with Thin Skin Belt. I’ve always loved Think Tank’s products because they’re functional and durable. This one is a low-profile version of the Speed Demon. It also comes with a rain cover and a shoulder strap for other daily use.
Weight Addition: 1.5 pounds.
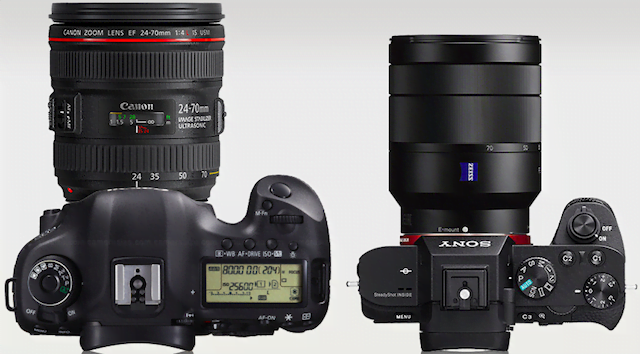
5) DSLRs are out
There, I said it.
Mirrorless cameras have been around for a few years now and have improved tremendously since their release. I don’t know if this is necessarily a lightweight photography tip, but rather a complete mindset shift.
The electronic viewfinder takes some getting used to (versus a DSLR’s pentaprism viewfinder) but it’s great to see what your exposure will look like through the viewfinder.
And the size and weight. My God. They’re so much smaller and lighter than DSLRs and they’re just as much, if not more, capable than their comparable DSLRs. This is just one of the many advantages of mirrorless cameras.
If you’re worried about giving up your lens collection you can get adapters. You may lose some functionality but a good lens is a good lens.
Mirrorless lenses can also be made smaller and lighter than their DSLR counterparts.
Mirrorless disadvantages can be overcome
Just don’t expect much out of the battery – the EVF uses some juice but I’m confident that the technology will improve. If you practice these mirrorless battery-saving tips you’ll be able to extend the battery further. There are a few other mirrorless camera disadvantages you can read here.
Here’s a post comparing Sony mirrorless cameras; you can read this one about my switch to Fujifilm mirrorless cameras.
Weight Savings: one to five pounds.
Total Savings
So we’ve cut down between roughly four and ten pounds by using these lightweight photography tips. That could be anywhere between 10-50% of your base pack weight!
Your shoulders, knees, and feet will thank you. And you’ll get better images because you’ll be a happier traveler!
Did I forget anything? Add your comments below!
Donna
Wednesday 29th of April 2015
I'll probably still be carrying too much gear five years from now. I went canyoneering Monday in Arches with my Canon 5d mark ii and 24-105 lens in the top of my bag. It was heavy, but worth it.
John Peltier
Wednesday 29th of April 2015
Hi Donna, yeah those are usually my two main pieces of equipment, though lately I've fallen in love with the 16-35mm f/4. I'll be doing the John Muir Trail in June and my goal is to carry less than 7 pounds of camera gear so that I can keep my total pack weight around 30 pounds. We'll see how that goes!
Dave
Wednesday 25th of February 2015
Yes...go to confession now! iPhoneography will continue to evolve and there's no avoiding it. The picture quality has improved by leaps and bound over the years and can't wait to see what develops in the years to come! Anyway, great post on lightweight backpacking tips. I used to do a lot of backpacking and always tried to gear down as light as possible, but never wanting to sacrifice on camera gear. Never took a tripod with me...always able to find something at hand.
John Peltier
Wednesday 25th of February 2015
I'll still be that one guy carrying around a heavy SLR in twenty years while everyone else is taking better pictures on their phone. Ha! I laugh about it now but I fear it'll come true. It's really tough to leave some of your camera gear at home when you go on a trip like that, but very necessary. Thanks for participating.