What is Fujifilm's White Balance Bracket Feature?
Disclosure: This post may contain affiliate links. I earn a small commission of product sales to keep this website going.
Fujifilm cameras have a lot of drive mode features - multiple exposures, bracketing, and so on. One of these bracket features is White Balance Bracket. It's a feature that I'm sure not many people use, and even less know that it's there. But there are times you may want to use White Balance Bracket, and that's what we'll cover in this post.
How to use White Balance Bracket is also covered in my Advanced Fujifilm Drive Modes course and Perfect Fujifilm In-Camera JPEGs course, which are included in my Fujifilm X Course Membership.
White Balance Problems
If you want to spend more time photographing and less time processing - a reason many Fujifilm photographers use these cameras - you'll want to get the correct colors at capture.
Fujifilm cameras are, for the most part, pretty good at choosing a neutral color balance in AUTO WB.
But there are times where your composition can fool the camera, and you'll end up with photos that are warmer or cooler than they should be. This is one reason why I'm an advocate of setting your white balance in the camera, rather than using AUTO all the time. If you're photographing for the JPEG, you'll end up with colors that you can't really fix later on.
I even think it's a good idea to set a manual white balance even if you're shooting RAW, as a reminder of how you thought the colors should have looked or how you felt at the time you captured the image.
Sometimes Manual Isn't Even Enough...
But even if you are setting a manual white balance in-camera, or using advanced white balance features like Fujifilm's Auto White Balance Lock, you can still end up with photos that just don't look right after the fact. You think the colors are right in the viewfinder. But when you review them later, you say, "man, I wish these were just a touch cooler. They're a little too warm for the feeling I wanted."
You could take those JPEGs into a processing program like Lightroom or Snapseed and make some color corrections. But there are two problems with that:
- The whole point of shooting for the JPEG is to not have to do this.
- Color balance in a JPEG can only be adjusted so much until the colors start breaking down.
Wouldn't it be nice if, in some situations, our camera gave us a few color variations to choose from?
One Way to Fix White Balance Problems
The subject of this post is one way to address these problems.
What Does White Balance Bracket Do?
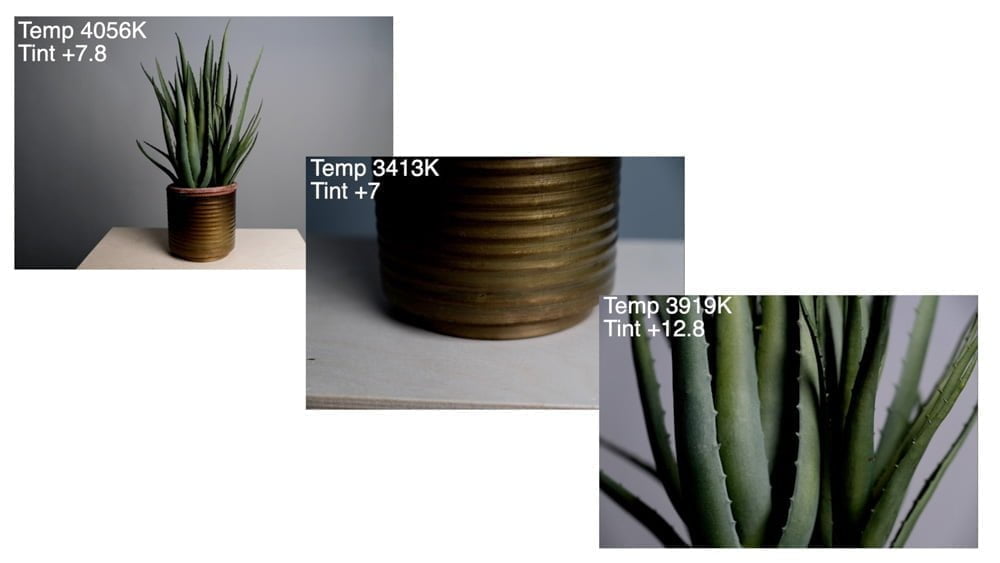
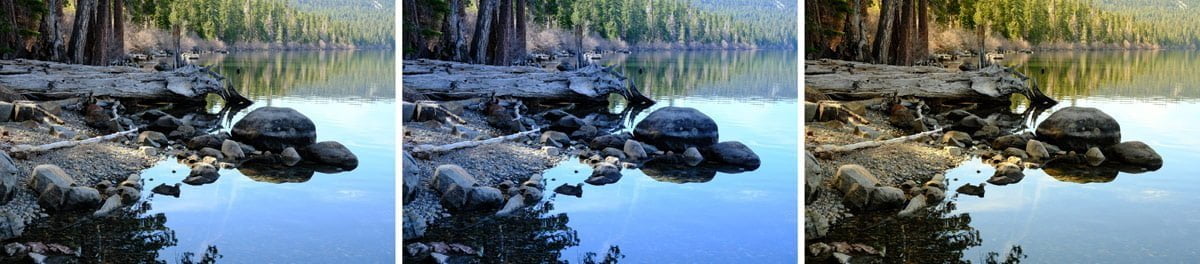
White Balance Bracket will capture one photo but create three files processed with different white balance settings. These will either be RAW or JPEG files depending on your file recording setup.
You can initially capture the photo in Auto White Balance, a Kelvin color temperature, presets, or a custom white balance. No matter which White Balance setting you use, when you bracket you'll end up with three different variations of that setting.
When to Use This Bracketing Mode
You may say, "oh this is exciting I'm going to use it all the time!" Not so fast.
First of all, you can't use multiple different bracketing modes at once. You have to choose one, and a different bracketing mode might take priority.
Second, and the most important fact to consider, is that you will have three times as many photos.
I know some of you. You fully take advantage of being able to store thousands of photos on a single memory card 🙂
This is true of all bracketing modes. Only use it when you really need to, when you really need its help. Because otherwise you're going to have to go through three times as many photos as you took, and no one wants to review that many photos.
Use White Balance Bracket only when you're just so flummoxed by the color, and it's that important to you, that you need to have a few options for every capture.
White Balance Bracket Settings
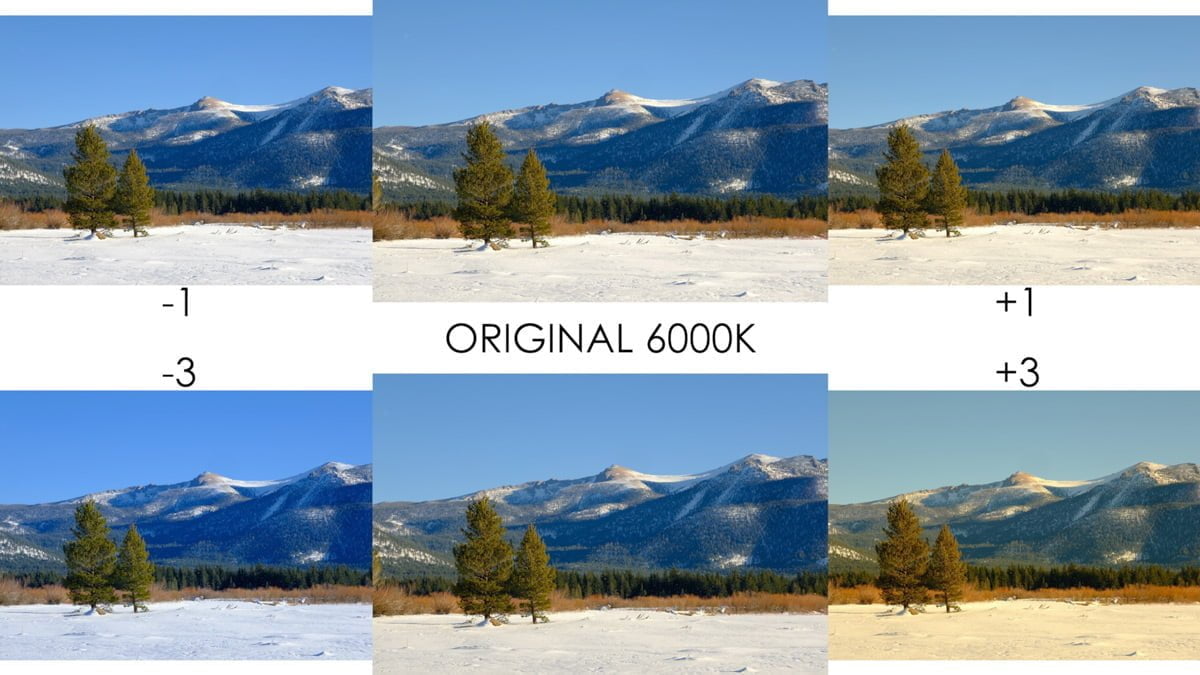
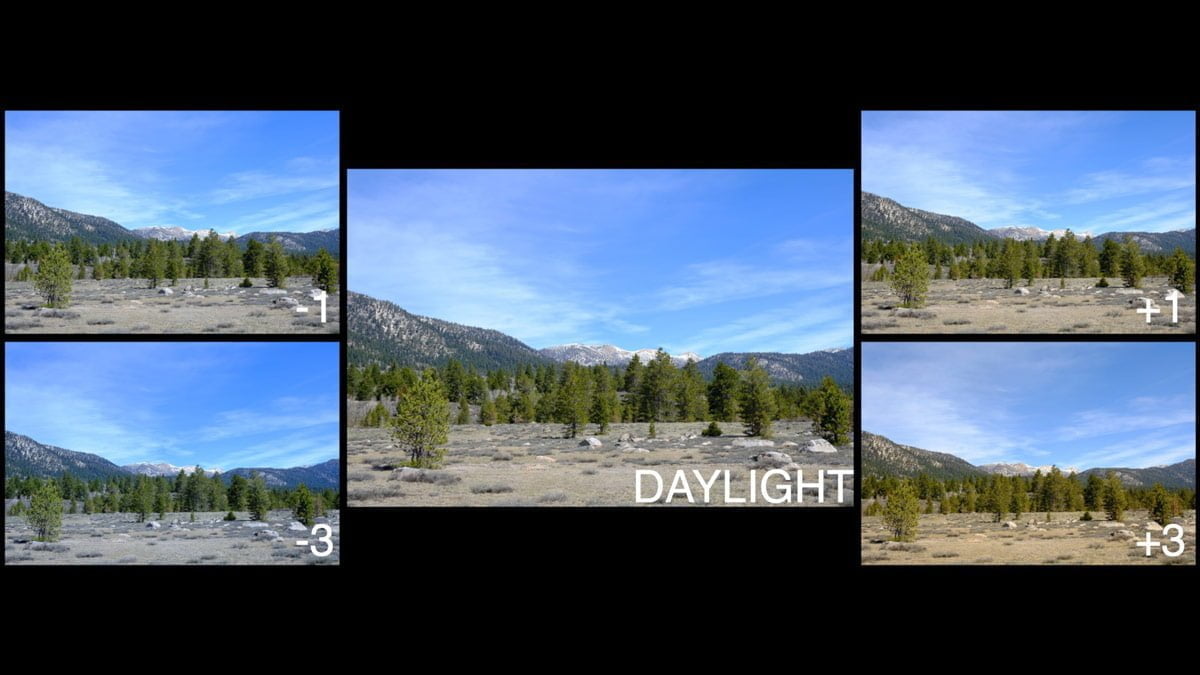
You will see three different White Balance Bracket settings (found in different places on different cameras; we'll get there in a second). Those settings are +/- 1, +/- 2, and +/- 3.
If you've looked in the Fujifilm manual to understand this, all it says is, "Select fine-tuning by the selected amount." Well, okay, is this color temperature? Tint? Multiples of something?
The fact of the matter is that there is no way to calculate the temperature/tint change for each one of those settings. It's just "a little," "more," and "the most." I've run countless tests on this and I get different temperature/tint adjustment combinations for different strengths, scenes, and white balance settings.
If your current white balance settings are pretty close and you just want to see small variations from that, select +/- 1. If you think you might be close but want to see some larger variations, select +/- 3. That's about as scientific as we can get, and I know that's going to drive some of you bonkers. Sorry.
Getting into White Balance Bracket
So how do we get there? It's different depending on the camera.
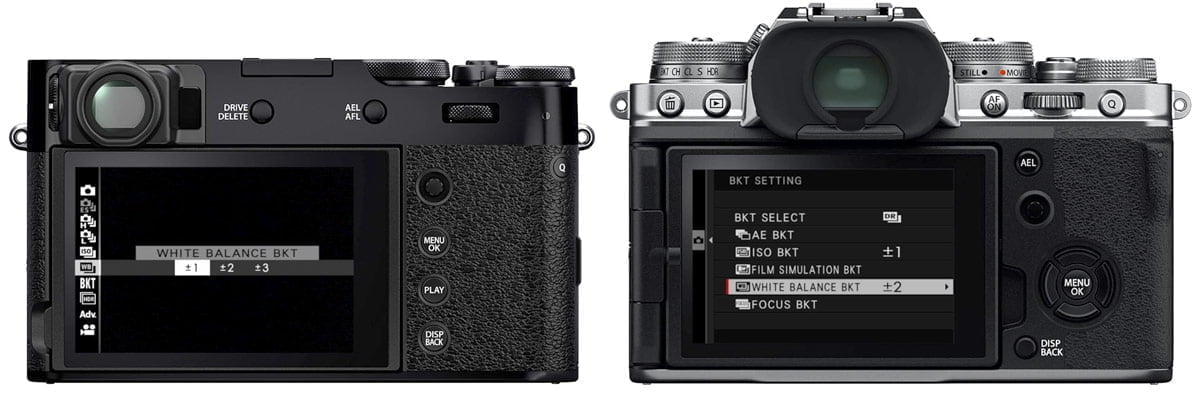
If your camera has a DRIVE button (X-E/X100/X-Pro series, X-S10), press DRIVE and then find WHITE BALANCE BKT. There you can select the strength of the bracket. You're now in White Balance Bracket.
If your camera has a Drive Dial (X-T series), you'll have a little more work to do.
- First, go into the SHOOTING SETTING menu. Go into the DRIVE SETTING menu, BKT SETTING, then WHITE BALANCE BKT. Set your strength there. All you've done is set the strength.
- Then you need to select WHITE BALANCE BKT under BKT SELECT. All this means is that when your Drive Dial is set to BKT, it will bracket White Balance.
- Finally, set your Drive Dial to BKT to actually use this feature. On cameras like the X-T30 with a BKT1 & BKT2, just set the corresponding number in both your menu and drive dial.
From there, just set your "base" white balance using any of the settings offered in the White Balance menu. You will know that White Balance Bracket is activated by looking for the "WB BKT" symbol amongst the other symbology in the shooting display.

Compose, check your exposure, focus, and press the shutter button once. The camera will process three different versions of that photo with variations in color. Afterward, just pick the one that looks best to you and delete the rest if you want to clean up your files!
Hi John,
thanks for another useful, well explained and illustrated article.
I was aware of different options for bracketing, but have not WB bracketing used it yet. When I was not satisfied with the auto WB on site I manually changed it to e.g. cloudy which was leading to too warm looking images (though nice in autumn).
Thanks to your article will test the WB bracketing this weekend!
Cheers from Germany
Wolfgang
You're welcome, I hope it helps you get better white balance!