Disclosure: This post may contain affiliate links. I earn a small commission of product sales to keep this website going.
For photographers who want the best possible images straight out of their cameras, Fujifilm gives us outstanding options for better in-camera JPEGs.
Two options for dealing with high-contrast scenes are Dynamic Range and HDR. These settings are not interchangeable with one another. In this article, we’ll look at the differences between Dynamic Range and HDR, when to use each, and how to use them.
Please note that HDR is not available in all Fujifilm X cameras; it’s a newer feature found in models released starting in late 2019 (X-Pro3 and on).
Difference between Dynamic Range and HDR
As mentioned in the intro, both Dynamic Range and HDR help us deal with high-contrast scenes. Scenes where we want to increase our exposure to see the texture and details in the shadow (dark) areas but don’t want to overexpose our highlight (bright) areas.
We call this “increasing dynamic range,” meaning we can more properly expose both the dark areas and the bright areas in one single image. This helps us preserve the texture, detail, and color in those extreme tonal ranges.
These settings aren’t magic bullets, and there’s only so much they can do. If there’s way too much contrast in a scene, neither of these settings will be able to pull it off.
The end results may look similar between the two settings, but the mechanics of how they work are extremely different.
How Dynamic Range works
The basic gist of how Dynamic Range works is this: the camera will capture one image, and that initial capture will be underexposed. This helps minimize overexposing the highlights. Then the processor increases the brightness of all but the brightest pixels, bringing everything back to the exposure you wanted without touching the highlights.
This is why the Dynamic Range settings require a certain minimum ISO. You can read more about how Dynamic Range works in this article; this article explains the differences between Dynamic Range and Dynamic Range Priority.
If you’ve used Lightroom, Photoshop, Capture One, ON1 RAW, or any other post-processing program, think of it this way. You pull down the Exposure slider to make the highlights darker and then push up the Shadows slider to make the darker areas as bright as the initial desired exposure. Crude analogy, but it’s a similar concept with the Dynamic Range setting.
How HDR works
HDR works just like the traditional method of creating an HDR image, but in-camera.
When you press the shutter button, instead of capturing one image like Dynamic Range, the camera will now capture three images. One exposed as you set, one overexposed (to bring up the shadows), and one underexposed (to bring down the highlights).
The processor will then combine the three images into one that has a higher dynamic range than any of the single images by themselves.
Settings for Dynamic Range and HDR
This is where things can start to get a bit nebulous.
I can give you the basic numbers in terms of “stops” but that doesn’t mean much to a lot of people, and in practice, the results aren’t that easy to see.
Here are the settings available for Dynamic Range and HDR, what they mean in terms of numbers, and what they mean in terms you can use.
Dynamic Range
The Dynamic Range setting has four options. You’ll find these in the IMAGE QUALITY SETTING menu.
- DR 100. This is the same as “Off”. No processing is applied.
- DR 200. This attempts to add “one stop” of dynamic range. Best when you have some contrast you want to fix but it’s not overwhelming. Requires a minimum ISO of 400 (older cameras) or 320 (newer cameras).
- DR 400. This attempts to add “two stops” of dynamic range. Better for scenes with much more contrast. The highlights are really bright and you want to pull them down. Requires a minimum ISO of 800 (older cameras) or 640 (newer cameras).
- DR AUTO. A great setting when you’re working in scenes of mixed contrast and you want to let the camera choose between DR 100 or DR 200 for each shot. It won’t consider DR 400. Requires a minimum ISO of 400 (older cameras) or 320 (newer cameras).
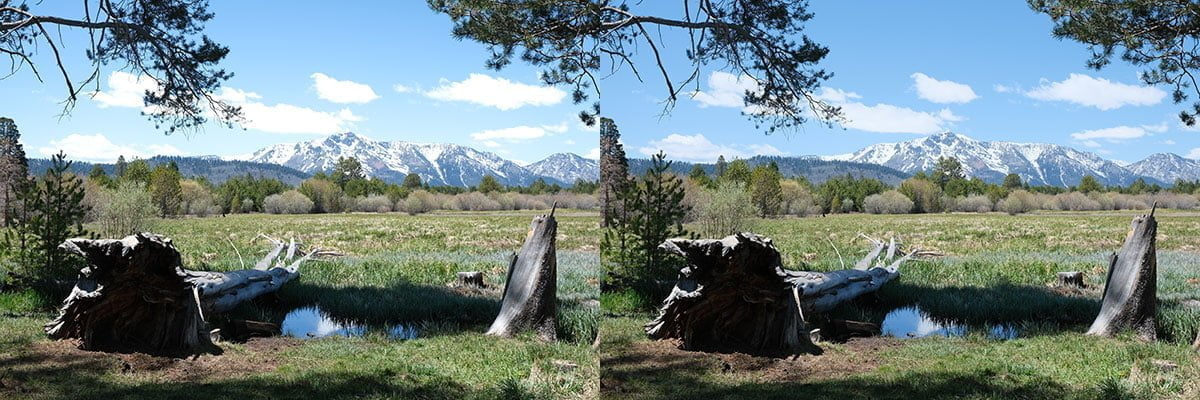
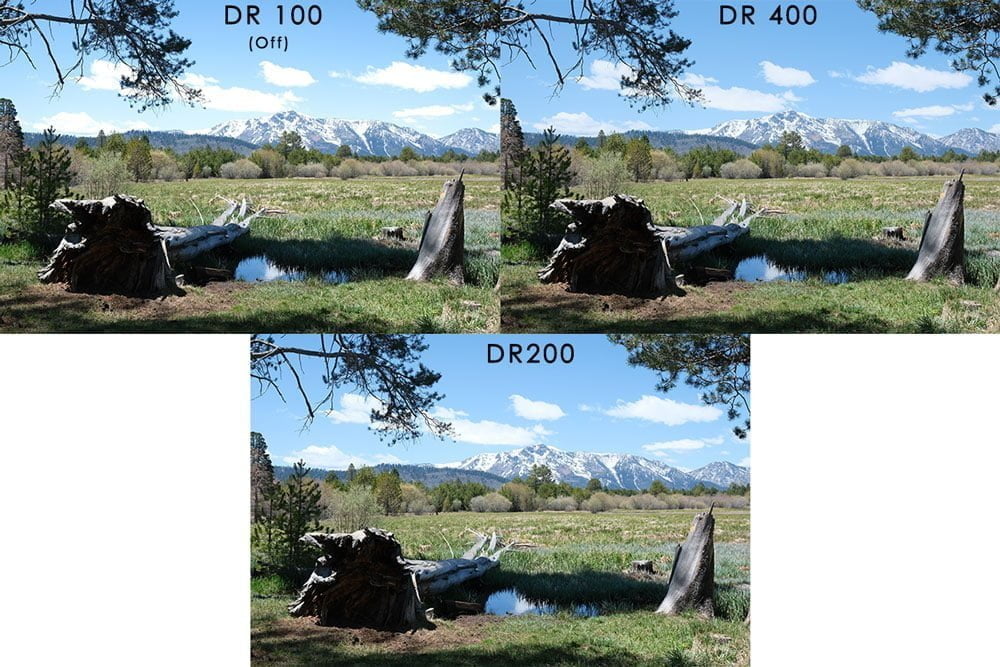
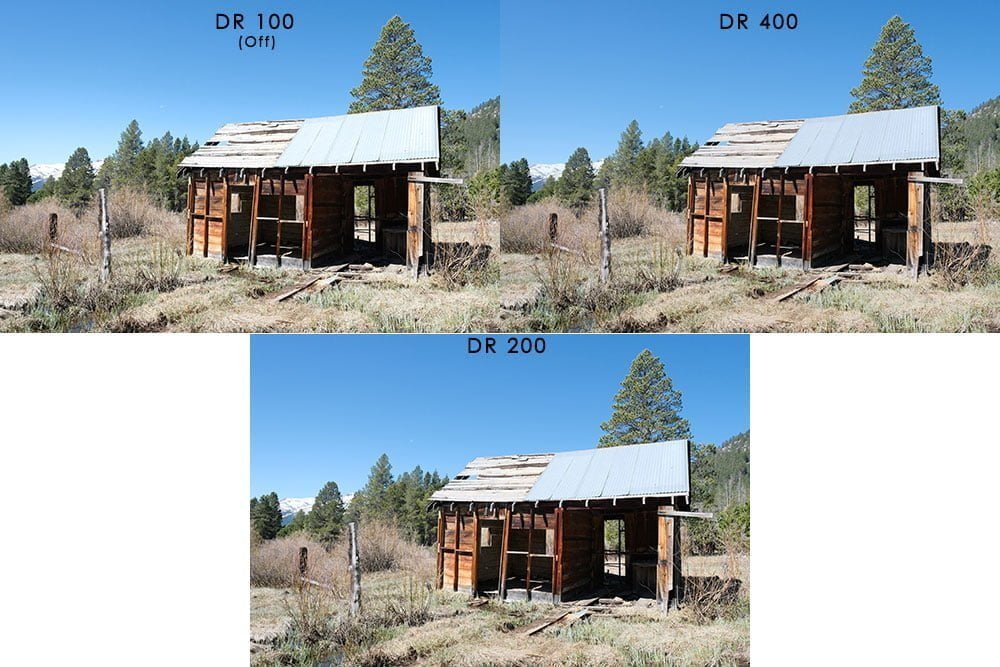
Here are some examples of what scenes look like with DR 100 (Off), DR 200 (1 stop), and DR 400 (2 stops). Notice the subtle differences in the highlight (bright) areas between each photo while the shadow (dark) areas are unchanged.
HDR
HDR has five options. The settings are in different locations depending on the camera.
- If your camera has a DRIVE button, you’ll find this under HDR after pressing DRIVE.
- If your camera has a Drive Mode Dial, you’ll find these in the SHOOTING SETTING menu under DRIVE SETTING.

The camera manual is a little vague explaining what each option does, but if we compare HDR to Dynamic Range, we can glean the following:
- 200%: Adds one stop of dynamic range, similar to DR 200. Good when there’s not too much contrast, or you want a very subtle (almost unnoticeable) HDR effect.
- 400%: Adds two stops of dynamic range, similar to DR 400. For higher contrast.
- 800%: Adds three stops of dynamic range. Best for very high contrast scenes because the HDR effect is more pronounced, but still doesn’t look too “fake”.
- 800%+/PLUS: Also takes control of your Tone Curve (Highlight & Shadow Tone) and Clarity settings to give you reduced contrast. Use only when you want a more obvious “HDR” effect.
- AUTO: The camera will choose between 200% and 800% based on the contrast it perceives. 800%+/PLUS will not be considered.
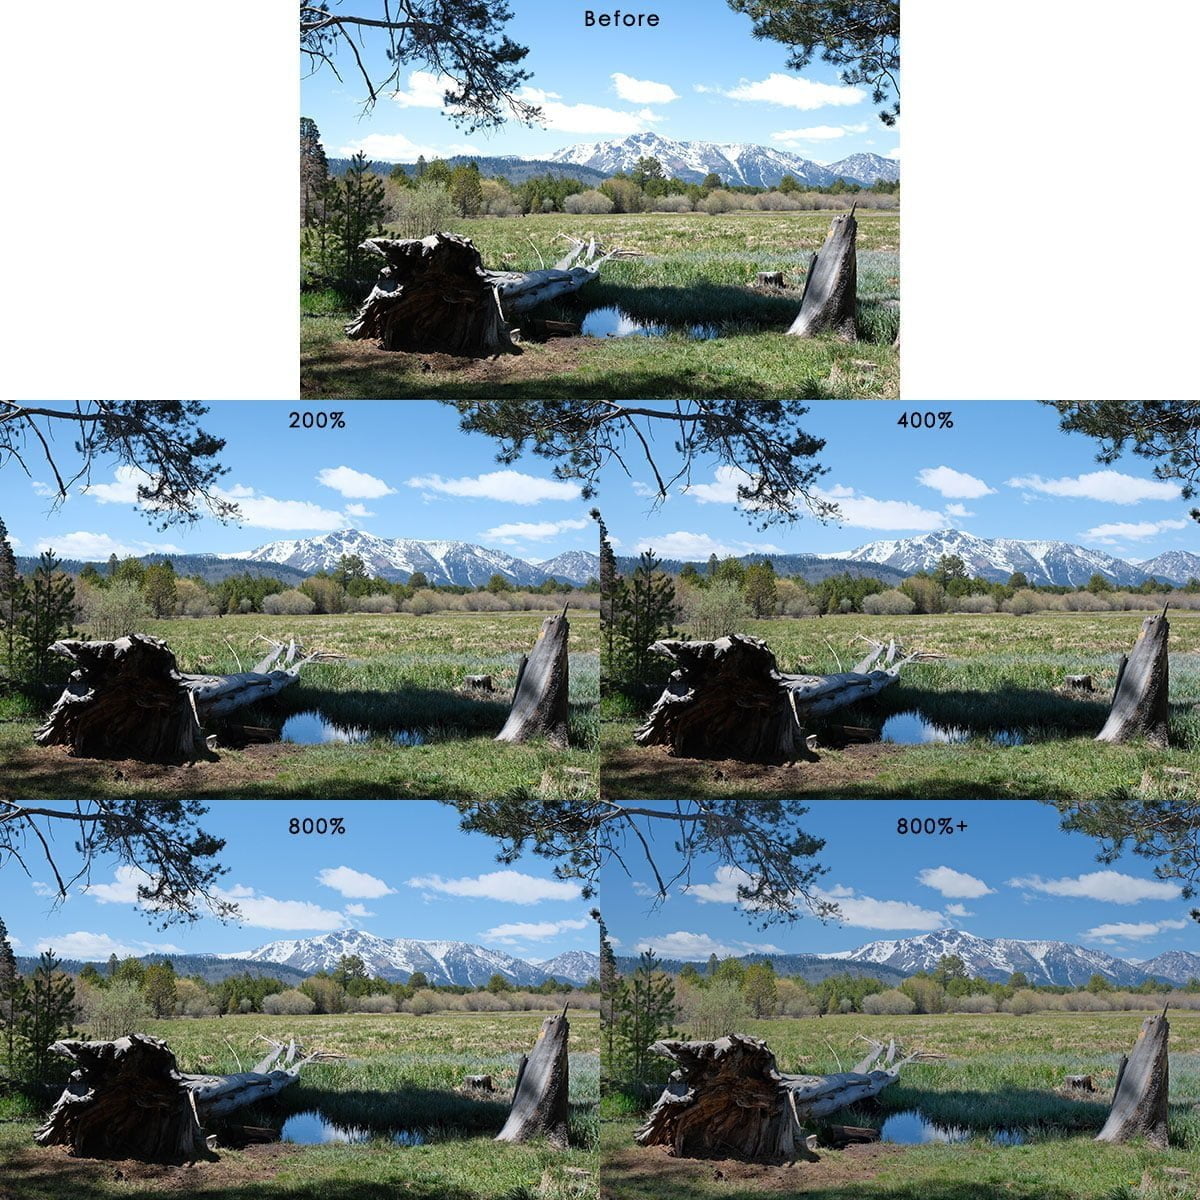
Here are some examples of the same scene processed with 200%, 400%, 800%, and 800%+/PLUS. Notice the very subtle differences between the first three settings, then the obvious “whoa, what?” for 800%+/PLUS.
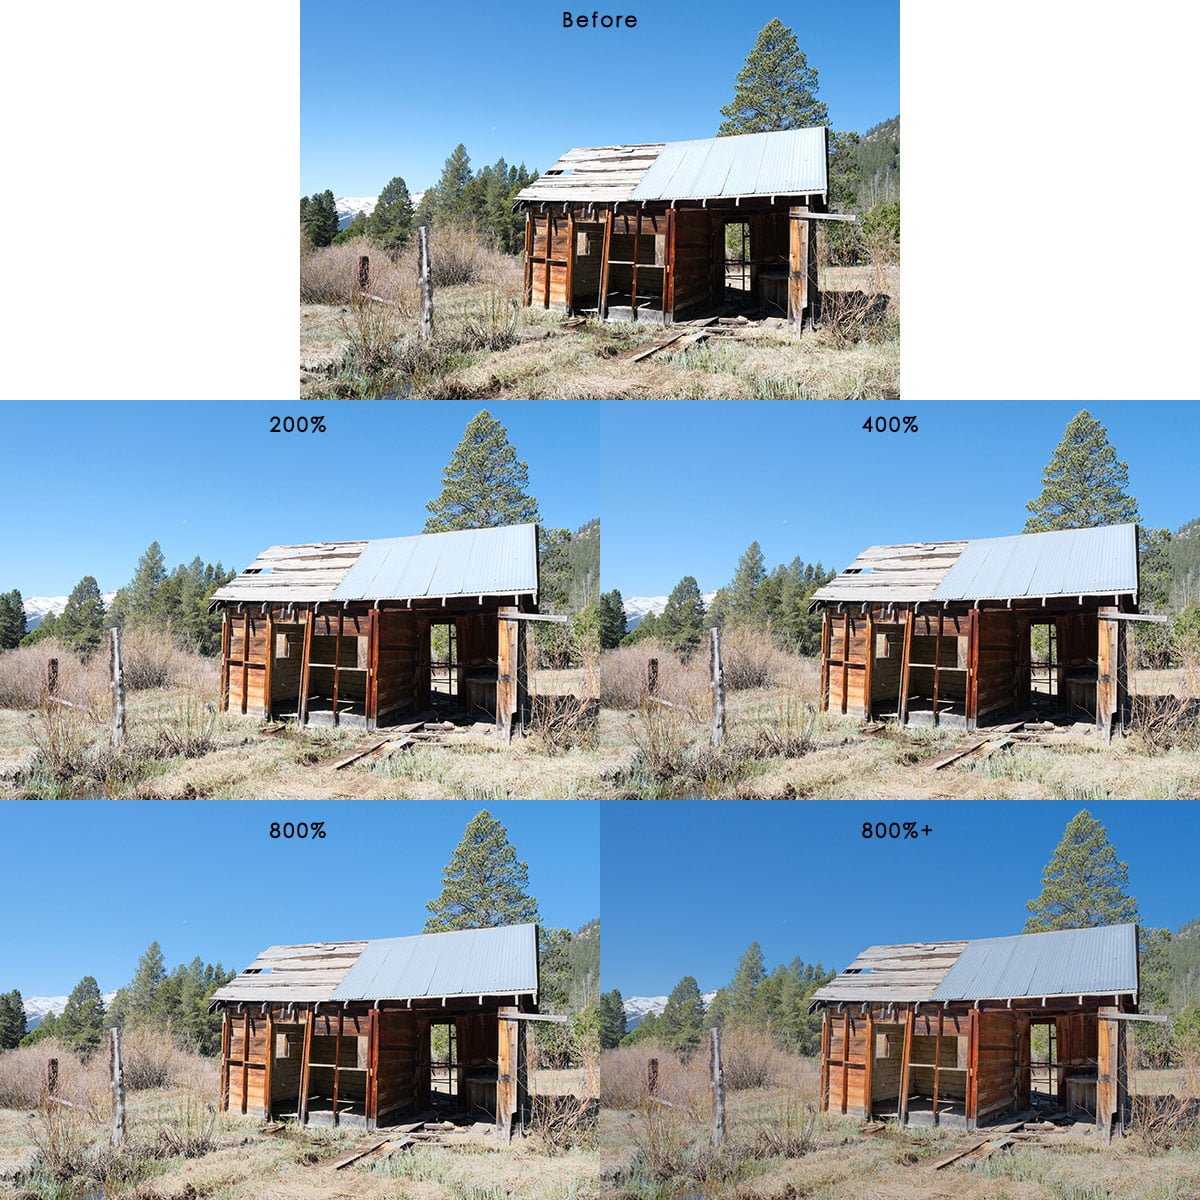
How close do these compare to the same scene processed using the Dynamic Range setting instead of the HDR setting?

When would you use HDR versus Dynamic Range?
Well, we’ve already established that these settings help you preserve detail in the bright areas of high-contrast photos. This ability is especially useful for photographers capturing a JPEG photo, who won’t be processing any RAW files.
If the results are, for the most part, similar, when would you use Dynamic Range versus HDR?
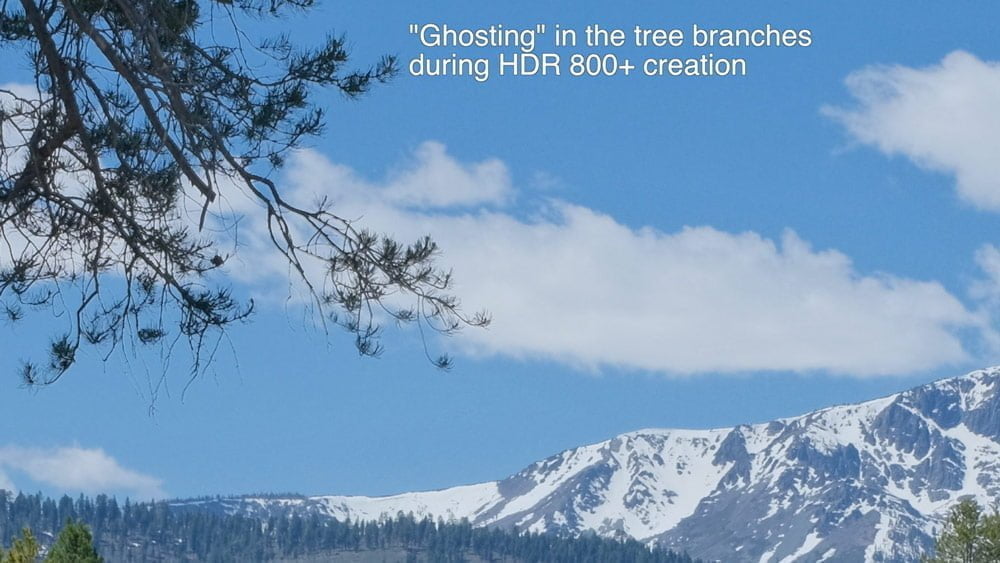
Use Dynamic Range when you’re handholding the camera or have movement in your scene. Remember, this does all of the processing to one frame. HDR stacks three frames and you want them all to line up perfectly.
Use HDR when you have the camera on a tripod and nothing is moving within the frame.
If you have a pre-X-Pro3 camera, then it’s an easy choice since you don’t have HDR 🙂
To learn more about the nuances of each of these modes – and all of Fujifilm’s different drive modes – you can check out my Advanced Fujifilm Drive Modes Course, which is also included in my Fujifilm X Course Membership.
If you have any questions please leave them below!
Jeff
Thursday 7th of December 2023
When you say minimum ISO, are you saying you must be at the ISO's numerical number or higher for DR to work? Example: Say you need ISO 320. If my X-T5 is at ISO 400 will DR actually function?
Also, I'm guessing none of this affects RAW in any way and is one of the reasons RAFs always look so spectacularly bland on just about every RAW processing software I've tried (Capture One, ON1, etc.)
John Peltier
Thursday 7th of December 2023
That's correct, "minimum ISO" refers to the minimum ISO required to "activate" the desired DR setting. This varies with each generation of camera. The DR settings do/do not affect the RAW file. What I mean by that is the DR setting is recorded to the EXIF data and some RAW processors automatically apply the DR curve to the demosaiced RAW file without your input. You can try it out in Capture One; create a photo of the same scene at DR100 and DR400 and compare them using the Linear curve in Capture One. You'll notice the DR400 photo has slightly pulled highlights.
Giuseppe
Friday 22nd of April 2022
Hi, about how dynamic range works, here you wrote that it overexposes the capture, but in the article "Fujifilm Dynamic Range Priority vs Dynamic Range" you wrote that it underexposes it. Which one is correct? BTW, valuable article, thanks.
John Peltier
Friday 22nd of April 2022
Ah, good call. After some back-and-forth with some engineers, I corrected the DR article to state the latter: the initial capture of the pixels is underexposed, then the processor pushes the darks and midtones back up. I've updated this article now to reflect the same. Thanks!