Disclosure: This post may contain affiliate links. I earn a small commission of product sales to keep this website going.
Using Lightroom’s Geotagging Feature Without GPS
What is “geotagging”? Camera EXIF (the data that records camera model, aperture, shutter speed, ISO, etc) also has a field for GPS coordinates.
You can use your camera’s internal GPS receiver, an external receiver, or even a handheld GPS to record these coordinates and automatically apply them to your photos. Then you can view exactly where they were taken on a map. Cool, right?
But what if you don’t have any GPS data to geotag your photos? It wasn’t practical to keep my GPS recording for the entire 210-mile John Muir Trail.
You can still do this manually after your trip. It takes some work, but here are some steps to make it as painless as possible, geotagging in Adobe Lightroom.
Read this post about geotagging with a handheld GPS or smartphone GPS.
It all starts with planning!
You’ll spend a long time determining where your photos were taken if you just take a bunch of photos along a 50-mile trail and do nothing else. Taking some active effort during the trip will speed things up when you get home.
Keep A Trail Journal
On long trips I keep a journal and at a minimum, have the date, features I passed that day, and camping location that night. Then I can filter that date in Lightroom and have an idea of where I was.
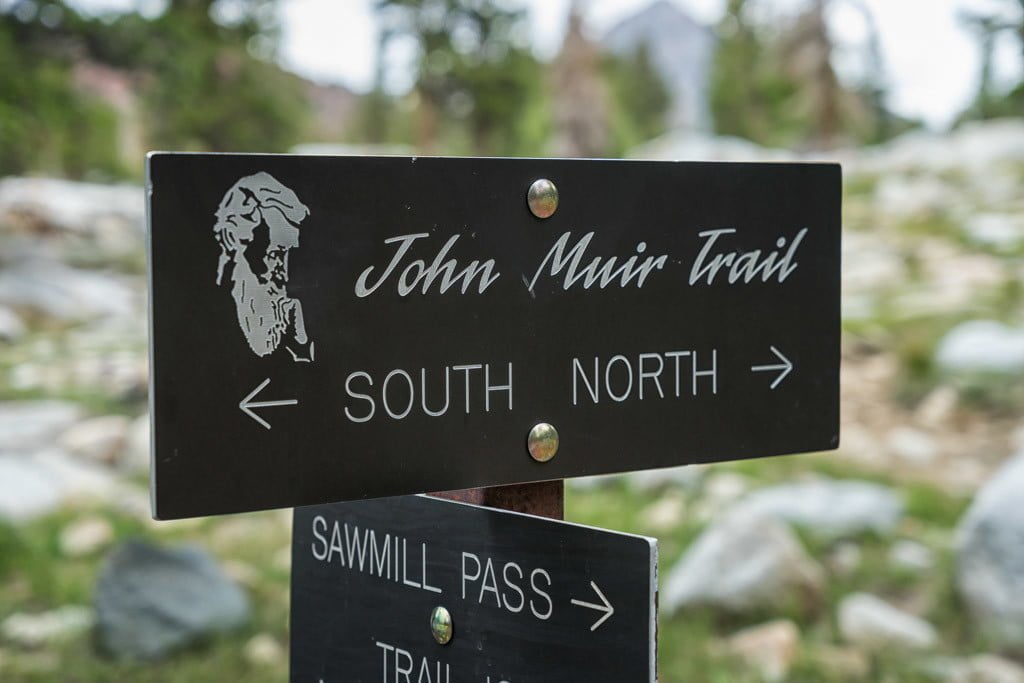
Where the John Muir Trail intersects the Sawmill Pass Trail.
Take Pictures of Trail Signs
Whenever you come across a trail sign, take a picture. This now becomes a reference point – a known point – and when you reference a map in post-processing you’ll know which photos were taken before and after this point.
Take Pictures of Your Map
If you have a map with enough detail (1:80,000 is a good maximum scale), you can use your finger or pencil to point at your location on the map and take a picture. This gives you another reference point.
Manually Geotagging Photos in Lightroom After Your Hike
Before You Start
When you sit down at your computer, make sure you have the map you used and your trail journal. Using Google Earth, a separate program, will help tremendously but the imagery in Lightroom is adequate enough.
Select the Photos Taken in the Same Spot
In the Library view, select all the photos taken near the same spot. Select the first photo and Shift-Click the last photo in the sequence.
I’m not too discriminating here; if the photos were taken within 50-100 yards of each other that’s good enough for me. You may want to have better resolution with your photo locations.
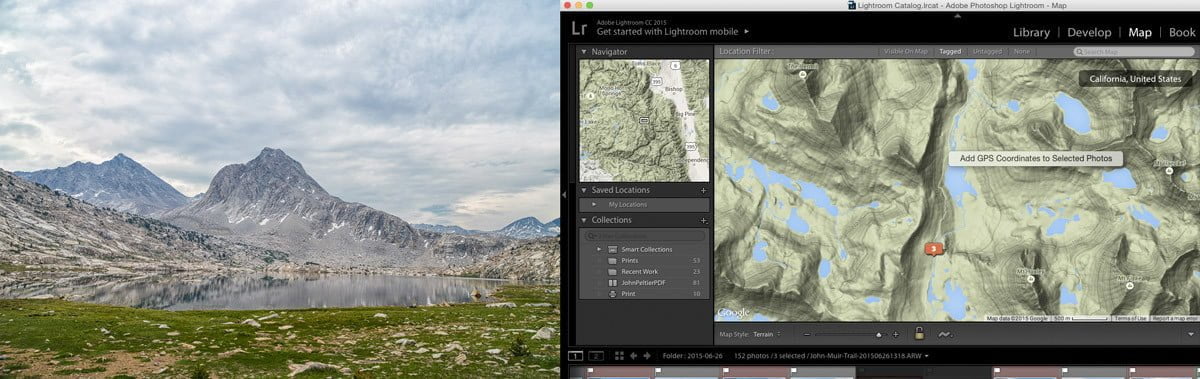
Find the Photos on the Map
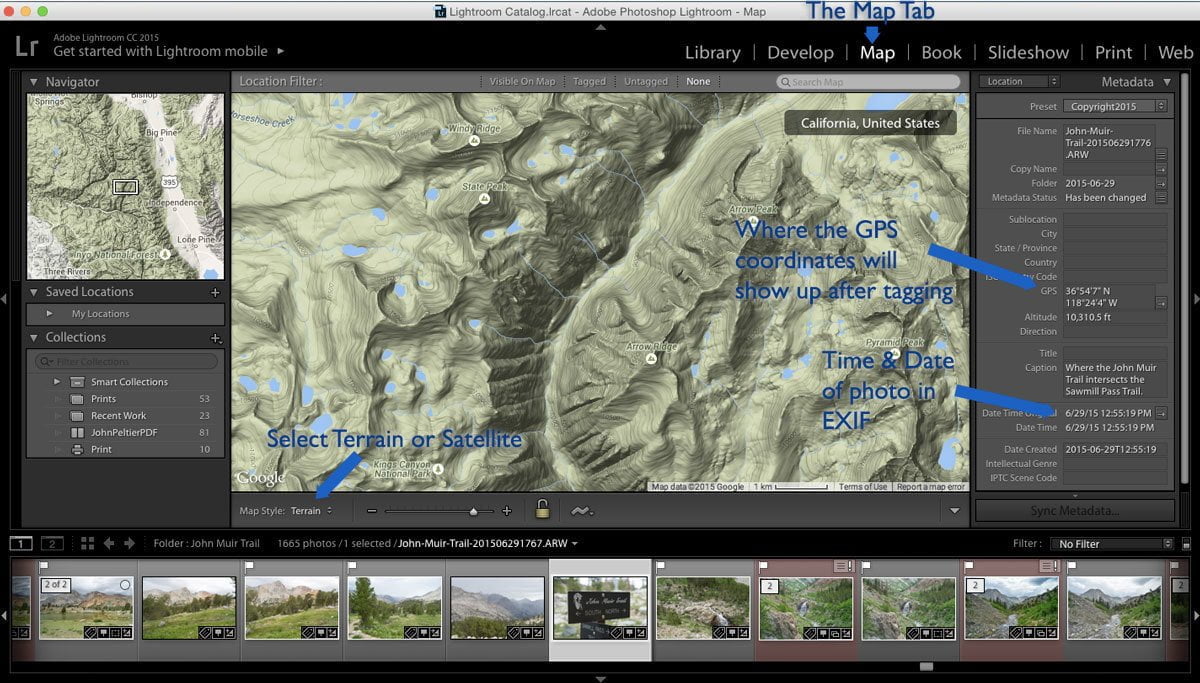
Now go to the Map tab. You should still see the selected photos on the strip below the map. Search for the approximate location of your photo, or if no search is available, start zoomed out and slowly work in.
I like to start with the Terrain view, selected from the dropdown in the lower-left corner of the map. This helps me identify terrain features that I can cross-reference with the map I took on my hike.
Now the fun part.
If you already found your exact location on the map, you’re golden. Right-click on that point on the map and select “Add GPS Coordinates to Selected Photos”.
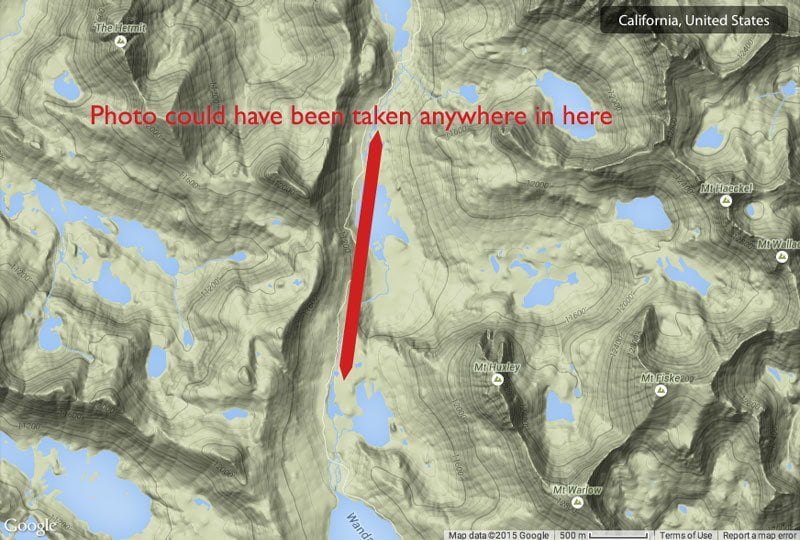
But if you only know your location within, say a mile or so, you have some more work to do. Here are some steps to follow:
- Start with known points, the ones you’re 100% sure of, and then interpolate the location of other photos from there. Use the time stamps on the photos to determine probable locations based on your hiking speed. Photos taken within thirty minutes of a known point probably aren’t any further than 1.5 miles from that point, based on a 3mph speed.
- Reference the photos taken before and after the ones you’re trying to figure out. Any clues? Did you take a photo of a stream crossing ten minutes later? Find that stream on the map then go back no more than half a mile.
- Which prominent terrain features do you see in the photo? Find mountain peaks in the Terrain view; for meadows go to the Satellite view and find that meadow. Is there a lone tree in the meadow you took a picture of? That will most likely show up in the satellite imagery.
You should be able to figure out where your photos were taken almost 100% of the time if you follow this flow. Right-Click on that map location and select “Add GPS Coordinates to Selected Photos”.
A few words of caution:
- Be patient. Get it right the first time. Doing this in post-processing for the 210-mile John Muir Trail took me a couple of weeks, but I did it right.
- Don’t be fooled by the field-of-view provided by Google Earth. It won’t match up with the focal length of your camera lens, especially if you were shooting wide-angle or telephoto. You’ll appear further away (wide angle) or closer (telephoto) than the Google Earth point. Look at all the surrounding features and other photos taken in the same proximity to extract your location.
Sample Flow
Here’s how I found the location of photo taken after leaving Evolution Lake in Kings Canyon National Park. There were two smaller lakes that this photo could have been taken at and I couldn’t immediately figure it out.

Smoke and low clouds over Sapphire Lake and Mount Huxley. Mile 124.
I knew that preceding photos were taken at Evolution Lake and succeeding photos at Wanda Lake, but there were two small lakes in between. I took this photo at one of them, looking south.
You can see both lakes have ridges on the south sides and mountains to the east. Google Earth should help. I went to a ground view from the north end of both lakes, looking south.
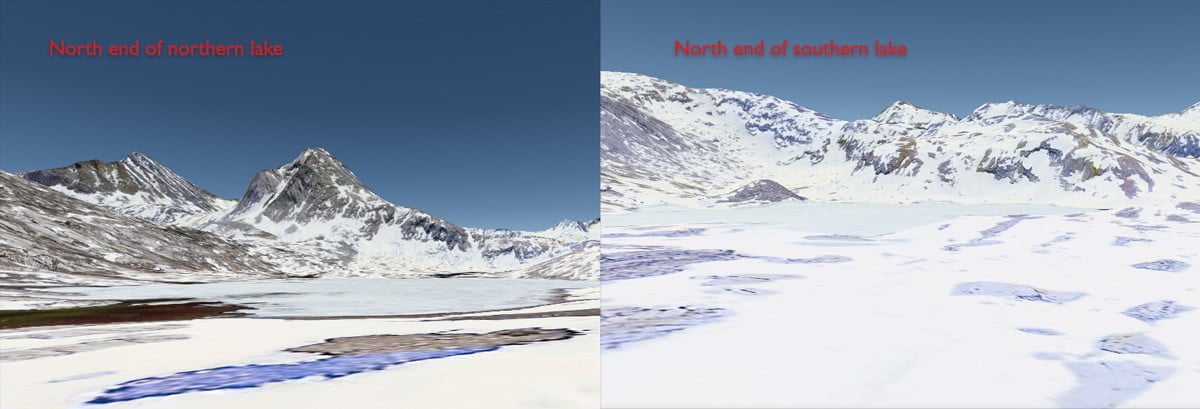
Even though the imagery was taken in winter, this is pretty easy – look at the Google Earth above vs the photo below. Now I know which lake the photo was taken at, and add the coordinates to Lightroom.