Disclosure: This post may contain affiliate links. I earn a small commission of product sales to keep this website going.
The Fujifilm X-E5 includes a unique viewfinder mode called Classic Display, a throwback to the analog film era that presents your shooting information in a clean, retro-inspired layout. If you learned photography on film cameras, you’ll feel right at home. Here’s everything you need to know to find it, read it, and customize it.

How to Activate Classic Display
Enabling the X-E5 Classic Display is straightforward:
- Bring your eye up to the viewfinder to activate it.
- While looking through the viewfinder, press the DISP/BACK button to cycle through the available viewfinder display modes.
- Stop when you see a clean image with red lettering along the bottom, plus an analog-style exposure meter needle. That’s Classic Display.
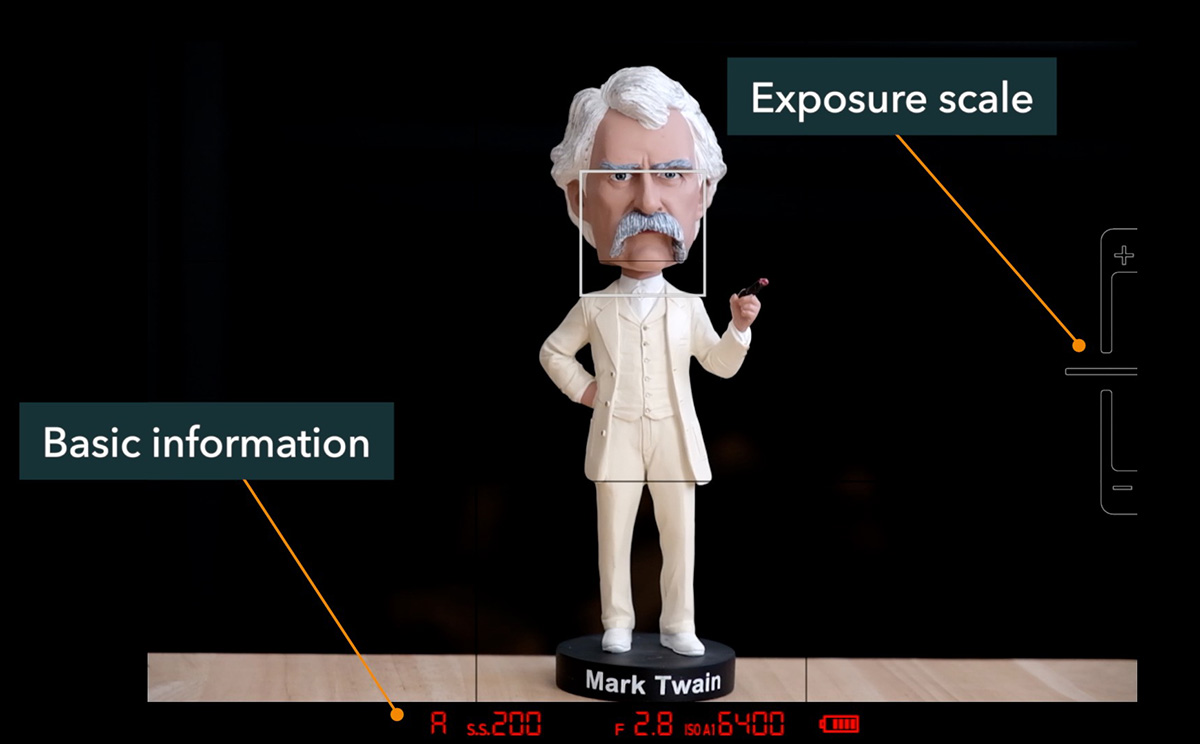
Reading the Classic Display
The layout is minimal by design. Here’s what you’ll see:
- Exposure meter needle (right side): Points horizontally at zero exposure. Needle up = overexposed, needle down = underexposed.
- Exposure mode, aperture, shutter speed, and ISO: Shown at the bottom.
- Battery level indicator: Also at the bottom.
- Focus frame: Overlaid on the image area.
Customizing the Classic Display
You can tailor what appears on screen via Menu → Screen Setting → Disp. Custom Setting. Options include:
- Focus frame
- Shooting mode
- Aperture, shutter speed, and ISO
- Exposure compensation digit (useful if the needle is hard to read)
- Exposure scale (the needle itself)
- Battery level indicator
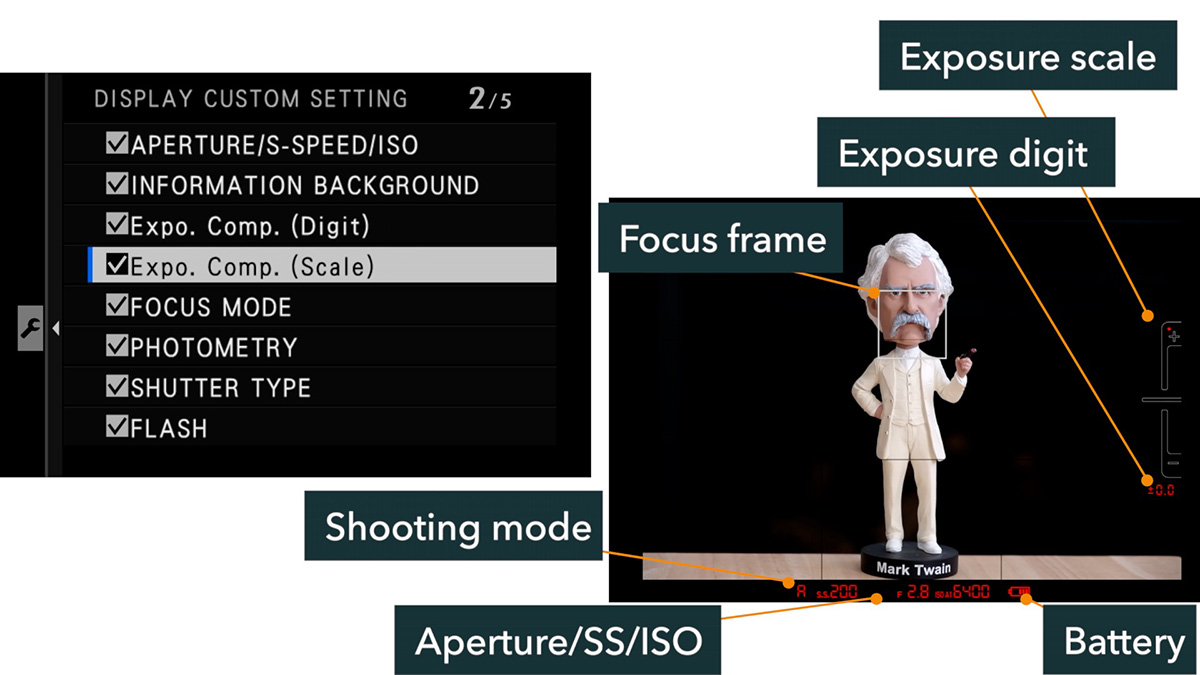
Note: Classic Display cannot be customized independently of the other viewfinder displays. Any setting you toggle here will apply to all other display modes as well.
Why Classic Display Won’t Appear (And How to Fix It)
The manual doesn’t cover this, but there’s at least one known condition that prevents Classic Display from showing up: the Surround View setting.
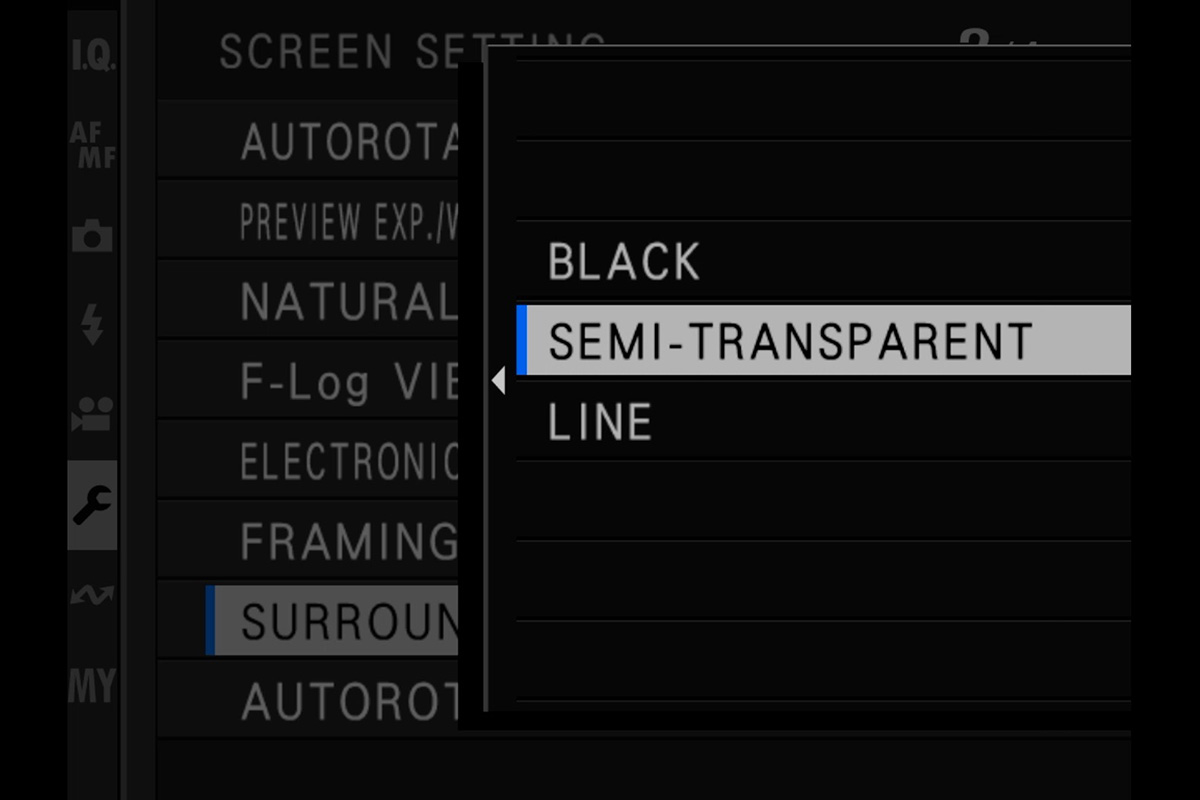
You’ll find it under Menu → Screen Setting → Surround View. This setting controls how the image is masked when shooting in aspect ratios other than 3:2. The three options are:
- Black: sides of the image are fully masked
- Semi-Transparent: a translucent mask lets you see just outside the crop area
- Line: white lines indicate the crop boundary
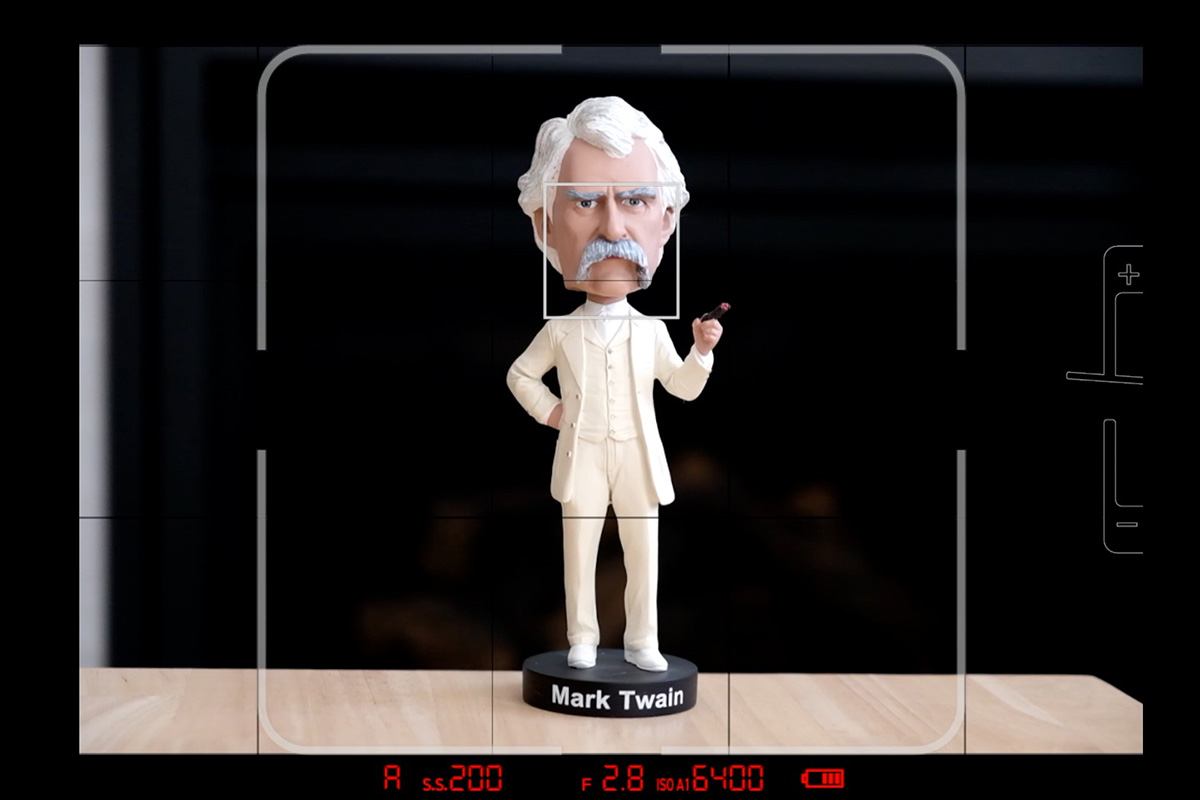
This is an example of Line with the Classic Display, using a 1:1 aspect ratio:
Semi-Transparent is not compatible with Classic Display. If it’s selected, Classic Display simply won’t appear when cycling through viewfinder modes, even if you’ve never changed your aspect ratio and always shoot in 3:2.
The fix: Go to Menu → Screen Setting → Surround View and switch from Semi-Transparent to either Black or Line. Classic Display should become available immediately.
Quick Summary
- Activate: Eye to viewfinder → press DISP/BACK button to cycle modes
- Customize: Menu → Screen Setting → Display Custom Setting
- Can’t see it? Check Surround View and switch away from Semi-Transparent
Want to go deeper? Check out the full X-E5 Tutorial Course covering every menu option, setup, and use. Use code “blog20” for 20% off.