Disclosure: This post may contain affiliate links. I earn a small commission of product sales to keep this website going.
There was a lot of excitement in the Fujifilm community when Pixel Shift Multi-Shot was announced. High-resolution photos! Better colors! Extreme landscape & portrait photos!
But before you get too excited, it’s essential to look at what Pixel Shift Multi-Shot does and how it works. Using it has many limitations and may not have as much utility as you think.
It is, frankly, disappointing how limited it really is.
What Fujifilm’s Pixel Shift Multi-Shot does
This special drive mode, found in the GFX100S, GFX50SII, X-T5, and X-H2, uses the camera’s in-body stabilization to shift the sensor around while it captures a series of RAW photos. It shifts the sensor by a half-pixel between each photo.
Depending on the camera, you will get either 16 or 20 RAW images when the sequence is complete.
What is the advantage of doing this, and what do you do with the photos afterward? Well, you’ll combine the sequence of images in free software later on. The result is a photo with more accurate color with the option for higher resolution.
The software outputs a DNG file.
High resolution
The combined multi-shot images can increase the resolution of your camera from 40MP to 160MP. In the 100MP GFX100S, the combiner software can spit out a 400MP image. That’s a lot of pixels!
Accurate color
The feature I was most excited about was the ability to get “real” color instead of “interpolated” color. I cover this in-depth in the April 2023 Fujifilm Photographer Member Webinar (recording available here).
Long story short, each pixel in your camera only records either red, green, or blue. The other two color channels for each pixel are interpolated based on the values of the surrounding pixels. So the colors in your photos are actually just “guessed” – but they’re pretty darn close, right?!
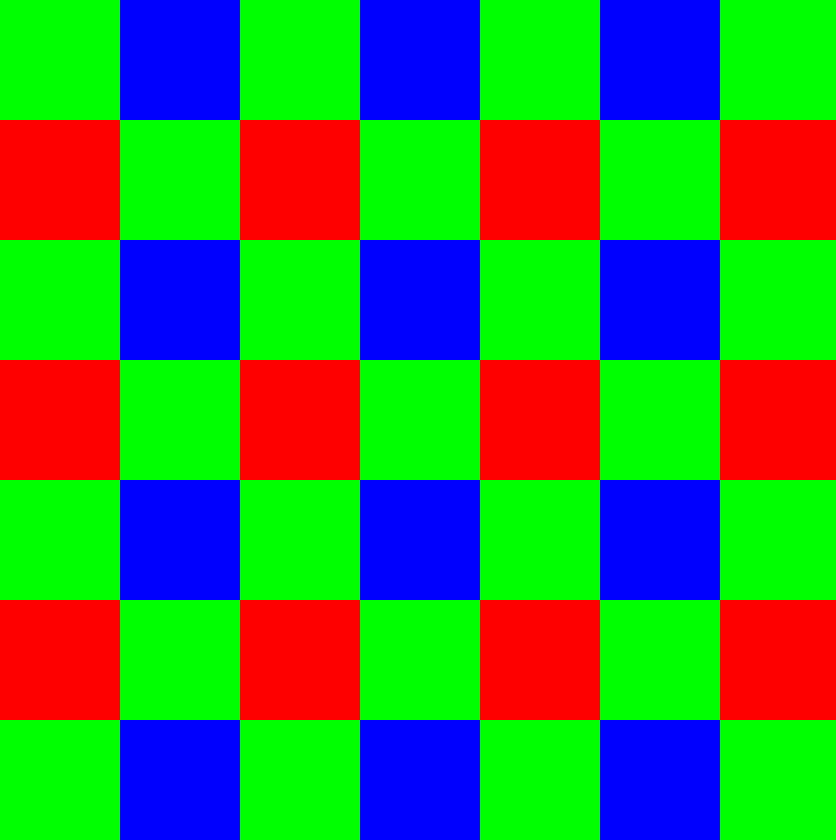
Pixel Shift Multi-Shot builds a picture that contains the actual RGB values for each pixel in your final image. Because the sensor is moving around, light from your scene will pass through each red, green, and blue filter.
When would you use Pixel Shift Multi-Shot?
What are high resolution and accurate colors good for?
Before you get all excited and say, “all of my photos!”, keep reading through the end. This feature is certainly not practical for all of your photos.
But the high resolution could be suitable for printing massive wall-sized prints or high-end commercial work where you need all the resolution you can get. High resolution is also good for macro photography, where you can better capture that detail.
Accurate color can also be critical when photographing high-end commercial photography and archival work, such as photographing the artwork of others for posterity’s sake.
The combination of high resolution and accurate color can increase the overall texture and detail in your photo, though it’s perceptually minimal.
Limitations of Pixel Shift Multi-Shot
All of this cool stuff comes at a cost, however.
Storage
First, there are storage requirements.
To create a single 160MP image, you need 20 RAW files at about 50 megabytes each. So there’s 1GB of RAW photos to create one high-resolution image. The resulting photo will be just shy of 1GB also. That’s 2GB per photo.
Have the 100MP GFX100S and creating a 400MP image? This increases your storage requirements to 5GB per photo.
Digital storage is cheap, but you better be able to justify that. It will add up fast!
Processing
Second, combining these images does take some processing time.
There’s the admin time of organizing each sequence of images and delineating where each sequence begins and ends (I put each sequence in a separate folder).
Opening up the sequence in the combiner software is quick, but combining a final image for each sequence can take some time. It takes about a minute to process a photo from my X-T5; I’ve heard from GFX100S owners that the increased data with that camera can take around 15 minutes per photo.
Then the resulting DNG files must be processed to your liking.
Movement
Don’t care about the storage requirements or the time it takes to combine a sequence? That’s cool. But here’s the main limitation – movement.
There can’t be anything moving in your scene. If you’re photographing a landscape, there can’t be so much as a breath of wind. Note the following two photos; one on a really windy day and the second with barely any wind.
Your camera cannot move either. Not even by a fraction of the width of a human hair. You better have a rock-solid tripod with, again, no wind. Even using a good tripod on this still life, there was enough wind to just slightly buffet the camera during the sequence, resulting in artifacts:
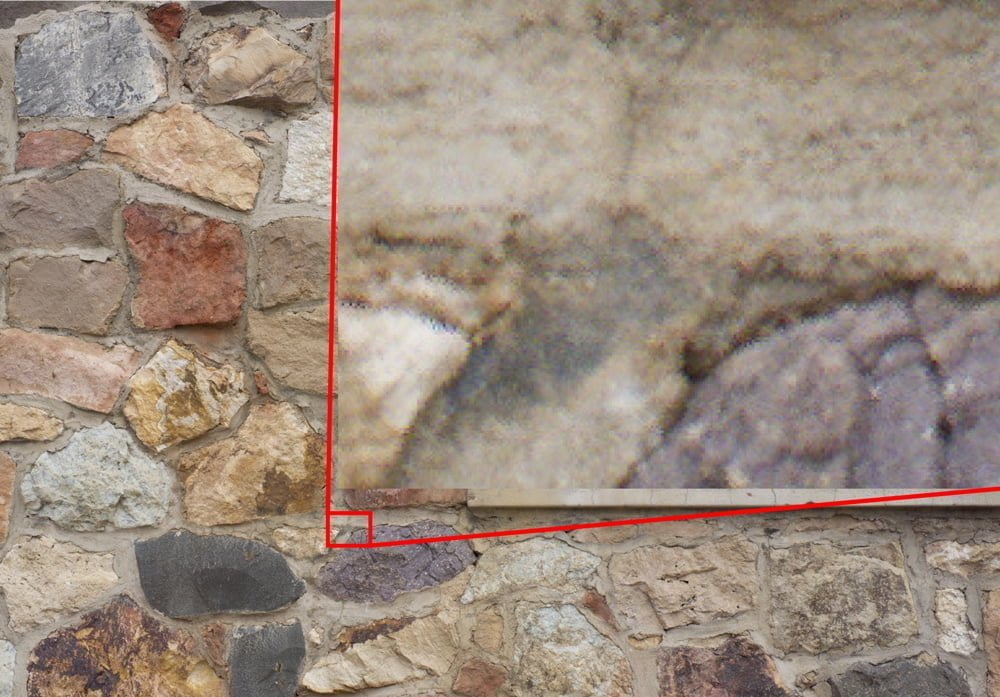
Can you see those artifacts when zoomed out, viewing the image to fit a computer screen? No, so maybe it doesn’t matter. But then, what’s the point of doing all of this?
If you encounter these artifacts when combining an image, you’ll still have the RAW files to work with. Single RAW files aren’t that bad, are they?
How to use Fujifilm’s Pixel Shift Multi-Shot
Ready to try it out? Here’s how to set up Pixel Shift Multi-Shot.
Camera setup
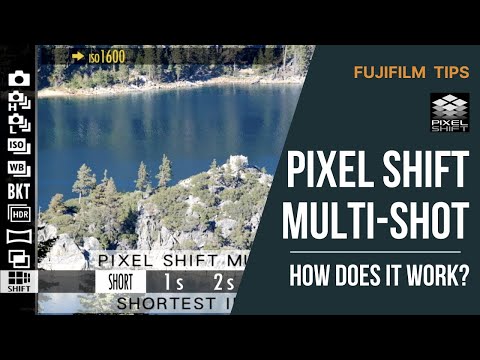
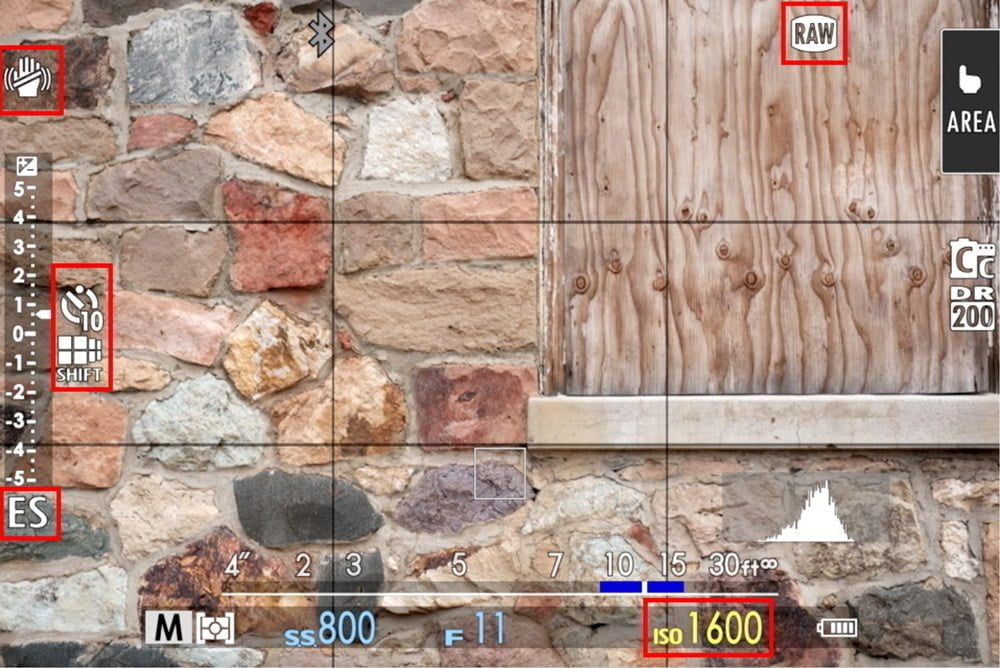
You’ll find the Pixel Shift Multi-Shot submenu at the end of the SHOOTING SETTING menu in the X-T5. In the X-H2 and GFX cameras, press the DRIVE button and go to the end of the list.
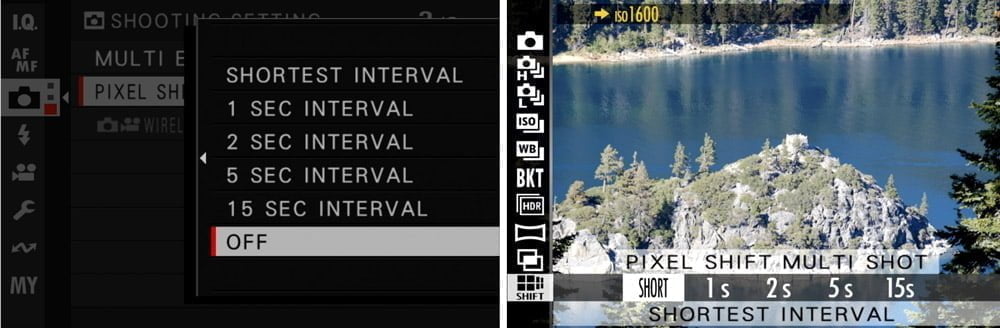
Set an interval between every photo. You should always set SHORTEST for the interval unless you’re using a flash. In that case, set the interval to an appropriate time to give your flash time to cycle.
The camera will automatically change some things when Pixel Shift Multi-Shot is enabled:
- File type will be set to RAW lossless compressed (no JPEGs will be captured).
- ISO will be limited to 1600 max.
- Shutter type will be set to Electronic.
- If in AF-C mode, it’ll be set to AF-S.
- Image stabilization will be disabled.
You’ll see the Multi-Shot icon on the screen to let you know you’re in this mode.
I would also recommend setting a 10 (not 2) second timer to dampen all vibration from pressing the shutter. Better yet, use a wireless trigger if you can.
When capturing the sequence, the camera will display which photo it’s capturing and let you know when it is complete. Back away from the camera during this time. Images created during the sequence will have the multi-shot icon in playback mode.
Using Fujiilm’s Pixel Shift Combiner software
As mentioned before, I put all images from a single sequence into their own folder. This keeps them organized so you know which photos belong to which sequence. I also store the final file here.
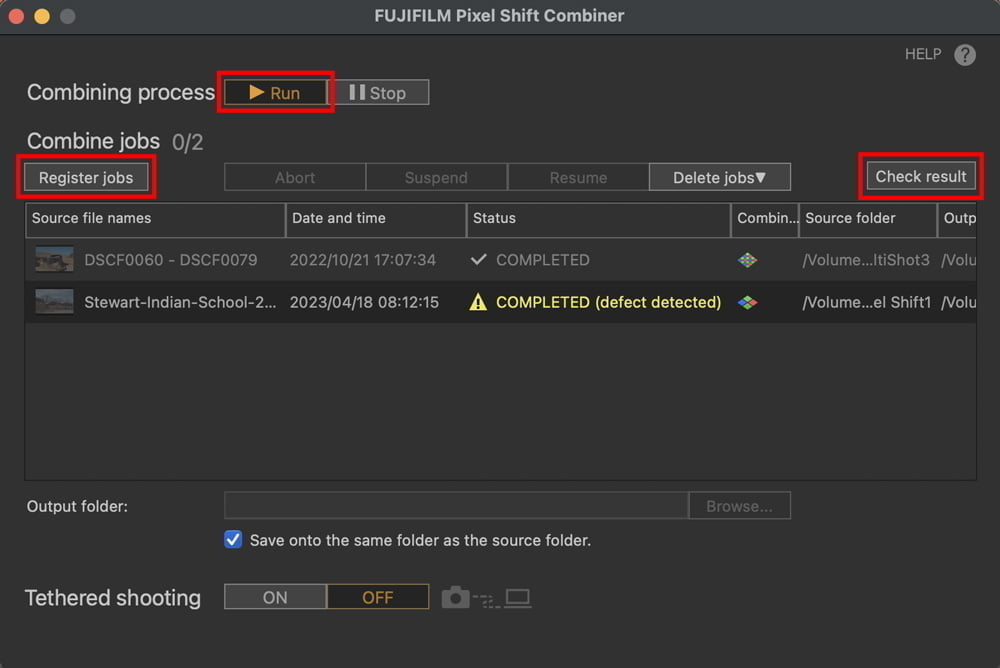
Download and open the Fujifilm Pixel Shift Combiner software.
Click the “Register jobs” button to open a sequence.
- Select a RAW file from the sequence. You only need to select one file; the software will determine the rest.
- Choose “High resolution + Accurate color” or “Accurate color” for the combining type. Accurate color only will keep the resolution the same as the source file but have more color information.
This job will appear in the list, along with an icon indicating whether it’s accurate color or also high resolution. You can load multiple jobs into the queue. Click Run to start combining.
The software will warn you if it detects any defects. After combining, even if no defects were detected, click on Check result to open a loupe and do some spot checks. I’ve found defects in images when the software didn’t.
The unfortunate reality of Pixel Shift Multi-Shot
I hate to sound all pessimistic, but this feature is really of extremely limited use and takes great care to get workable files. Landscape photographers were super excited about this feature, but landscape photography is probably one of the worst places to use this feature.
Want to create a massive print? Just save yourself the headache and use AI-powered upscaling software that can create better results from a single RAW file in a fraction of the time – and you can have all the movement you want in it.
What about that “accurate color”? Are Fujifilm colors really that bad that this feature will “save” your photos? In fact, one of the things that have made Fujifilm cameras unique and given them an edge is their color science. It’s cool to know you can get “real” colors using multi-shot, but what’s wrong with the “interpolated” colors we’ve used all along?
High-end commercial & product photographers and archivists, as well as macro photographers, this may be valuable to you, to more accurately capture high-resolution photos – if you think the gains are worth it.
For the rest of us, keep on with the status quo and focus your efforts on creativity and storytelling.
Have you used Pixel Shift Multi-Shot? What are your thoughts on it? Let us know below.
Sean
Monday 30th of December 2024
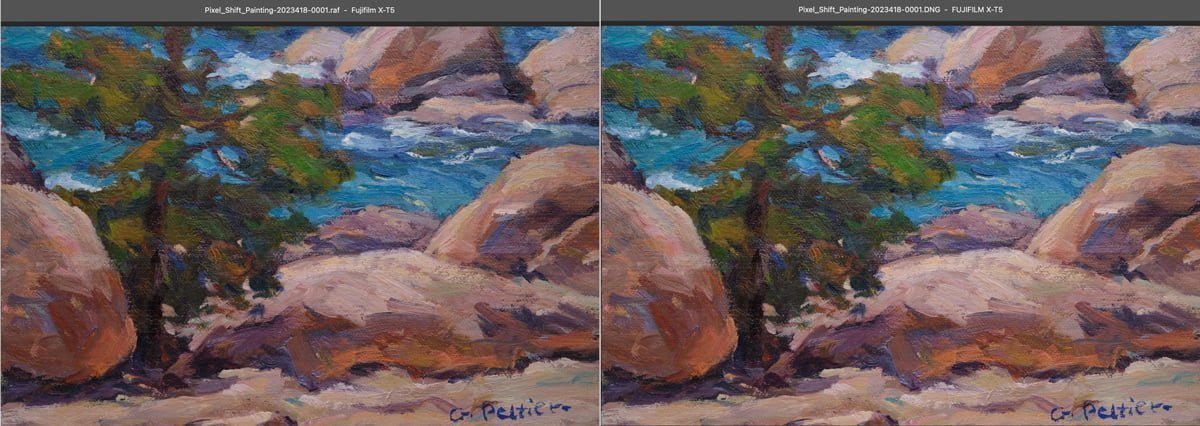
Interesting. I can see the difference easily in your screenshots. The green colors are more natural and lighter with variations being visible. The single raw is more subdued/darker with less variation as subtle color changes exist...
All of the colors looks a bit lighter and more like your looking at something without going through a lens or something. Big difference? No. Obvious if you didn't know what to look for? No worth the hassle of all the technique entails? Heck no.
Practically the only use case i see for this would be scientific archiving for accuracy or historical precision or something. And even then, wouldn't you be using a better camera than an xt5 at that point? Lol
John Peltier
Tuesday 31st of December 2024
100% agree. There was so much excitement about this in the Fujifilm community when this was first announced, then reality set in :)