Disclosure: This post may contain affiliate links. I earn a small commission of product sales to keep this website going.
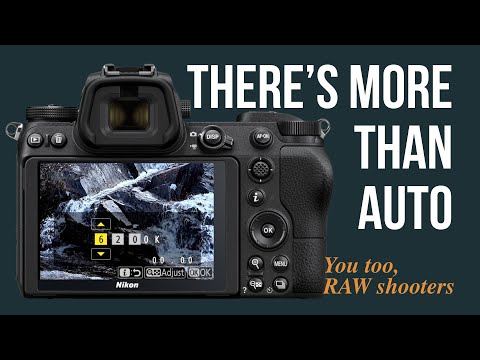
White balance isn’t just a concern for photographers shooting JPEGs. It’s equally important if you’re recording RAW files. Getting it right in-camera not only helps you judge exposure more accurately, but also makes your editing workflow smoother and faster. In this article, we’ll look at Nikon’s different white balance options, when to use them, and how to fine-tune your results.
You can read this article or watch the video for the basics; the Nikon Z Photography Fundamentals course goes into this even more in-depth. Take 20% off that course with the code “BLOG20”.
Why White Balance Matters in RAW
Even though you can adjust white balance later in post, setting it correctly in-camera has big advantages. It helps you preview your photos more accurately on the LCD, keeps your exposure consistent, and saves time during editing. Think of it as setting yourself up for success before you even open your RAW files.
Auto White Balance Options
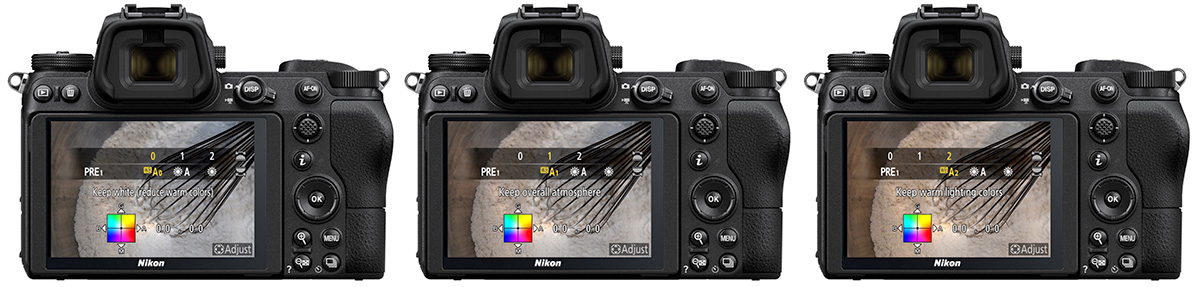
Nikon cameras actually provide several auto white balance (AWB) settings, not just one. The A0, A1, and A2 modes are designed for indoor incandescent lighting:
- A0: Neutralizes warm tones for cleaner whites.
- A1: Balanced middle ground between neutral and warm.
- A2: Preserves or enhances warm amber tones for a cozy feel.
Outdoors and under natural light, the Natural Light Auto setting often produces richer, more natural colors than the standard AWB modes. Greens look greener, skies appear more vivid, and the results generally feel truer to what your eyes saw.
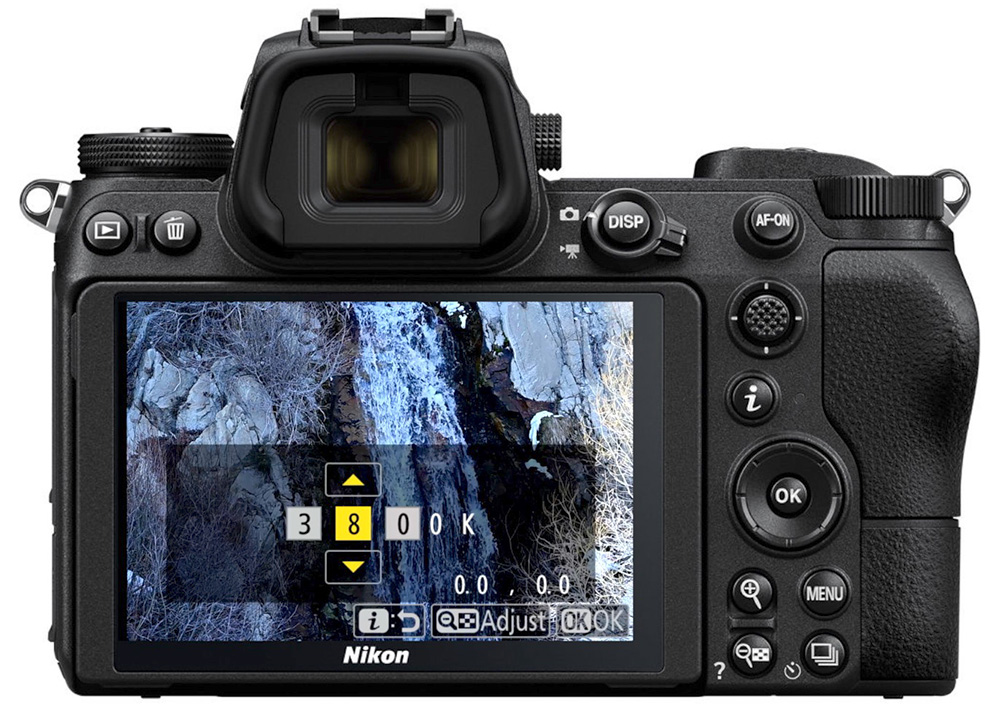
Using the Kelvin Setting
The Kelvin white balance setting allows you to manually dial in color temperature. Lower values make images cooler (bluer), while higher values create a warmer (amber) look. This is especially useful when lighting conditions are consistent, such as a sunny day or a room lit by a single bulb, because it ensures your colors remain consistent across multiple shots.
Creating Manual Presets
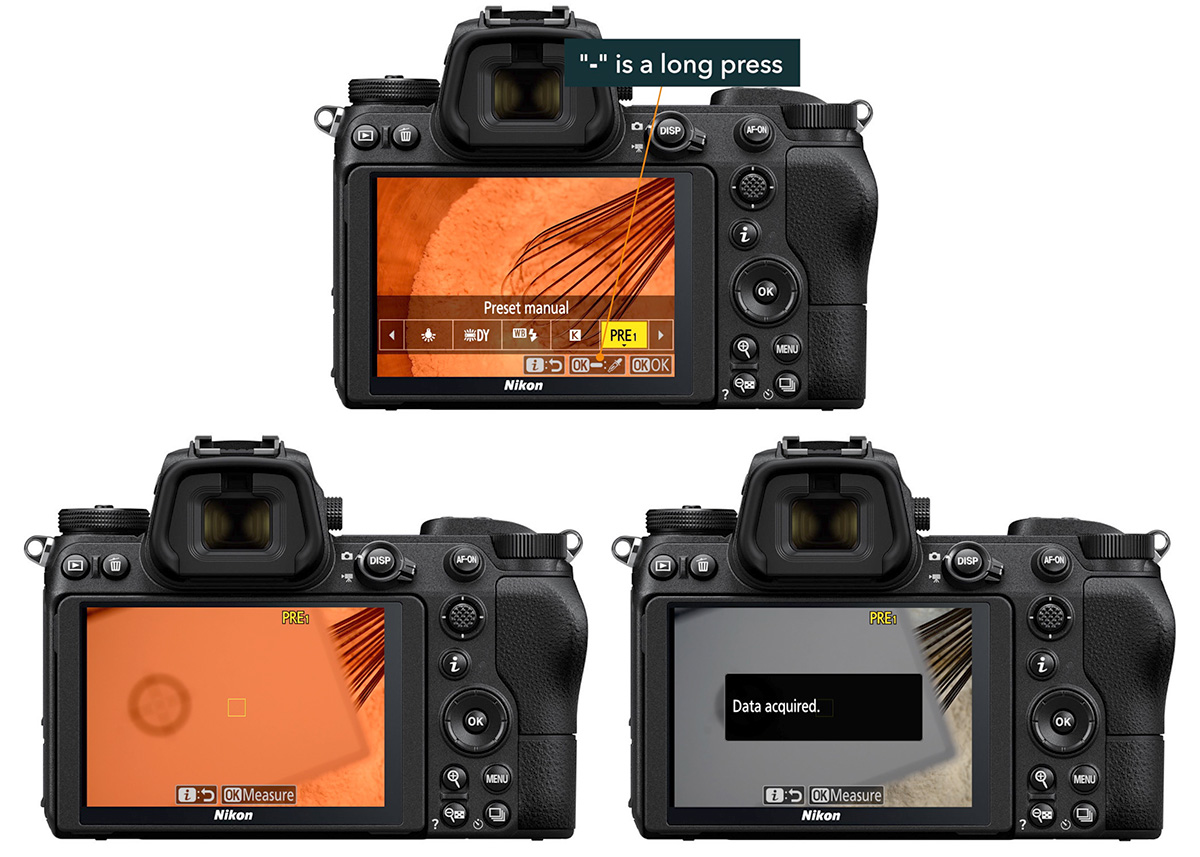
When auto or Kelvin adjustments don’t quite deliver, you can create a custom preset. By photographing a white or gray reference card in the same light as your subject, you can set a precise white balance that locks in accurate, repeatable colors. This is particularly helpful under mixed or tricky lighting, like photographing food in a kitchen at night. To create a manual white balance in Nikon cameras:
- Select White balance from the i Menu
- Select Preset manual and press the multi-selector down
- Choose a d-1 through d-6 slot to save it in and press OK
- Follow the instructions on the bottom next to the eye-dropper – usually long-press OK to enter measurement mode
- With a neutral-gray object in the middle of the frame, and in the same light as your subject, press OK to register the measurement
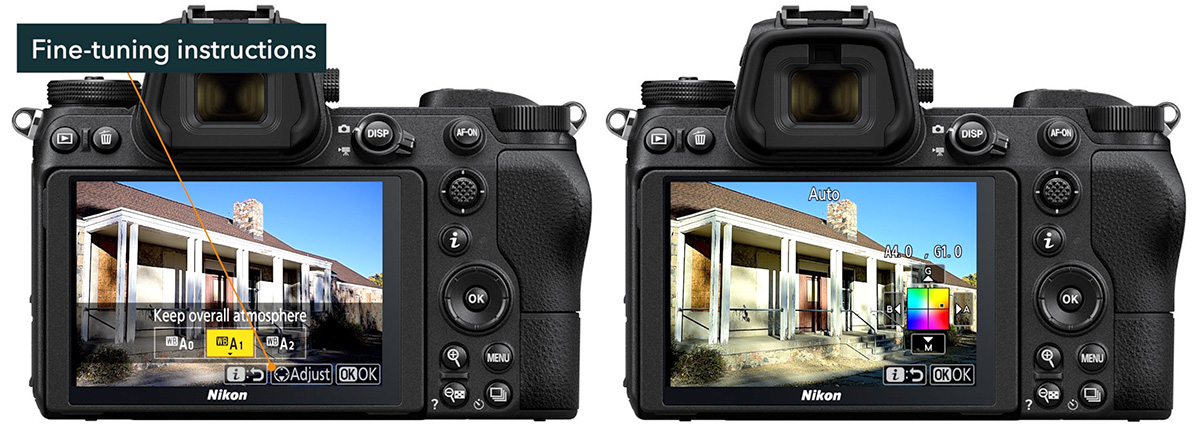
Fine-Tuning White Balance
All of Nikon’s white balance modes can be fine-tuned in the menu. Using a color adjustment grid, you can nudge tones toward warmer/cooler or add subtle shifts in red/cyan. This flexibility gives you more control for both accuracy and creative expression.
Other Preset Modes
Nikon also includes presets such as Shade, Fluorescent, and Direct Sunlight. These can work in simple scenarios but tend to be more restrictive, since real-world lighting often varies from their fixed settings. Auto, Kelvin, and custom presets usually give you more flexibility.
Final Thoughts
Understanding Nikon’s white balance options will improve your in-camera JPEGs and make your RAW editing workflow faster and easier. Whether you rely on Auto, set Kelvin manually, or create custom presets, paying attention to white balance will bring out more natural and consistent colors in your photography.
Want to go deeper into Nikon’s menus, exposure tools, and customization features? Check out my Nikon Z Photography Fundamentals course. You can watch free previews, and use code BLOG20 for 20% off the full course.
Questions or comments? Please let us know below!