Disclosure: This post may contain affiliate links. I earn a small commission of product sales to keep this website going.
The 1-5 star rating system is great for identifying your favorite photos, the ones you want to process, the images you wish to send to clients or include in your portfolio, and separating the photos you’re not too keen about.
But if you’re reviewing hundreds of images from a shoot and trying to decide, “where on the 1-5 scale is this photo?” I’d urge you to consider the “binary” method of editing photos instead of the “1-5” method. You may find that your portfolio improves with this binary method.
Listen to the podcast or keep reading:
The 1-5 star method
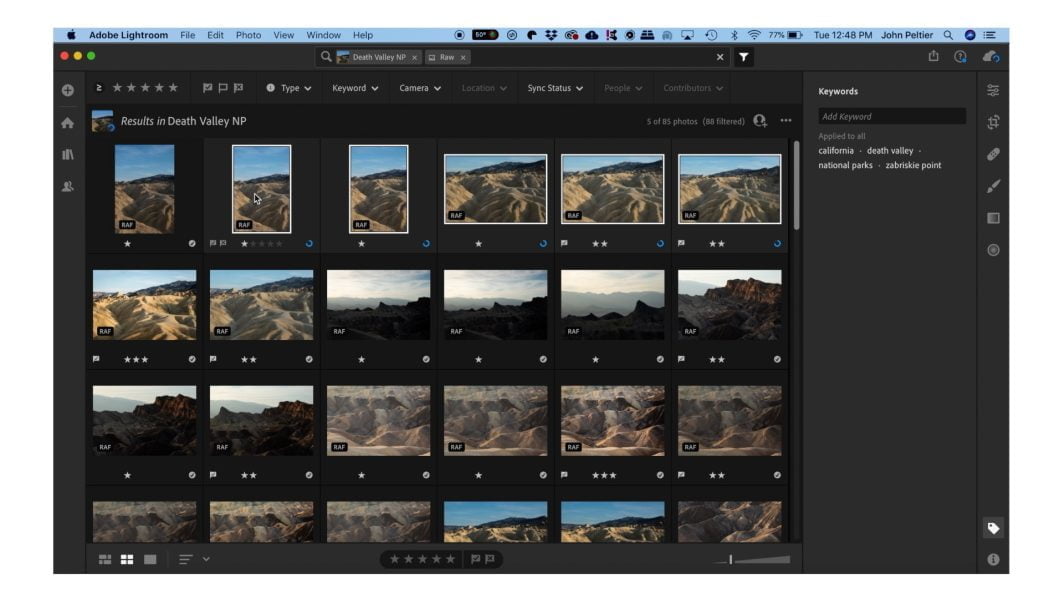
This was the photo editing method that I used for years when I first got into digital photography.
I’d review my photos in Lightroom Classic, study a picture, and assign a rating from one to five stars. The one-star images were sent to the trash pile, and the five-star photos would be my absolute favorites in my entire portfolio, with the range of photos in between.
Does this sound familiar? Are you using this photo editing system too?
The problem with this method is that it’s inconsistent and inefficient.
What exactly are your criteria for a five-star versus a four-star photo or a one-star versus a two-star photo? Do you have those conditions written down, and do you follow them? Probably not because it’s nearly impossible to identify concrete conditions that would delineate images in that manner.
This method is just far too subjective, and the rating scale far too broad, to accurately evaluate one image amongst hundreds of others with one look. What you may consider a three-star photo one day might be a five-star photo the next, just depending on your mood.
The binary method
This binary method of editing photos still uses a 1-5 star rating system, but you’re following a different path to get there.
We go through the actual mechanics of doing this, along with visual examples, in the following courses:
- After the Capture post-production course
- Better Photography Through Visual Storytelling
- The Photo Mechanic Guide
- The Lightroom Guide
At first glance, it may seem like this editing method will take longer. But you’ll see how it’s actually quicker and more efficient.
If you’re recording both RAW+JPG files, be sure you know how this process is affected by that.
The first pass
You will go through all of your photos from a shoot, beginning to end. And all you’ll do is give each photo a thumbs up or a thumbs down. A yes or no. One star or zero stars.
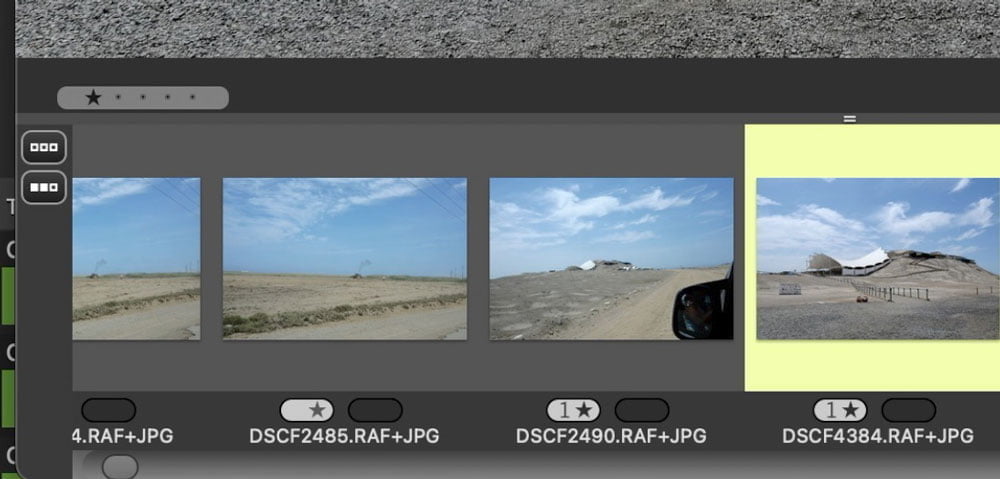
Do you want to at least consider processing a photo? Give it a yes vote, and assign it one star. Even the ones that, at first glance, you really love. Just one star.
These are all gut decisions. It should take no more than a couple of seconds per photo. You’re not trying to identify the five-star photos you want to make massive prints of. Just give them a yes or no to continue.
At the end of this pass through your photos – which shouldn’t take long – you’ll have a mix of photos with only zero or one stars.
The second pass
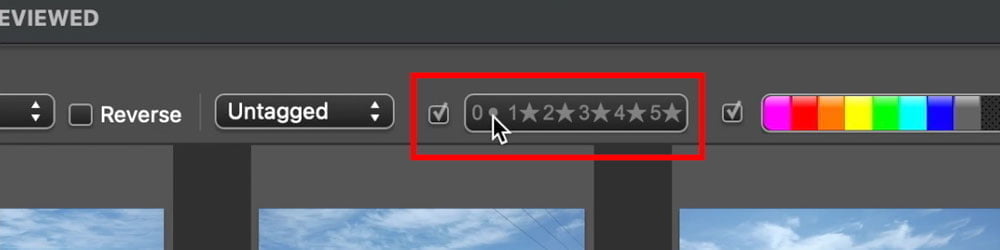
Use your program’s filtering or sort features to show you the one-star photos. The ones you decided to promote through your photo editing process.
Now you’re going to do the same thing. Go through all of your one-star photos from beginning to end. Do you want to further promote a photo towards the goal of processing and including it in your portfolio? Give it two stars. If not, just move on to the next. No need to change any ratings on those photos. You’re only promoting the images that you want to advance to the next round.
You’ll have a mix of one and two-star photos at the end of this editing pass through your photos.
The third pass
This third pass is usually the final one for me, at least when determining which photos to process, which photos to include in my portfolio, and which images to send to clients. If I need to whittle it down further, I will do so after my entire processing process.
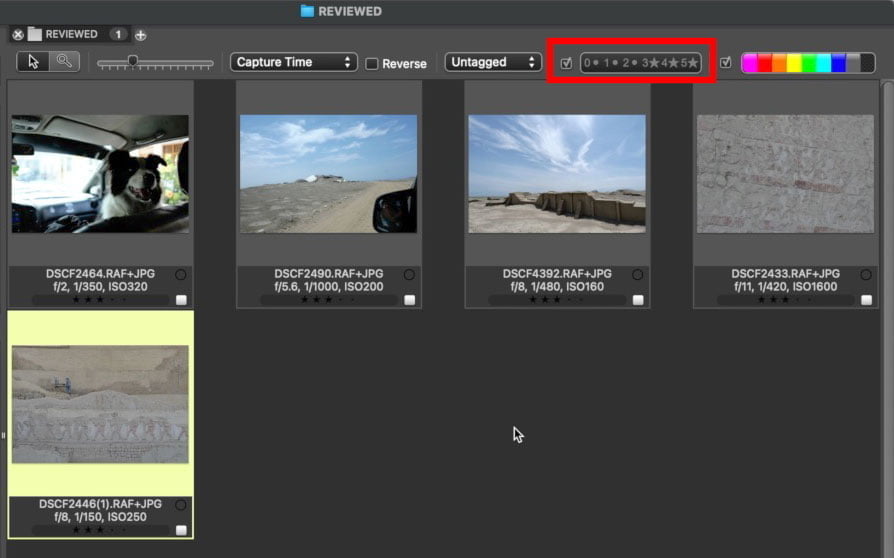
You’ll filter or sort your images only to see the two-star photos from the previous round and now go through and promote those photos you wish to advance. Give those three stars and skip through the others.
It may take slightly longer in this pass, especially if choosing between two similar photos, but your collection is much smaller to begin with in this third editing pass.
When complete, filter your view only to see the three-star photos. You can, again, repeat this entire process two more times to get to your five-star photos or end here and process your three-star photos. Start and stop this process wherever you wish, as long as you see the utility in doing so.
What do you think of this photo editing system?
Three editing passes instead of just one? Certainly, that will take longer.
But in fact, it’s actually faster.
With the 1-5 system, you need to study each photo and determine where it lands on that 1-5 scale. Maybe you’re unsure about an image and give it three stars. But after going to the next, you decide that the previous image should have been one star, so you go back and change the rating. You have to do this for every photo.
This binary photo editing system is largely instinctive, especially in the first pass. Trust your instinct; it’s powerful! You can get through all your images and assign zero or one star in a fraction of the time it’d take to assign 1-5 for all your photos in one pass. Subsequent passes are just as fast because your selection is smaller.
You can stop after the first pass if you don’t have a lot of photos to begin with or continue all the way through a fifth pass if you have thousands of photos and really need that level of granularity.
Not only is it faster, but it will make your portfolio stronger. You’ll make more consistent decisions when editing your photos this way, and that will improve your portfolio as a whole.
Do you have any experience with either of these systems that you’d wish to share? Please do so below!
Benjamin Leeds
Tuesday 13th of February 2024
I do something similar in Capture One.
In my first pass, if I think a photo is good, or the best of a series, I will give it one star. Next, I edit each one-star photo, and if I like the result, I mark it as green.
Green photos get exported to deliver. No-star photos are deleted from disk.
John Peltier
Wednesday 14th of February 2024
Nice simple solution!
Ian Taylor
Wednesday 17th of May 2023
Hi John, I've been a "one" pass grader for a long time, but this makes sense and I can see once in bedded in the psyche the binary method becomes very quick. Thanks for this. As an aside I'm new to Fuji defecting from Canon after 30 odd years to the X-T5 and not regretting a single moment. The X-T5 course made the transition quick and easy excellent work.
John Peltier
Friday 19th of May 2023
Glad you're enjoying the new camera, and the course! Thank you for the feedback.
Mary
Thursday 11th of May 2023
This is similar to what I do, except my first pass is to flag the rejects - these are the ones that are obviously out of focus, shots of the inside of the car, WAYY blown out, and the like. Then I go through and assign one stars. The one stars are possibles for future processing. Any one star that I process gets 3 stars, any processed that are going to make it to my website or a project gets 5 stars. This process works for me as I hardly ever have more than 200 images in a download. If I find myself with more than that, I'll likely use your process and go through the one stars and assign two stars. Thanks for another informative article.
John Peltier
Thursday 11th of May 2023
Thank you for the addition! Yeah that's what the flag/reject features are for, I just skip that step and make those my 0 stars :)
Ken
Tuesday 9th of May 2023
Really useful advice! I’ve been doing something similar using the colored labels in Bridge but it’s less methodical and intuitive. That is, 4 stars is obviously a higher rank than 3 stars, but in my system, colors are not very intuitive to rank.
John Peltier
Thursday 11th of May 2023
Yeah I tried that for the longest time...red was "no," yellow was "maybe," and green was "good!" or something like that. But I still had to think about it when looking at them. Now I use color labels for photo status, such as "To process," "Has been processed," etc.
Tim Walters
Monday 8th of May 2023
I think you're still making it too complicated. For me, either is picture is worth working on or it isn't, and it only takes one fairly quick pass to make that decision. If the thumbnail isn't good, I don't bother enlarging it, because a picture that doesn't look good as a (reasonably-sized) thumbnail isn't actually good. If the thumbnail is good, then I enlarge it to see if it holds up. If so, it gets a flag. Boom, 90% eliminated from consideration. And yes, occasionally I think "there must have been a picture of X that I missed." But when I go back and check, there never is.
If one needs coverage for some sort of project or assignment, one might need to be more lenient. But if not, putting effort into a less-than-exciting picture is a waste of time. For me, anyway.
Tim Walters
Monday 8th of May 2023
@John Peltier, Fair enough! It's true that I'm dealing with a lot fewer photos. Your point about binary sorting being faster than linear sorting is the main takeaway.
John Peltier
Monday 8th of May 2023
For documentary/assignment work, coming back with thousands of photos I need to go through, the "is it worth it or not" just isn't practical. I need to review the images more methodically and thoroughly and whittle them down to a series that will tell the story for my client/project. This method outlined above has never let me down and has really helped me successfully identify those photos. But for others who may be doing personal work or going out for some landscapes and coming home with a small handful of photos, for sure, don't make it more complicated than it has to be!