Disclosure: This post may contain affiliate links. I earn a small commission of product sales to keep this website going.
There’s one focus setting in the Nikon menus – if you’ve even seen it – that might leave you baffled. That’s Focus point persistence, found in the Custom settings a Focus group. The manual isn’t a huge help, and we like visual examples, right? So here’s an explanation of Focus Point Persistence.
When Focus Point Persistence Applies
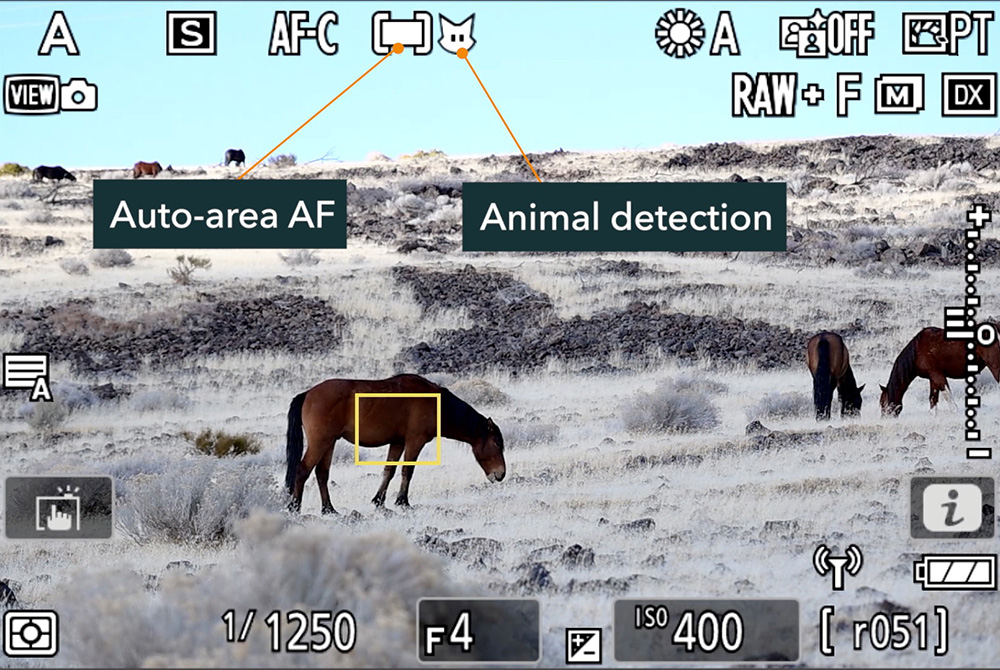
There may be times when you’re using Subject tracking in the Auto-area AF mode, where the camera is tracking something across the entire frame. Like an animal. That focus system is locked on to and following that animal.
You have the option of pressing another button during that focus lock to switch to a different AF-area mode, such as Single-point. This is one of the many Nikon Z focus tricks available.
Where do you want that point to go when you press that button? Do you want it to stay on the locked animal, or go to the last position Single-point was in before switching to Auto-area? That is Focus Point Persistence.
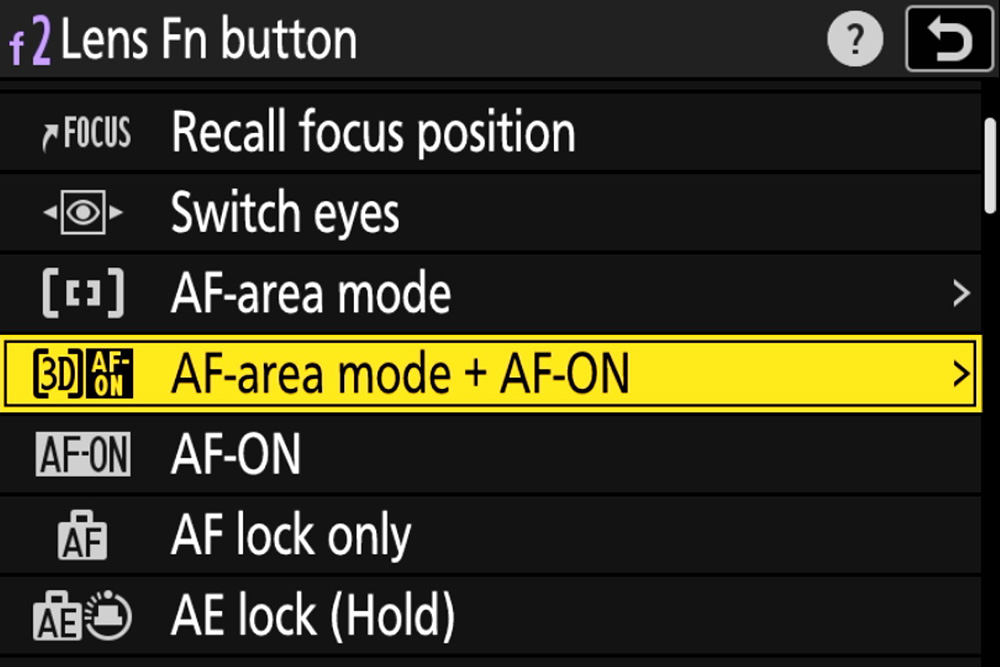
Note: To have the option to push another button to switch to another AF-area mode, this needs to be programmed in the Custom settings f2 (Custom controls) menu. Program a button to
- AF-area mode: Switch to the selected AF-area mode.
- AF-area mode + AF-ON: Switch to the selected AF-area mode and command autofocus.
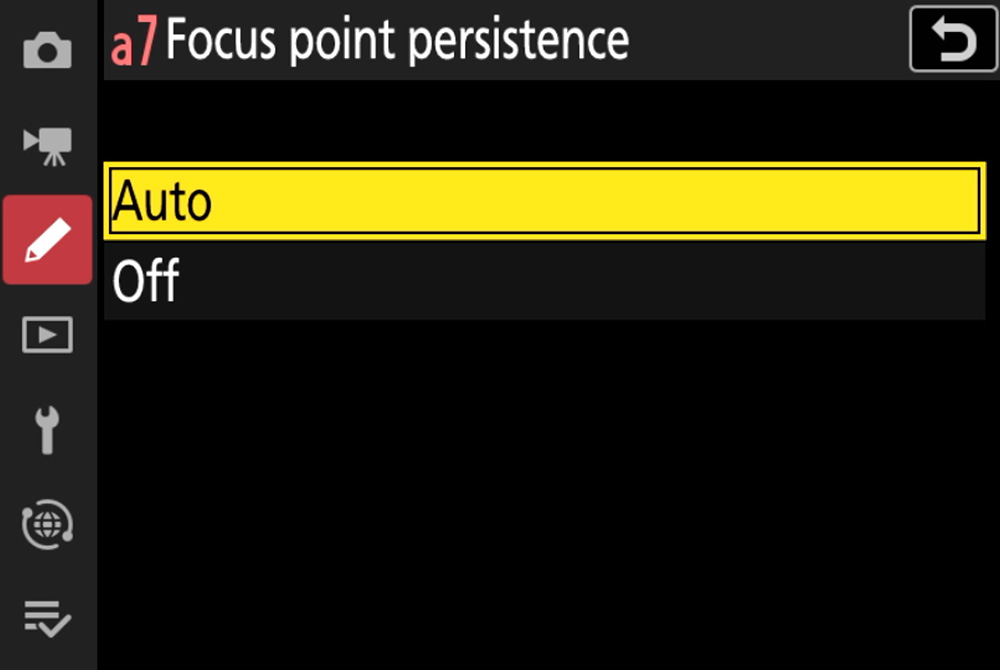
Focus Point Persistence Settings
You’ll see two settings in the Focus Point Persistence submenu, Auto and Off.
Focus Point Persistence – Auto
When Focus point persistence is set to Auto, that focus point will persist. It will stay in the same position it was in; it won’t move.
Let’s look at the following example.
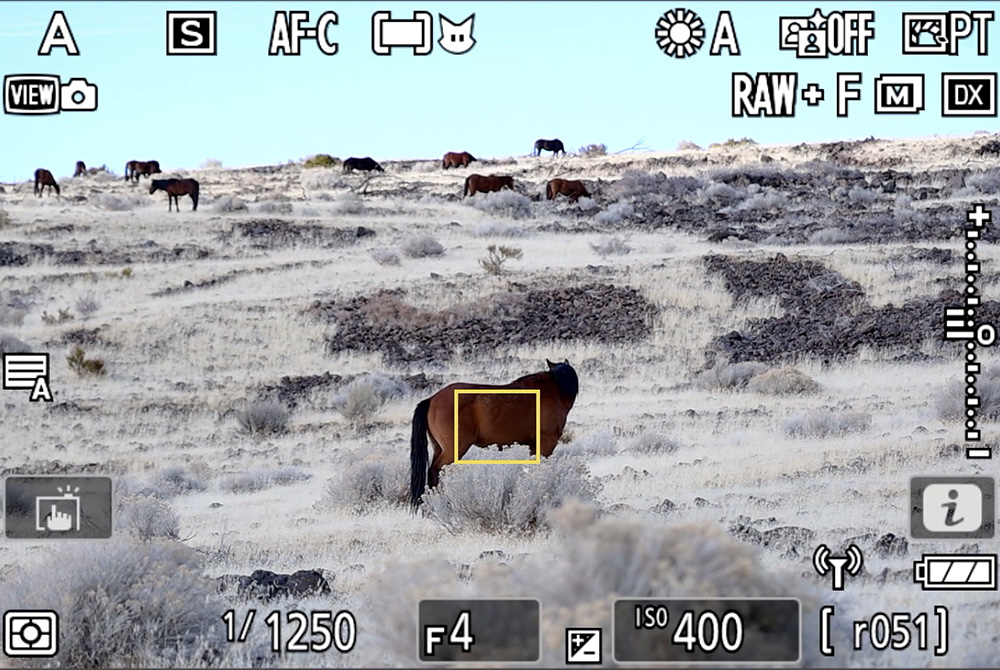
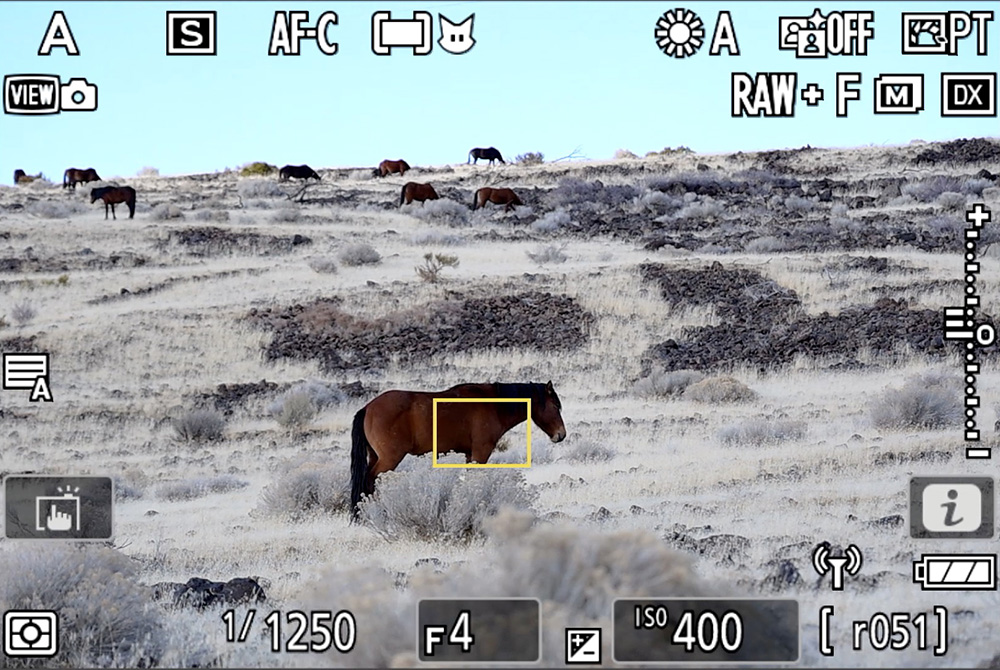
I’m in Auto-area AF tracking a horse and commanding autofocus, indicated by that yellow box over the horse:
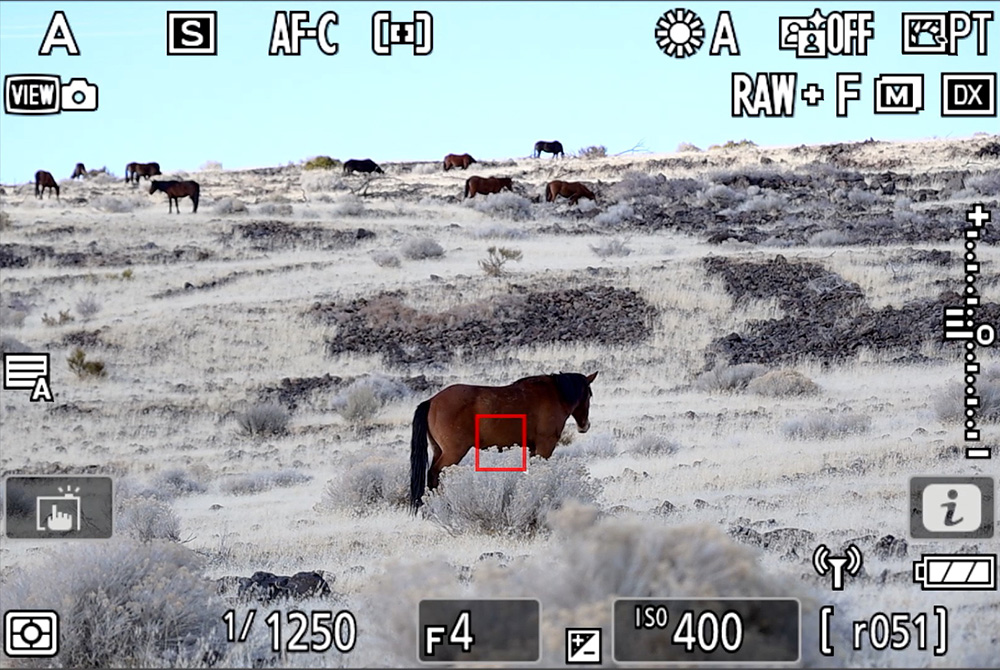
I press the L-Fn button to switch to Single-point AF, and the box changes to the Single-point box, in the same position as the tracking box was:
The Auto-area AF tracking box returns in the same spot, on the horse, when I release the L-Fn button:
You may want to use Auto to switch to a more reliable AF-area mode after obtaining a subject track. Maybe subject tracking is acting up or is difficult to use, but it initially moved that box to your desired subject. You can then switch to a different AF-area mode to ensure that the AF-area stays in that position without “fluttering,” as can sometimes happen with subject detection. It’s more stable.
Focus Point Persistence – Off
If Focus point persistence is Off, that focus point will not persist. It’ll move to whichever position the new AF-area mode was in before you went to Auto-area AF.
Let’s look at another example.
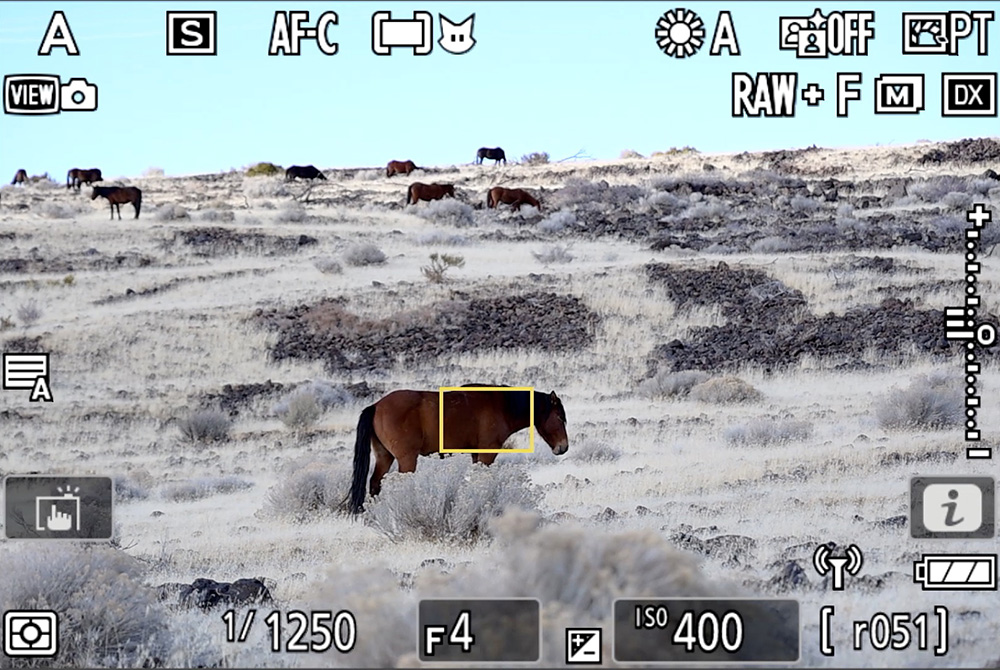
Like before, I’m in Auto-area AF tracking the horse and commanding autofocus, indicated by that yellow box over the horse:

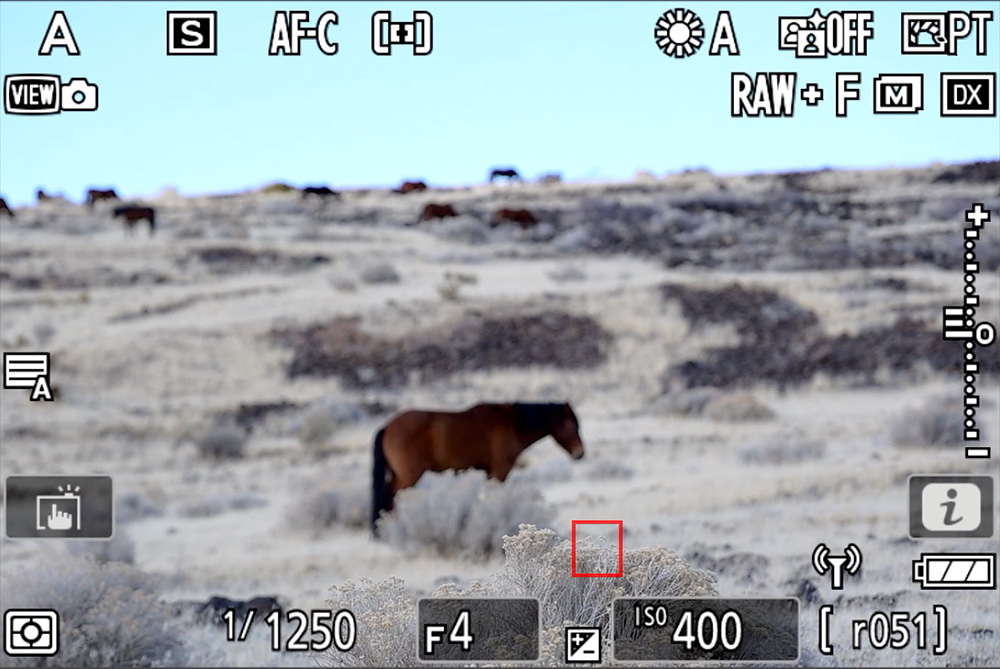
I press the L-Fn button to switch to Single-point AF, and the box changes to the Single-point box. However, it now moves to the foreground, where I had previously set Single-point. It focuses on the foreground, and now the horse becomes blurry:
When I release that button, the Auto-area AF tracking box returns to the horse, and the horse is brought back into focus.
Off is a good option if you want the ability to quickly switch to a different position on the screen. You can temporarily leave Subject tracking without having to go into any menus or rotate any dials. Press one button to switch to a new point, then release it to return to your subject track.
Conclusion
Which Focus point persistence setting should you choose?
You’ll need to run through some scenarios and determine what suits you best, based on your own needs.
For me, I think of backup options.
Subject tracking is great, but sometimes it loses the subject if it can’t detect the algorithm programmed for the subject type. I have my L-Fn button programmed to 3D-tracking + AF-ON. If I think Subject tracking is going to have difficulty holding the lock, I can press the L-Fn button to let 3D-tracking take over. That’s why I have it set to Auto.
Do you want to learn even more about focus systems in your Nikon Z camera? I have an entire chapter dedicated to this in the Nikon Z Photography Fundamentals course. Watch the free previews, and if you decide to enroll in the full course, use the code “blog20” for 20% off.
Please leave any questions or comments below.