Disclosure: This post may contain affiliate links. I earn a small commission of product sales to keep this website going.
Many Nikon Z cameras – those with Mode Dials – have positions on them called U1, U2, and U3. What are these, and why are they important? Here you’ll learn all about setting up custom User Settings in Nikon Z cameras.
You can download a free User Setting template with examples in the Nikon Z Photography Fundamentals free previews.

Why Custom User Settings Matter
Have you ever been fumbling around with your camera settings when time is critical, and you miss a shot because you couldn’t change your AF-area mode fast enough? Or you forgot to go into “burst mode” when shooting action?
It’s happened to all of us, and it sucks.
This is where taking advantage of User Settings can really help you become more efficient and get that shot when it matters.
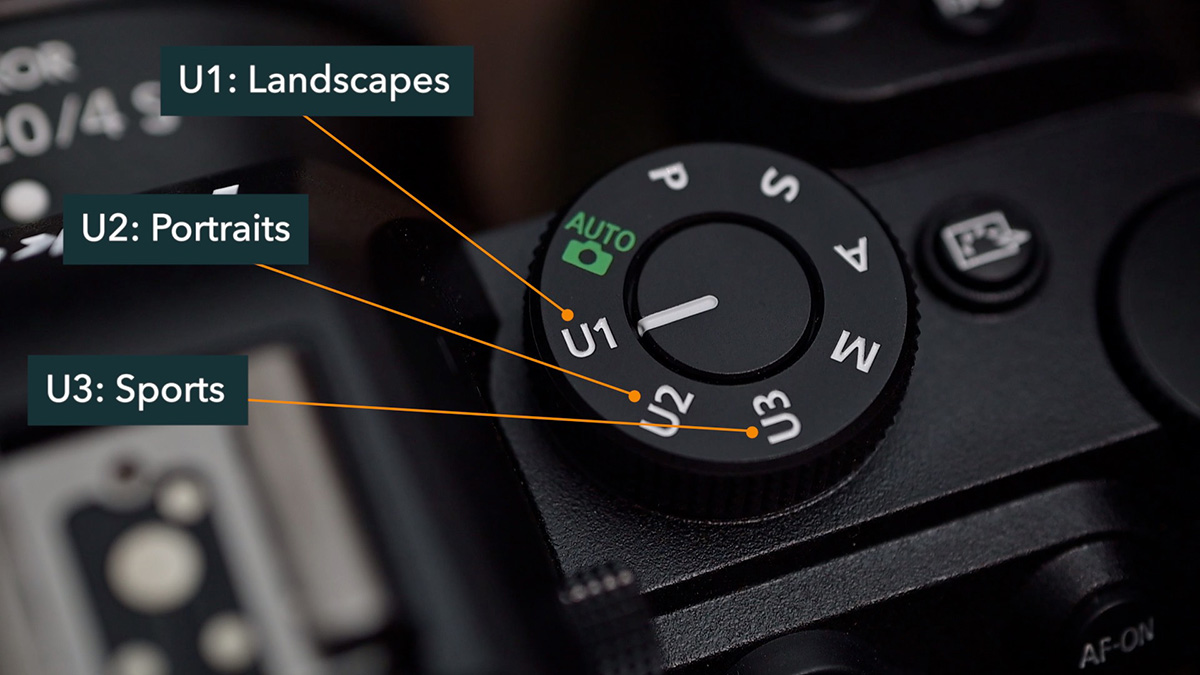
If you commonly photograph different situations, genres, or subjects, you can program the settings you use in those situations to recall them when you need them instantly. For example:
- U1: Landscapes
- U2: Portraits
- U3: Sports
Now you just flip the dial to U1 when photographing landscapes, then over to U3 to photograph your kid’s soccer game, and your settings are where you need them!
What Are U1, U2, and U3?
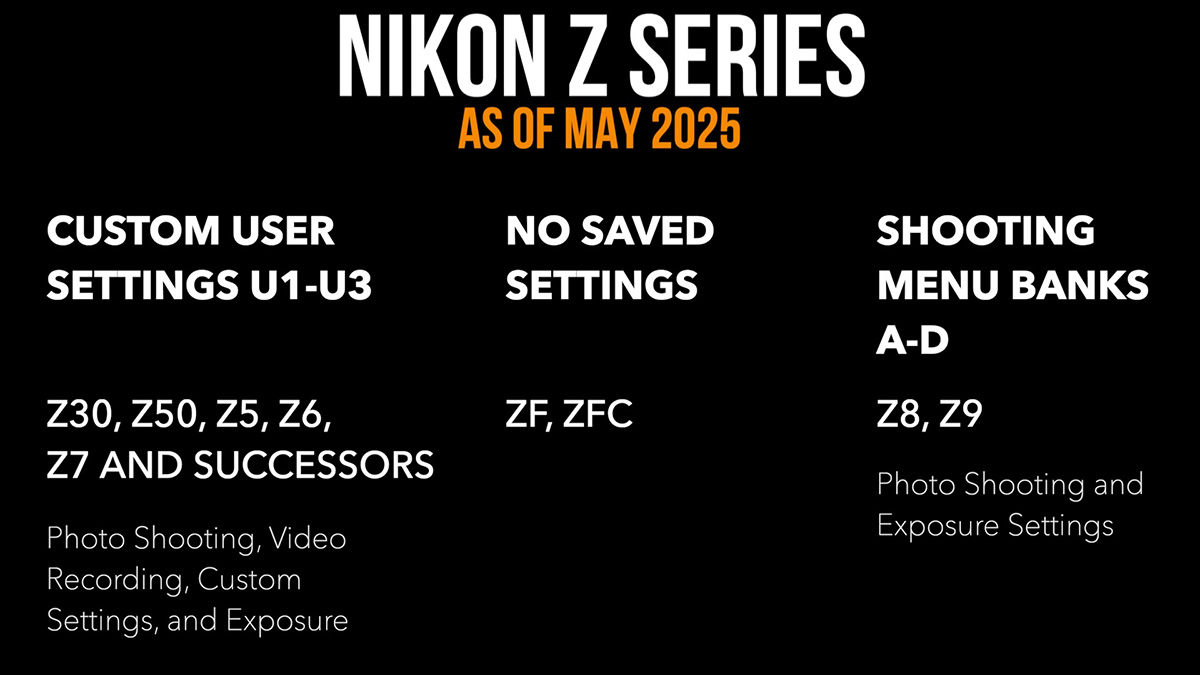
The U1, U2, and U3 positions are found on Nikon Z cameras with Mode Dials (the Z50 only has two). This means you won’t find this feature in the Zf, Zfc, Z8, or Z9.
User Settings are different from Shooting Menu Banks found in the Z8 and Z9. These only let you save items in the Photo Shooting menu and your exposure settings.
The User Settings (U1, U2, and U3) allow you to save your Photo Shooting, Video Recording, Custom Settings, and exposure settings, giving you a lot more flexibility to have completely different camera setups. For example, you can save different:
- Apertures/shutter speeds
- Metering
- Release modes
- Focus settings
- Vibration reduction
- Shutter type
- Flash sync speed
How to Set Up U1, U2, U3 User Settings
Come up with your settings
The first step in setting up your User Settings is to identify your needs.
What is it that you shoot? Why do you need to recall common settings? What situations are those?
Figure out which three scenarios are the most important to you and write them down. And remember, you also get a “base” camera setting, which is when you’re not using a saved preset. You should really have your “base” set up first before creating User Settings – all items in every menu are as you want them for your defaults.
I find it easiest to use a spreadsheet, or you can use a piece of paper, to jot down the three User Settings. It’ll be easier to construct your settings this way. I’ve created a User Settings template that you can download as part of the Nikon Z Photography Fundamentals free previews.

The next step is to figure out your camera settings for each User Setting. As I mentioned previously, I really like to write them down so I can see and compare the camera settings for each scenario. You will need to figure out:
- Exposure Mode (P, S, A, or M)
- Exposure variables for the appropriate mode (aperture, shutter, ISO, exposure compensation)
- Photo Shooting menu settings
- Video Recording menu settings (if doing video)
- Custom Settings (a-g) settings
Go through all of those menus and write down the settings that are different from your base defaults. For example, if you’re always using “AF-S Priority Selection – Focus” no matter what you’re doing, then you don’t really need to write that down.

After going through your menus and writing down your settings, it’s time to program them.
Programing U1, U2, U3 User Settings
Having written down your settings will make this step really easy.
First, set your Mode Dial to the appropriate mode and adjust your exposure variables for that mode, including Exposure Compensation and Flash Compensation, if appropriate.
Second, go through each menu item and change the ones you wrote down.
Finally, save your User Settings. Go to the Setup Menu > Save user settings, pick the slot you want to save, and press OK to save settings.
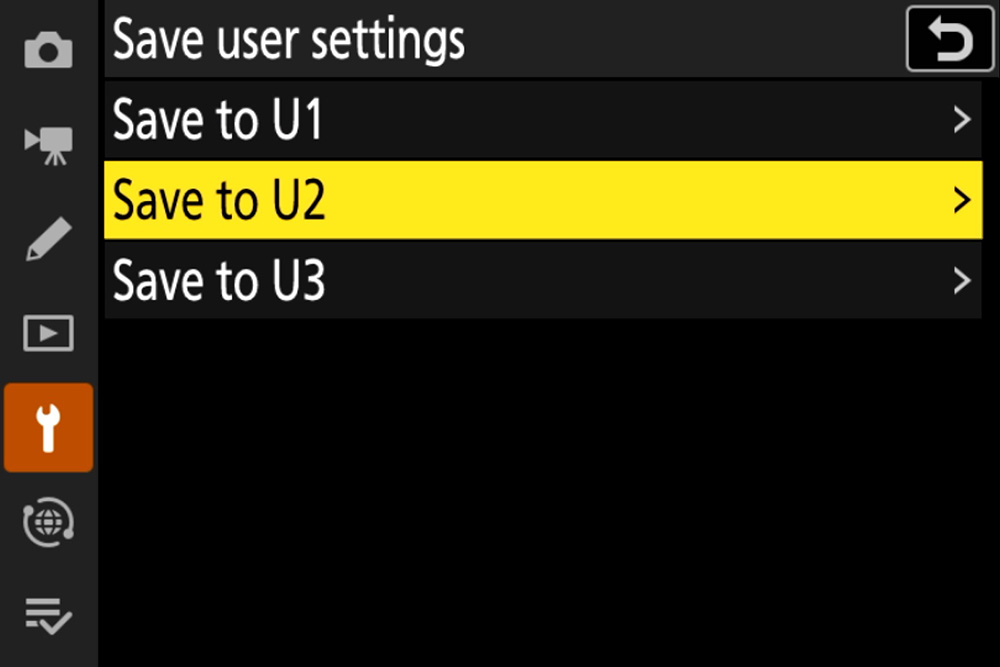
If you messed anything up and need to start with a clean slate, you can select Reset user settings.
Tips for using User Settings
Once saved, all you need to do is rotate the Mode Dial to U1, U2, or U3 to use these. When you do that, your current “base” settings will be replaced by whatever is saved in that User Setting. You can go back to your “base” settings at any time by switching to the exposure mode you want to use.
Also, any changes you make while in a User Setting will not be saved.
For example, if you change your aperture while using your U2 Portrait setting, then you quickly switch to U1 and back to U2, or you cycle the camera power, the aperture will be reset to what was saved. If you want to use that other aperture permanently, you need to set it first and then go to the Setup Menu > Save user setting, and re-save that setting. This is important to remember if you’re on a long shoot and had to slightly tweak one of your User Settings for that specific scenario.
This is another reason why I prefer to have a record of my U1, U2, and U3 positions. If I had to make changes in the field and “temporarily” save them, I could restore them when I get home. Writing them down also allows you to make changes now and then if you need to update them as you evolve.
Custom User Settings Examples
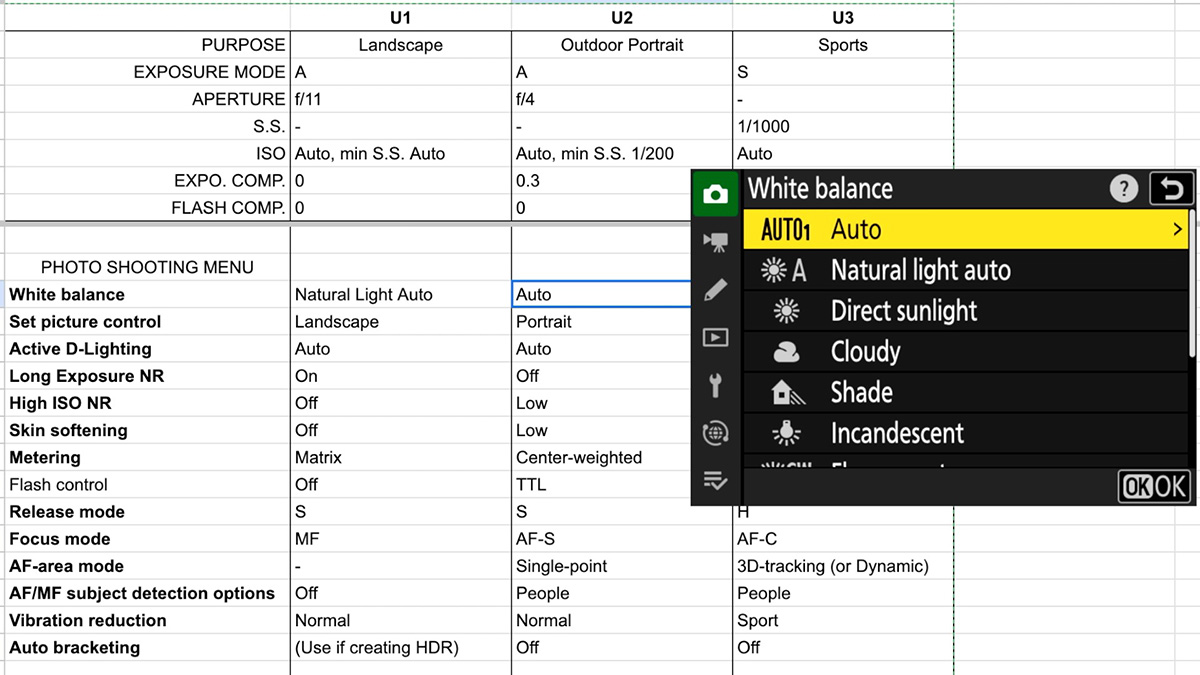
Need some ideas to get started? Here’s an example User Setting for Landscapes.
- Exposure Settings: A Mode, f/11, Auto ISO (min. shutter speed Auto), Exposure Compensation 0
- White balance: Natural light auto
- Set Picture Control: Landscape
- Active D-Lighting: Auto
- Long Exposure NR: On
- Skin Softening: Off
- Metering: Matrix
- Flash control: Off
- Release mode: S
- Focus mode: MF
- AF/MF subject detection options: Off
- Vibration reduction: Normal
- Custom settings a Focus points used: All
- Custom settings d Shutter type: Auto
The User Settings template in the Nikon Z Photography Fundamentals course includes more examples for Travel/Street, Sports, Outdoor Portraits, Studio Portraits, Pets, and Wildlife.
How Will You Set Up U1, U2, and U3?
Be sure to take advantage of these Nikon Z User Settings so you can quickly recall commonly-used settings without fumbling or guessing.
I recommend writing them down so you can easily construct them and have a record. Use that template linked in this article if you want something pre-constructed.
How will you set them up?
Please leave any questions or comments below!