Disclosure: This post may contain affiliate links. I earn a small commission of product sales to keep this website going.
If you’re still using the shutter button to autofocus on your Nikon Z camera, you might want to rethink that setup. While it’s simple and familiar, there’s a powerful alternative that can make your focusing faster, more accurate, and more consistent: Back Button Focus.
This article will walk you through what back button focus is, why you should consider using it, and how to set it up on your Nikon Z camera. It’s one of the many tricks you’ll learn in the comprehensive Nikon Z Photography Fundamentals course (use code “blog20” for 20% off).
You can watch the video here:
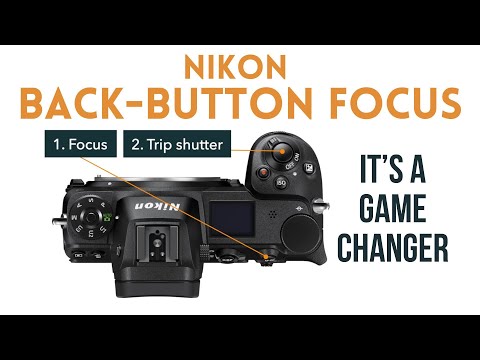
What Is Back Button Focus?
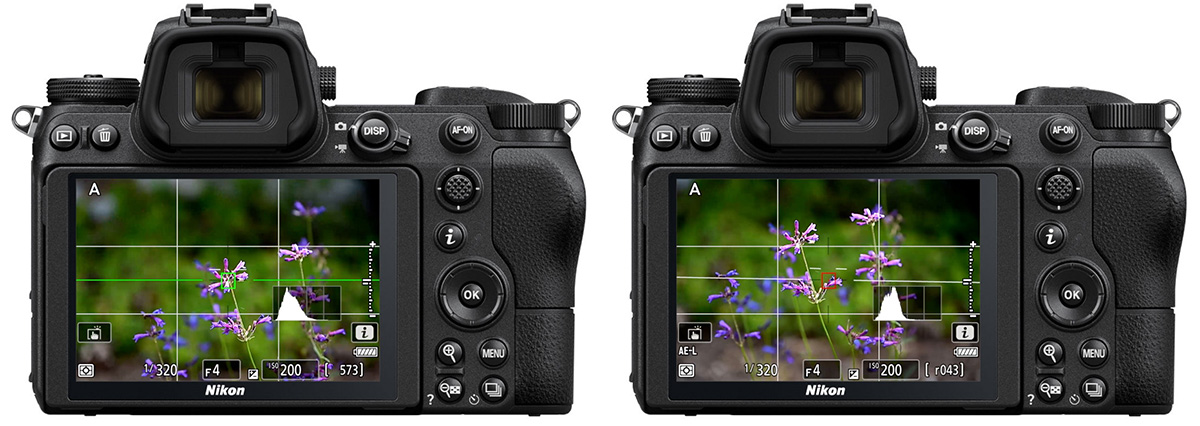
By default, your Nikon camera uses the shutter button for two actions: focusing and taking the photo. With back button focus, you separate these two tasks. The shutter button only takes the photo, while a dedicated button on the back of the camera (usually labeled AF-ON or AEL/AFL) is used to control autofocus.
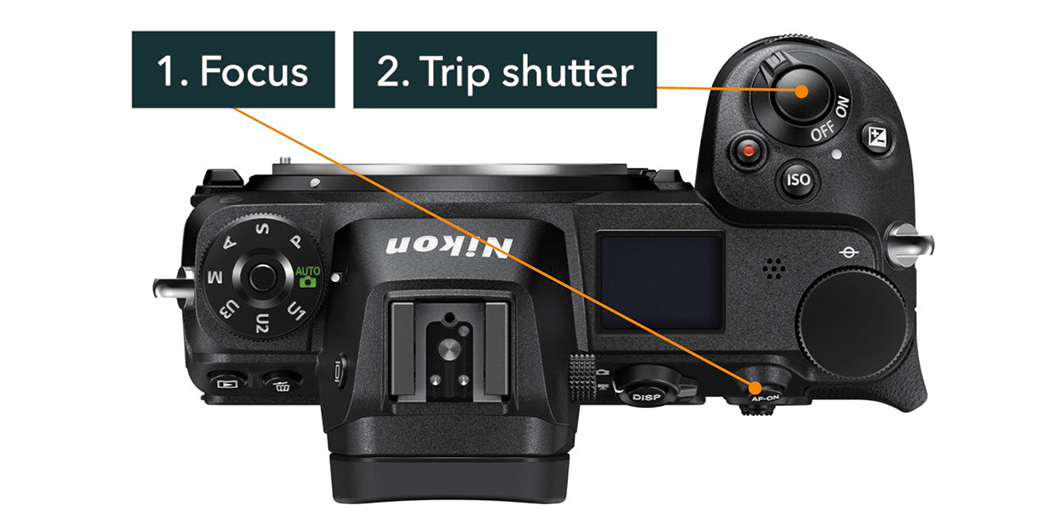
This method gives you more control and flexibility, and it’s been a favorite technique among many experienced photographers, myself included.
Why Use Back Button Focus?
- Faster shooting in static scenes: Once you’ve focused, you can take multiple shots without refocusing every time.
- Fewer missed moments: Eliminates focus delays when timing is critical.
- More accurate recomposing: Great for using the center AF point, then reframing your shot without shifting focus.
- Less chance of misfires: Avoid accidental full-presses of the shutter when trying to focus halfway, especially with gloves or people suffering from tremors.
Step-by-Step: How to Set It Up
1. Disable Shutter Autofocus
Go to Custom Settings Menu → a (Autofocus) → AF Activation
- Change it from Shutter/AF-ON to AF-ON only
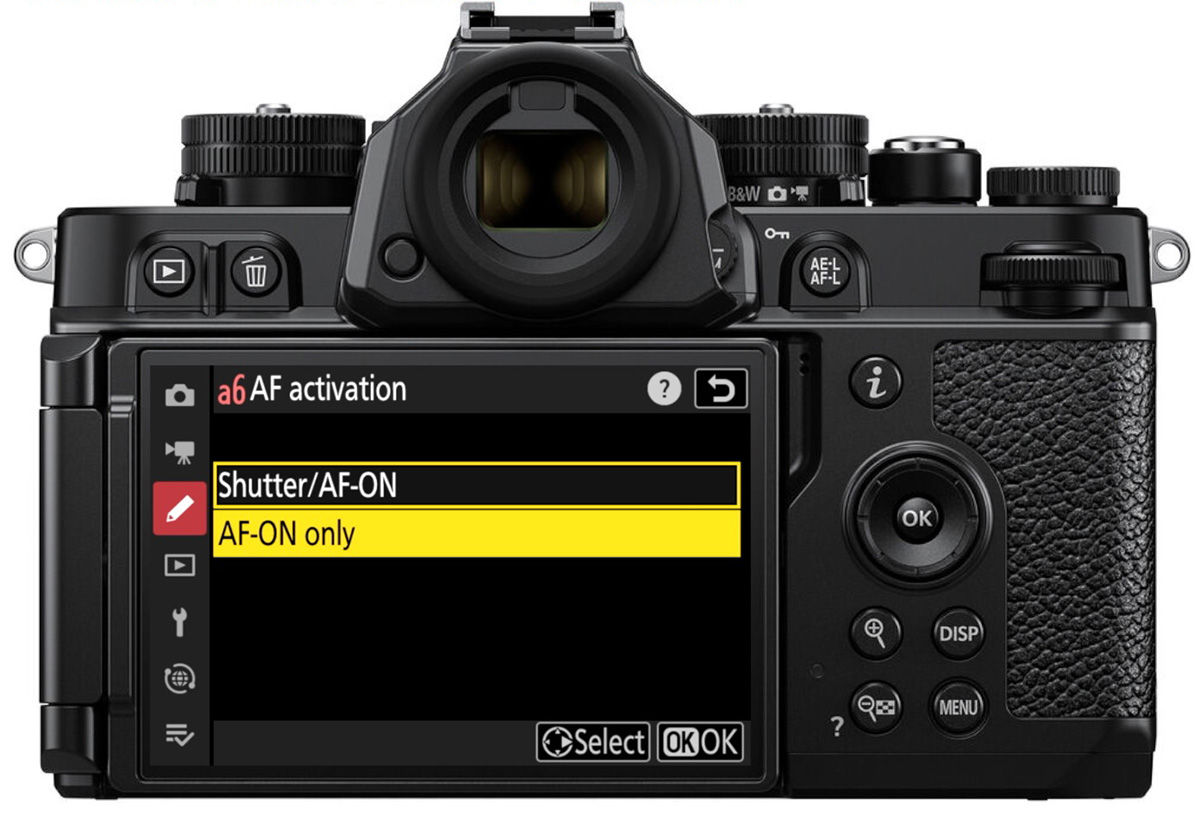
This disables autofocus from the shutter button and enables it only on the AF-ON or assigned back button.
On that same option (AF-ON only), press the multiselector right and enable Out-of-Focus Release. This allows you to take a photo even if the camera doesn’t think it’s in perfect focus, useful when you’ve already locked focus yourself.
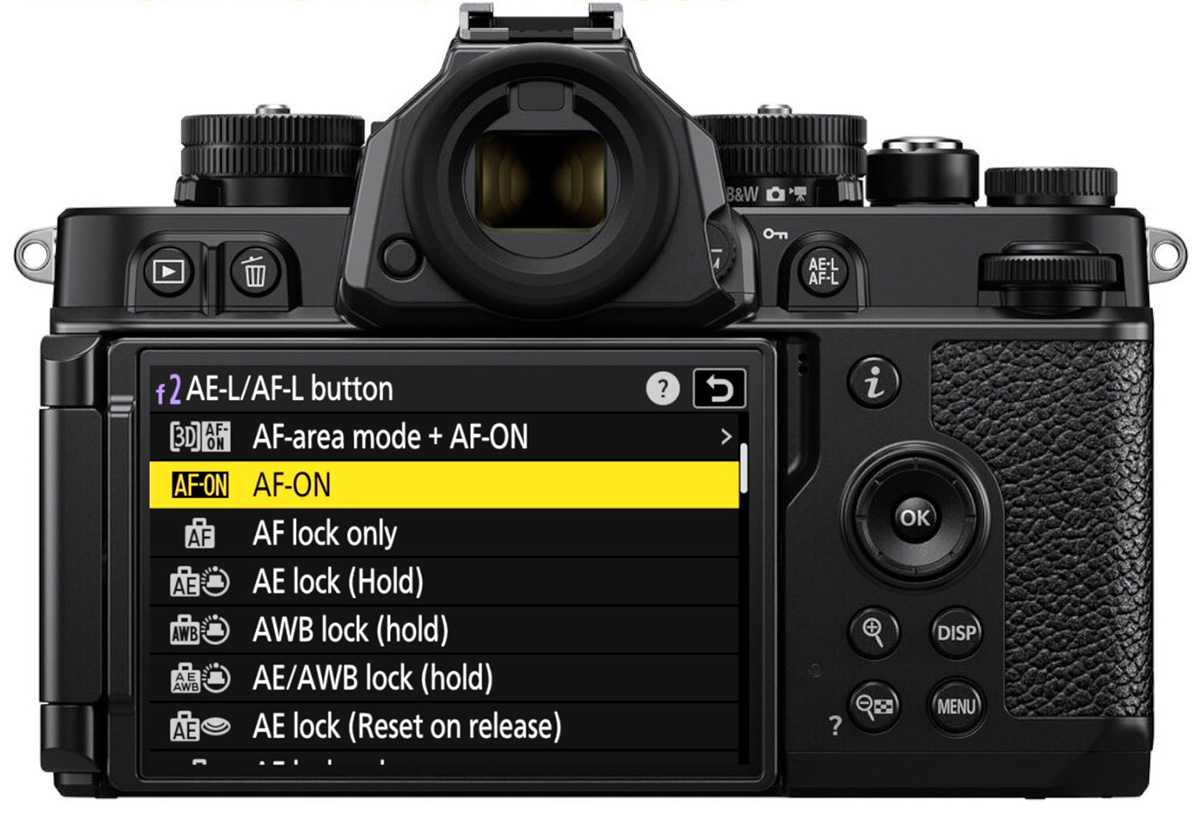
2. Assign the AF-ON Button to Autofocus
Go to Custom Settings Menu → f (Controls) → f2 (Custom Controls)
- Find the AF-ON or AEL/AFL button
- Assign the function AF-ON to it
This button is now your new autofocus command.
How to Use It in the Field
Once set up, here’s how it works in different focus modes:
- AF-S (Single AF): Press and release the back button to lock focus. Then press the shutter to take the shot.
- AF-C (Continuous AF): Keep holding the back button with your thumb to track your subject. Use your index finger to capture photos when the moment is right. Release your thumb to stop focusing.
- AF-F (Full-time AF, Video Mode): The back button temporarily overrides AF-F to act like AF-S. Use this only if you want to lock focus manually while filming.
Things to Keep in Mind
- It takes practice. You may forget to focus with the back button at first. Stick with it; it quickly becomes second nature.
- Refocus when things change. If you adjust your aperture, focal length, or subject distance, remember to refocus using the back button.
Try It Out!
If you’ve never tried back button focus before, give it a shot. Set it up, go shoot for a day, and see how it feels. If it’s not for you, just head back into your autofocus settings and re-enable shutter AF. But if it improves your workflow, even a little, it could become one of your favorite camera customizations.
Next Steps
This article is part of my comprehensive Nikon Z Photography Fundamentals Course, where we dive deep into focus modes, exposure settings, custom controls, and more. You can learn at your own pace with videos, handouts, assignments, and quizzes designed to help you master your camera. Watch the Free Previews and use the code “blog20” to get 20% off that course.
You can also read: Nikon Z Focus Tips for even more focusing tips
Bholanath Bakshi
Wednesday 13th of August 2025
Like it,do more topics